-
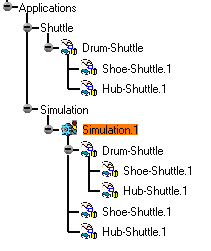
Multi-select in the specification tree:
-
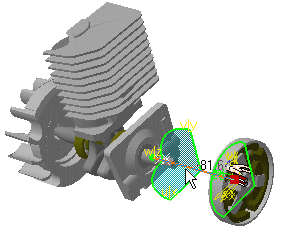
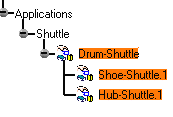
Drum-Shuttle
-
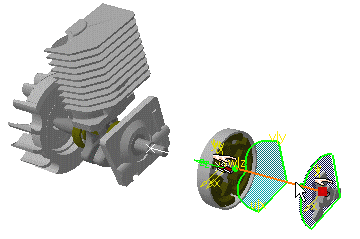
Hub-Shuttle
-
Shoe-Shuttle
-
Select Insert > Simulation.
The Edit Simulation dialog box is displayed. 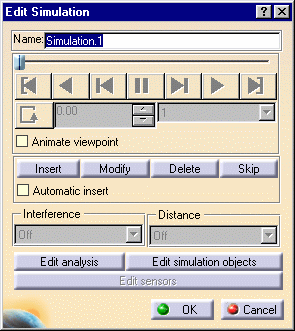
The 3D compass lets you move the shuttle. -
Move the Drum-Shuttle to the desired location via the manipulator.
-
Select the Insert button to record the shot.

Insert means that you record and insert shots inside the scenario. The initial location of the shuttle is automatically recorded as a starting shot. If you need to reposition the shuttle, please delete the first position or modify it. -
Select the Hub-Shuttle. Three possibilities are available:
- Select the Hub-Shuttle in the specification tree
- Select the Hub-Shuttle axis in the geometry area
- Select the product in the geometry area.
The 3D compass snaps onto your selection. -
Move the Hub-Shuttle to the desired location using the 3D compass.
-
Click the Insert button and record the desired shot.
You recorded the motion of the three shuttles. The simulation object is created and identified in the specification tree. 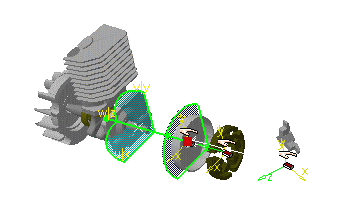
-
Select the Shoe-Shuttle axis.
-
Drag the Shoe-Shuttle to the required location.
-
Record this motion by clicking the Insert button.
-
Select the OK button in the Edit Simulation dialog box.
-
You can now create a replay.

For more information, please refer to Generating a Replay. To analyze an object and its related objects under the form of a specification tree or in the 3D, select Analyze > Current Selection from the menu bar. The Current Selection Panel dialog box appears as follows: 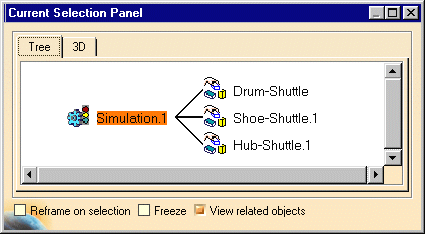
|
|
 |