Creating Roughness Symbols 

This task shows you how to create a roughness symbol annotation.
Open the Annotations_Part_04.CATPart document.
  1. Select the Front View.1 annotation plane.

  2. Click the Roughness  in Annotations toolbar.

  1. Select the surface as shown on the part.

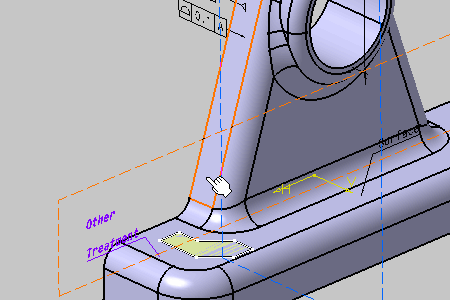
    This scenario illustrates the creation of a roughness symbol by selecting geometry,
    but you can also select any Part Design or Generative Shape Design feature in the specification tree.
    In this case, the created annotation will not be attached to the selected feature,
    but to its geometrical elements at the highest level.
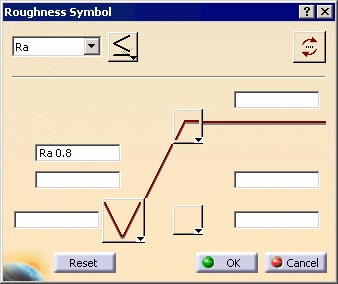
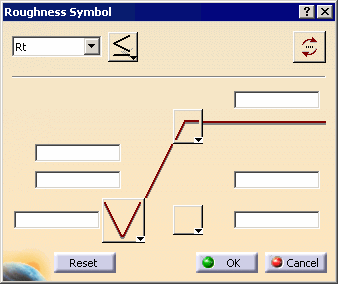
  1. The Roughness Symbol dialog box appears.

    The new roughness symbol allows you to respect the following standard parameters:
    • ISO
    • ASME
    • ANSI
    • JIS

    You can modify these the standard parameters using:
    Tools > Standards... command, then selecting the Drafting category.
    The old roughness symbols created in previous document are migrated at edition.
    If you slide a new roughness symbol outside its reference, an extension line is added,
    its overrun is fixed to 2mm and cannot be modified.

    The Tools Palette is displayed according to the type of face selected depending on the canonicity. In this scenario the Tools Palette is not used. For more information, refer to Propagating Geometry Selection for Feature Creation.

  2. Select Ra symbol and enter a value: 0.8

  1. Click OK.

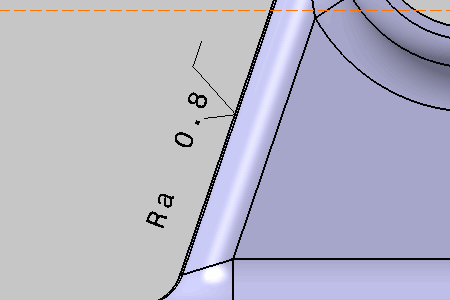
    The roughness symbol is created without a leader.
    To add one, see Adding Leaders and Using Breakpoints.