This task lets you know how to check whether specification assigned to a model are consistent. You can perform check operations on:
You also see how to migrate Analysis Connections created before the Version 5 Release 12.
Note that this check on features considered as inconsistent is performed both via the dialog box (one line per feature and a dedicated diagnostic box) and via highlighted associated features in the specification tree.
We advise that you perform a check before computing a case.
Check on Bodies
Check on bodies means on all the Mesh parts (1D, 2D, 3D) as well as their properties and supports.
You created a new property
To do this, you selected the 3D Property command and selected Pad1.
Open the sample37.CATAnalysis document from the samples directory.
-
Click Model Checker
 in the Model Manager toolbar.
The Model Checker dialog box appears.
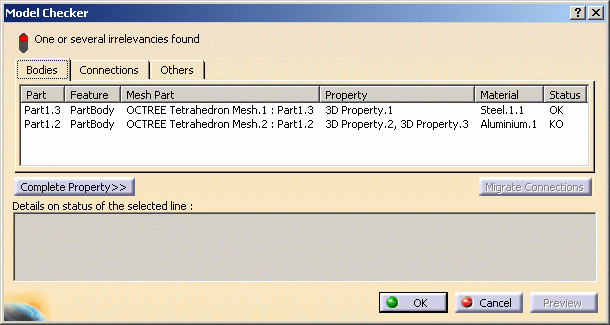
- Bodies tab: this tab gives the list of all the Mesh
parts (1D, 2D, 3D) as well as their properties and supports.
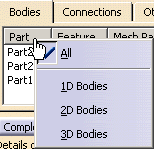
You can filter the bodies (1D, 2D, 3D or All bodies) in the displayed list using contextual menus.
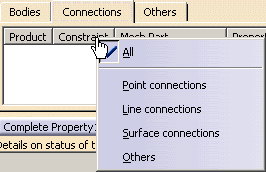
- Connections tab: any connection specification.
You can filter the connections (All, Point, Line, Surface or Other connections) in the displayed list using contextual menus.
- Others tab: specification features (loads, restraints, virtual parts).
- Complete Property>>: lets you complete your finite
element model.
You can define a property and its characteristics only once and duplicate this property automatically for many other supports.
This can be useful in documents that contain a lot of different geometries (for example, a surface assembly model containing many 2D geometries built with the same material and same thickness).
When you use the Complete property button, you have to make sure the property can also be added using the corresponding property commands; otherwise, the automatic application of property might fail.
- Migrate Connections: this button lets you migrate
the Analysis Connections created before the Version 5 Release 12.
It is strongly recommended to migrate the former Analysis Connections because you cannot select them as Connection Properties support any longer.
To know more, refer to Migrating Analysis Connections.
The Model Checker dialog box displays all the parts (one per line in the dialog box) which are assigned at least one mesh part or property.
A status is assigned to each Mesh part you select in the dialog box, to let you know whether:
- you forgot to assign the material,
- you assigned no or too many Mesh parts,
- you assigned no or too many properties.
- Bodies tab: this tab gives the list of all the Mesh
parts (1D, 2D, 3D) as well as their properties and supports.
-
Select the line with a KO status.
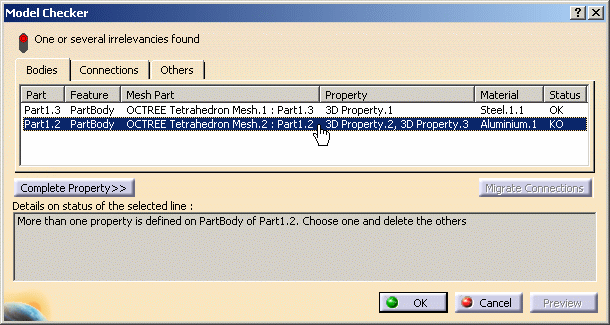
When you select a part in the table, the corresponding features in the specification tree and in the model as well as the assigned properties and material are also highlighted.
In this particular case, more than one property has been defined.
-
Click OK.
-
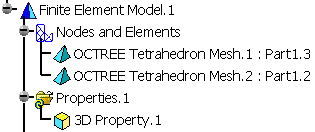
Delete the 3D Property.2 and 3D Property.3 properties.
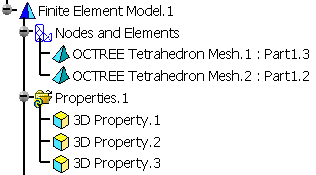
The specification tree is updated:
-
Click the Model Checker icon
 .
.The Model Checker dialog box appears.
You can select the line with a KO status.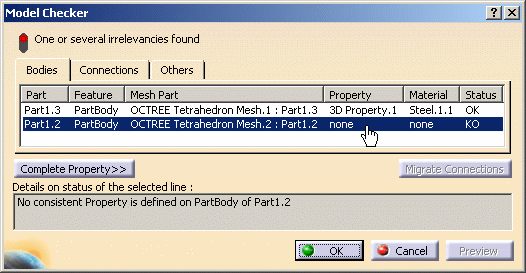
A 3D property is missing.
-
Click the Complete Property>> button.
-
Select the line with the KO status and click the
 button.
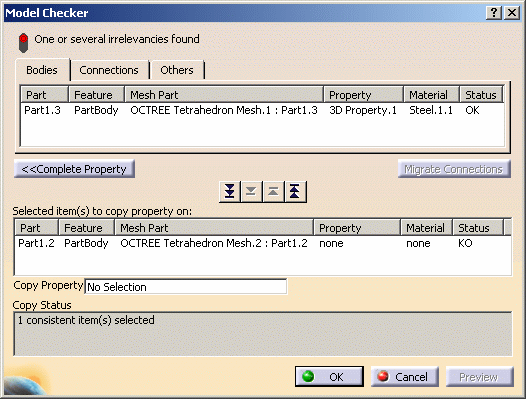
-
Select the Copy Property field.
-
Select the 3D Property.1 property in the specification tree.
The Preview button is now available in the Model Checker dialog box.
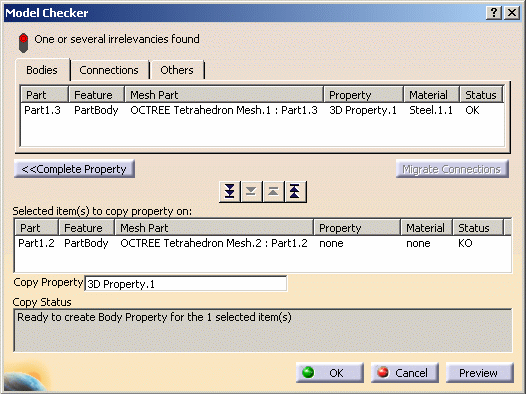
-
Click Preview.
The Model Checker dialog box is updated.
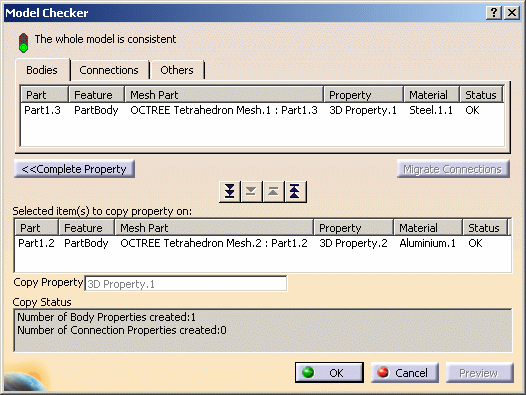
A 3D Property is created, and the specification tree is also updated:
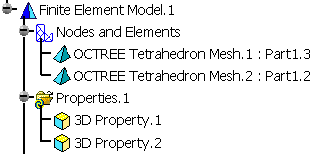
-
Click OK.
![]()
You deleted the material from an OCTREE mesh part
Open the sample38.CATAnalysis document from the samples directory.
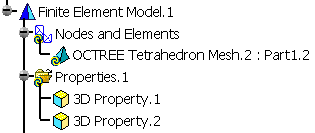
-
Click Model Checker
 in the Model Manager toolbar.
The Model Checker dialog box appears.
For more details, refer to the description of the dialog box.The Model Check dialog box displays the lists of all the Mesh parts as well as their properties and supports.
When you select a part in the table, the corresponding features in the specification tree and in the model as well as the assigned properties and material are also highlighted.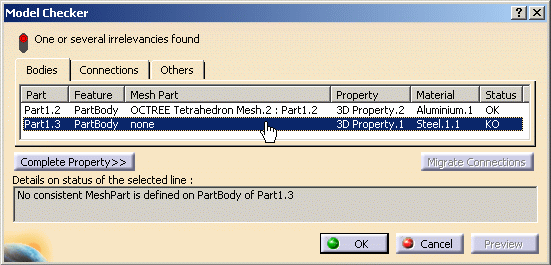
In this particular case, no mesh part is defined for the Part1.3.
-
Click OK.
-
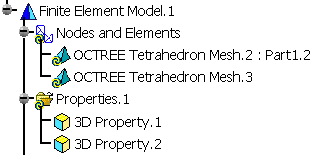
Create a mesh part applied on Part Body of Part1.3 and get this:
To do this, refer to Creating 3D Mesh Part.
-
Click Model Checker
 .
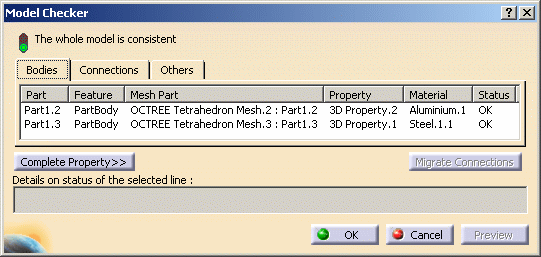
.The specifications are now consistent: all the states are set to OK.
-
Click OK.
![]()
Check on Connections
Check on connections means on any connection specification. In other words, you will check the consistency of the connections regarding the following: missing mesh parts, properties, materials ; connected supports with no associated mesh parts ; overlapping connections and so forth.
You deleted the mesh part of a part that was connected to another
Open the sample50.CATAnalysis document from the samples directory.
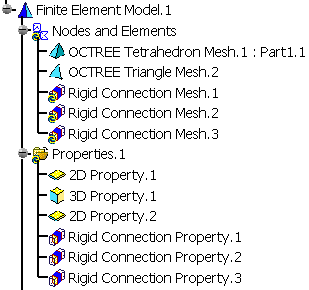
A warning message appears to inform you that you have to
migrate analysis connections created before the Version 5 Release 12.
To do this, refer to Migrating Analysis Connections.
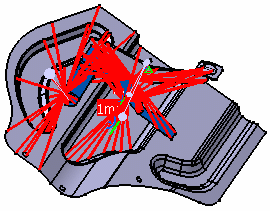
-
Click Model Checker
 in the Model Manager toolbar.
The Model Checker dialog box appears.
For more details, refer to the description of the dialog box.The Connections tab of the Model Checker dialog box displays all the parts (one per line in the dialog box) which are assigned at least one connection:
- Mesh part and property assigned to this mesh part
- Connected mesh part
- Product to which the constraints was assigned
- Names of both mesh parts connected to each others
- Material (has no impact on Connection valid state).
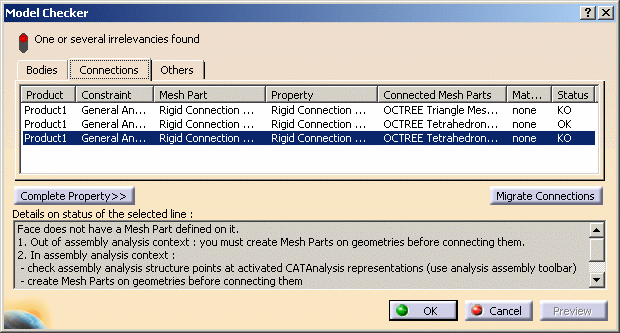
When you select a connected mesh part in the table, the corresponding features in the specification tree and in the model as well as the assigned properties, material and constraints are also highlighted.
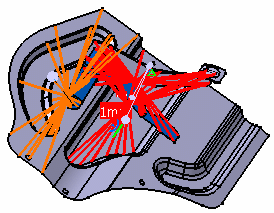
In this particular case, Face does not have a Mesh Part defined on it.
-
Click OK.
-
Create mesh parts on the geometry.
![]()
Check on Others
Check on others means on specification features such as loads, restraints, virtual parts, masses and periodic conditions.
Scenario: You deleted the mesh part of a clamped part that was connected to another
Open sample50.CATAnalysis document.
A warning message appears to inform you that you have to
migrate analysis connections created before the Version 5 Release 12.
To do this, refer to Migrating Analysis Connections.

-
Delete OCTREE Tetrahedron Mesh.1 : Part1.1 mesh part in the specification tree.
-
Click Model Check
 in the Model Manager toolbar.
The Model Check dialog box appears.
For more details, refer to the description of the dialog box.The Others tab of the Model Check dialog box displays all the specifications features (one per line in the dialog box) which are not correct as well as details on the status of the selected line. In this particular case, Clamp.1 is KO as the part the clamp was assigned to has been deleted.
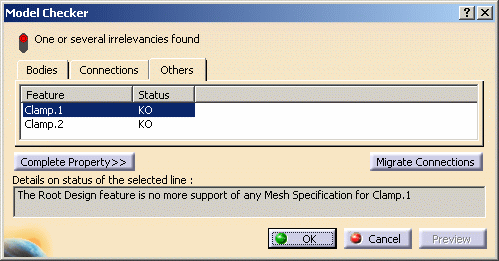
In this particular case, the root design feature is no more support of any Mesh specification for Clamp.1 and Clamp.2.
-
Click Cancel.
The solution is therefore to add the mesh part to the invalidated part.
![]()
Migrating Analysis Connections Created Before Version 5 Release 12
It is strongly recommended to migrate the former Analysis Connections because you cannot select them as Connection Properties support any longer.
Analysis Connections created before the Version 5 Release 12 are stored in the Analysis Connection Manager under the product:
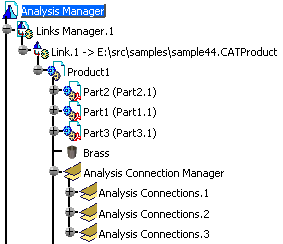
Open the sample50.CATAnalysis document from the samples directory.
A warning message appears to inform you that you have to migrate analysis connections created before the Version 5 Release 12.
-
Click Model Checker
 in the Model Manager toolbar.
The Model Checker dialog box appears.
For more details, refer to the description of the dialog box.Note that the Migrate Connections button is available.

-
Click Migrate Connections.
The following message appears:

-
Click Yes.
Analysis Connection Manager.1 appears in the specification tree under Analysis Manager.
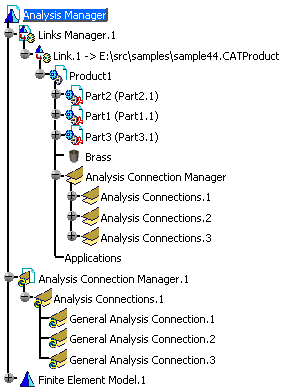
-
Click OK.
![]()