A zone has certain properties that you can assign or change. It is global in nature and can extend over several documents, and contain numerous boundaries. While a zone is global in nature, once you create a boundary and make it part of a zone, it becomes local, or specific to that document. This means that when you change the properties of the zone you do it locally so that the change applies to a specific document.
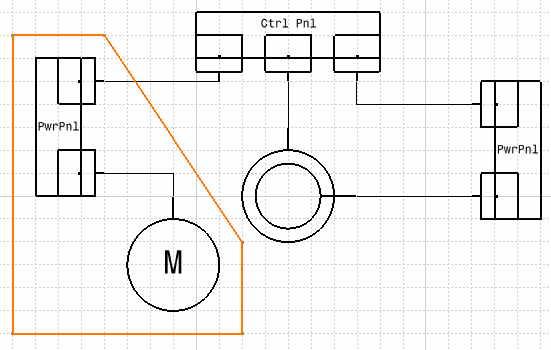
See Project Resource Management for Electrical Connectivity Diagrams.
For more information see also Understanding Project Resource Management.
-
Click the Create Zone button
 .
.The Create Zone dialog box displays. 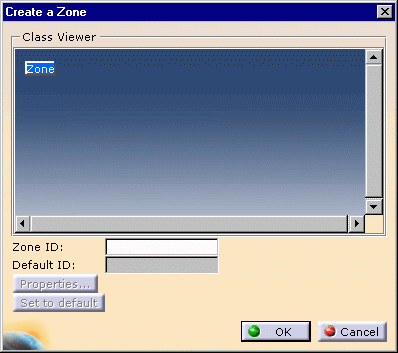
-
Enter a name for the zone.
-
Enter properties if you want to.
Certain default properties will be assigned but you can enter your own if you want to. -
Click OK.
The zone will be created.