-
Click Add Branch Point
 .
.
You are prompted to select a bundle segment. -
Select the bundle segment.
The Create Branch Point dialog box appears with a pre-selected reference point, allowing you to place the branch point on the curve: 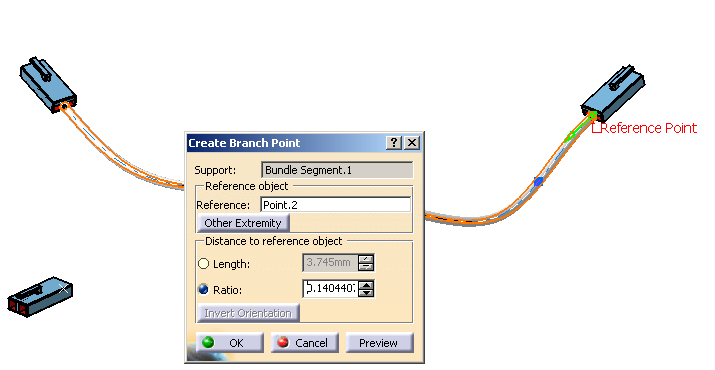
-
Optionally, click Other Extremity to change the reference point to the other end of the bundle segment.
-
Click Length to define the distance to the reference object and enter 60mm for example.
-
Click OK to validate.
A branch point is created and the branch now contains two bundle segments.The result looks like this: 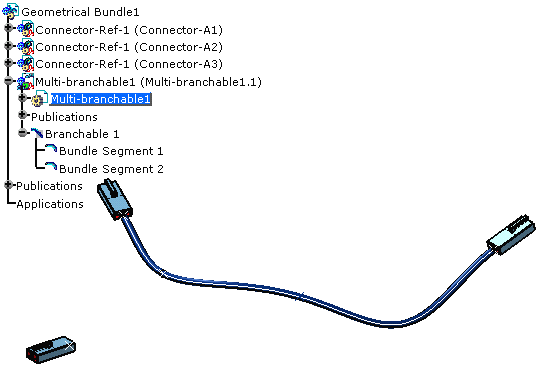
-
You can now create another bundle segment to be connected to the branch point:
To do so: - Click Branch Definition
 .
. - Click Route Definition.
- Click successively in the geometry the connector A3 and the branch point previously created.
- Click OK .
The result looks like this:

- Click Branch Definition