This task shows you how to automatically synchronize your 3D flatten at any time during your session. You can add the missing components or remove the additional components, and also synchronize the bundle segment structure, attributes.
The document is still open from the previous task.
Also open the initial document (3D-Install Harness) before the data was
extracted.
-
In the 3D-Install harness document, select a bundle segment:
- Double-click the bundle segment you want to modify.
CATIA switches to Electrical Harness Installation. The Bundle Segment Definition dialog box opens. - Enter a value for the diameter, a value for its new length, and change its color.
- Click OK and switch back to Electrical Harness Flattening.
- Double-click the bundle segment you want to modify.
-
Save your 3D-Install Harness document.
-
Come back to the extracted model.
-
Click Synchronize
 .
.When defining the Harness Flattening Parameters, you already specified whether or not to move the ends of bundle segments during synchronization. To modify this option, double-click the Flattening Parameters feature in the specification tree.
-
The Synchronize dialog box pops up:
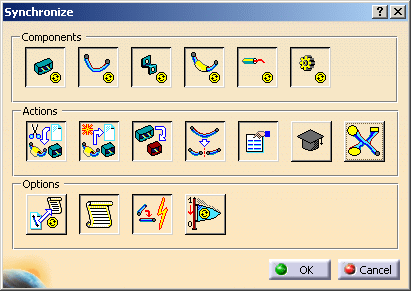
For the purpose of this scenario:
- In Components, select Bundle Segments.
- In Actions, select Bundle Segment Structure and Attributes.
- In Options, click to clear Html report so
no report is generated, and select Synchronize Flag to
set the synchronization history of all components to False.
You can see the value by right-clicking a component to open the
contextual menu and by selecting Properties.
Refer to Synchronizing the Environment for more information.
-
Click OK to validate.
A status bar appears showing the synchronization progress.
The extracted document is updated.