It is recommended that the flatten algorithm mode be set to Coarse.
-
Select the branch around which other branches will be arranged near the junction you want to arrange.
This branch is referred to as the fixed branch.
A preview highlights the junction and shows how branches will be arranged.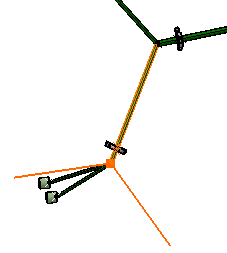
-
Click anywhere in the geometry area to accept the arrangement.
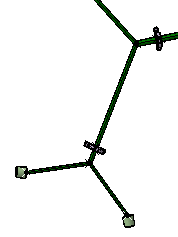
More about Equal Angle Patterns
The solution you obtain will be slightly different depending on whether the junction:
- Is formed by bundle segment ends
Or, - Is built on a branch point.
Junction Formed by Bundle Segment Ends
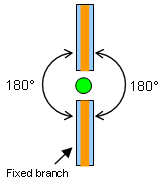
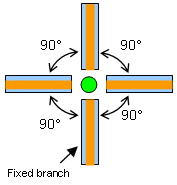
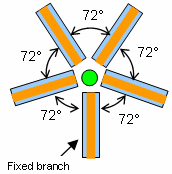
The angle between branches is computed as follows: 360°
/ (Total number of connected branches at junction).
Note: The fixed branch is counted as a branch.
| Two branches: | Four branches: | Five branches: |
|---|---|---|
 |
 |
 |
| Legend: |
|
|
|
|
Bundle segment Branch |
Junction Built on a Branch Point
The proposed solution depends on whether or not the branch containing the branch point is selected as the fixed branch.
- If the fixed branch is the branch containing
the branch point, the two bundle
segments making up this branch are positioned at an angle of 180°.
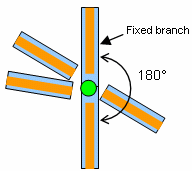
Branches on either side of the fixed branch are then arranged at equal angles with respect to each other.
Note: The fixed branch is not taken into account.The angle between branches is computed as follows:
 180°
 / (Total number of connected branches on one side of the fixed branch + 1).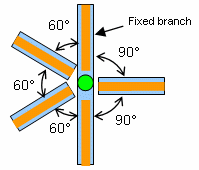
- If the fixed branch is not the branch containing
the branch point, the
branch containing the branch point is split into two at the branch point. A message informs the user who must confirm
the action. The junction is then arranged like a junction formed by bundle segment ends.
Note: The branch cannot be split if wrapped by a protective covering.