The Systems Space Reservation product is a prerequisite.
For more information about it, refer to
Systems Space Reservation User's Guide.
Open a document containing at least a schematic system and its corresponding 3D implementation through item/path reservations.
-
Click the Manual Routing
 button.
 -
Select a cable or a diagram document.
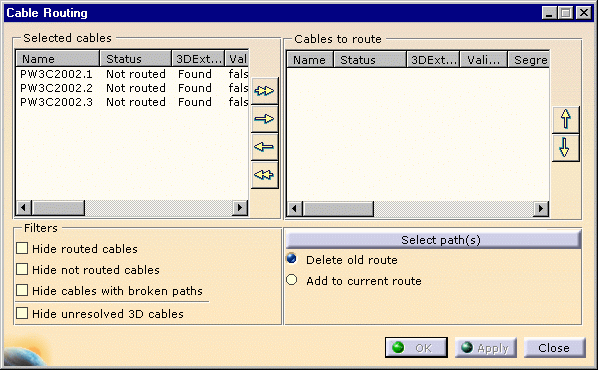
The Cable Routing list opens:
It shows the cables as well as other cable attributes:
- name: name assigned to the cable
- status: routed OK, not routed, routed KO (route not OK)
- 3D extremities: found, not found
- validated route: true, false
-
Select one or more cables in the list.
-
Click the right arrow or the multiple arrow if you want to route all the cables.
-
Click Select Path(s) to indicate the recommended segments.
The Edit Path dialog box opens 
Note: If one cable only is selected, a default path is displayed. -
Select one or more segments in the geometry.
The light turns to green. -
Choose the appropriate options:
- Delete old route (default value).
- Add to current route.
-
Click OK to validate the entries made.
The routing is performed.
The Routing Report window opens, and you can see the result.
![]()