If you performed the Part Drawing section of the Getting Started, you deactivated the view name and scaling factor (they are set by default). You now need to reactivate them so that they are displayed in views. To do this, go to Tools > Options > Mechanical Design > Drafting, click on the Layout tab and check the View name and Scaling factor options.
Also, you need to specify what geometrical and dress-up elements should be generated on views. Still in Tools > Options > Mechanical Design > Drafting, click on the View tab. Make sure Generate center lines is selected (it should be if you performed the Part Drawing section of the Getting Started) and check Generate axis.
-
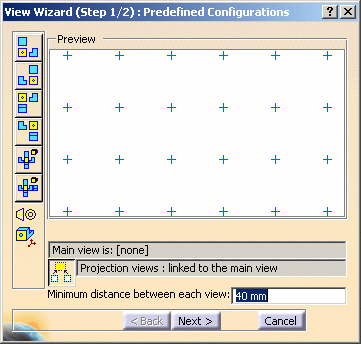
Click View Creation Wizard
 in the Views toolbar (Wizard sub-toolbar).
The View Wizard (Step 1/2): Predefined Configurations dialog box is displayed.
-
Click Configuration 3 using the 1st angle projection method
 to
create a front, a top and a left view using the ISO standard/first angle
projection method.
to
create a front, a top and a left view using the ISO standard/first angle
projection method. -
Click Next > to go to the second step of the wizard. The View Wizard (Step 2/2): Arranging the Configuration dialog box is now displayed with a new set of view buttons.
-
Simply click Finish to validate and exit the dialog box.

For more in-depth information on projection methods and the various possibilities offered by the wizard, refer to Creating Views via the Wizard in the User Tasks chapter. -
Now, in the assembly window, select the Slow Speed sub-assembly from the specification tree.
Note that you can also select the whole assembly.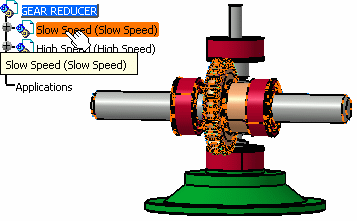
-
Then, click on the desired plane on the 3D assembly to define the reference plane.
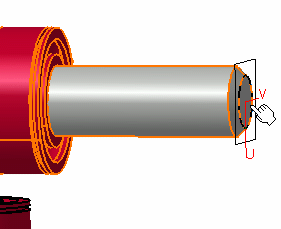
On the sheet, a blue knob appears, as well as three green frames containing a preview of the views to be created.
The knob lets you define the location and orientation of the views to be created, using the blue manipulators: top, bottom, left, right or rotated according to a given snapping, or according to a specified rotation angle.
-
Click on the drawing sheet or at the center of the blue knob to generate the views.
A progress bar appears temporarily, showing the view creation progress. The front, top and left views of the selected sub-assembly are created.
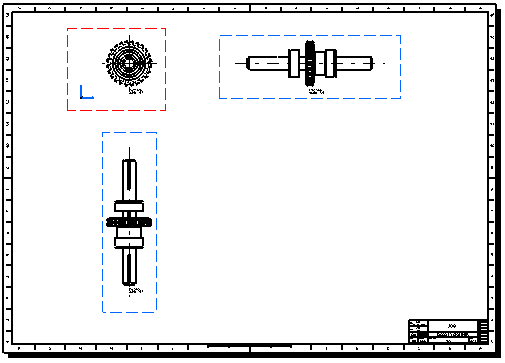
You may need to move the views to position them properly on the drawing. To do this, simply drag the front view (i.e. the active view with a red frame) with the cursor and drop it when you are satisfied with the position of the views.