-
Click the Add 3D Clipping
 icon in the Views toolbar (Break view
sub-toolbar).
icon in the Views toolbar (Break view
sub-toolbar).
The Clipping Object dialog box is displayed.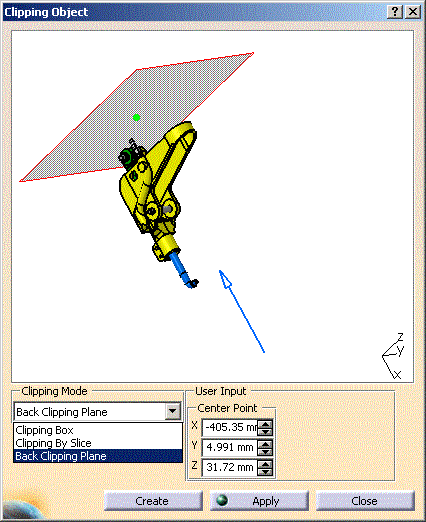
-
Clipping Mode:
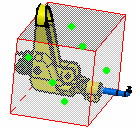
- Clipping Box: to select 3D elements inside the clipping box.
- Clipping By Slice: to select 3D elements between the back clipping plane and the front clipping plane.

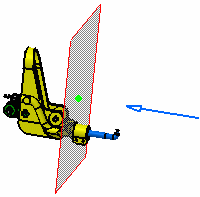
- Back Clipping Plane: to select 3D elements
positioned ahead of the plane. The blue arrow indicates the front
face of the clipping plane.
By default, this clipping mode is selected.
For these three clipping modes, elements intersecting the clipping planes will be cut.
-
User Input: to define the position and dimension of the clipping planes.
You can also drag and drop the green bullet at the center of the clipping plane
-
-
Create: to create the clipping view and close the dialog box.
-
Apply: to create the clipping view without closing the dialog box.
-
Select the Back Clipping Plane mode, and enter the x, y, z coordinates as below.
You can also drag and drop the green bullet to position the clipping plane.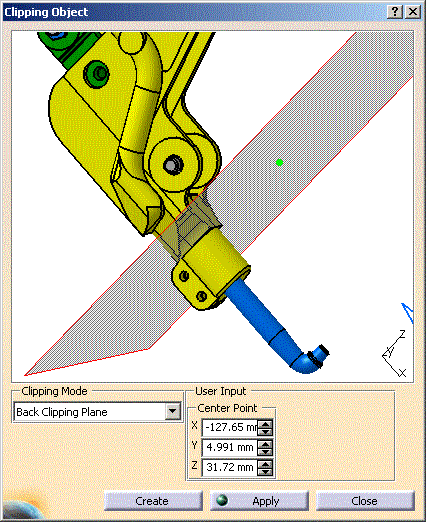
-
Click Create.
The front view is modified.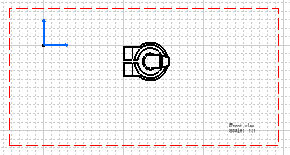
![]()
About 3D Clipping
- You can add only one 3D clipping object per view.
- A 3D clipping object is not associated with 3D elements.
- The 3D clipping is not available on the following views:
- CGR, raster, approximate views
- Section cut views
- Aligned section views
- Unfolded views
- Views from 3D
- Advanced front views with DMU box.
- The option Cut in section view has no effect on a 3D clipping, whether selected from the CATProduct (Specification tree > Contextual menu > Properties > Drafting tab) or from the Drafting (via Overloading properties).
Removal/Appliance of a 3D Clipping
In the contextual menu of a 3D clipped view (selecting the current View object, then 3D Clipping), the following commands are proposed:
- Remove 3D Clipping: to restore the view.
- Apply 3D Clipping: to copy the selection of 3D objects in another view.
Customization of a 3D Clipping
Cut elements are represented with the same parameters as breakout views.
To modify these parameters, select Tools > Options > Mechanical Design
> Drafting > View tab> Geometry generation / Dress-up >
View linetype, and click Configure. The Linetype
and Thickness dialog box is displayed. Choose a type for
breakout view. It will also configure representation of cut elements
in 3D clipped views.
It is also possible to modify the representation of 3D clipping elements by customizing Generative View Style parameters.