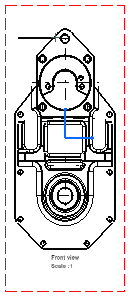
Many objects are of such shape that their principal faces cannot always be assumed parallel to the regular planes of projection. Creating an auxiliary view allows showing the true shapes by assuming a direction of sight perpendicular to planes that are perpendicular of the curves. This auxiliary view, together with the top view, completely describes the object.
-
Click Auxiliary View
 in the Views toolbar (Projections sub-toolbar).
 -
Sketch the representation of the plane by clicking a point and then an edge, or an edge, on the right view.
Both the 3D surface and the sketched plane are associative.
The selected edge becomes a line that you can position where desired using the cursor. This line/callout will be automatically used as the plane.
-
Click to position the callout.
The reference plane is automatically positioned according to the selected edge.
Positioning the auxiliary view callout amounts to defining the auxiliary view direction.
-
Click to position the auxiliary view.
Before clicking, as you move the cursor within a zone perpendicular to the plane, a preview of the auxiliary view to be created appears. This view will be automatically positioned accordingly. This is also true when creating a section view or a section cut.
You can also move the cursor outside the zone perpendicular to the plane and position the view where you want.
Note that the callout can be inverted or graphically modified.

- You can choose the auxiliary view axis orientation. To do this, go to Tools > Options > Mechanical Design > Drafting > Layout and select the Auxiliary and/or section views orientation according to profile check box.
- You can move the view freely after it has been created, providing you position it independently of its reference view. To do this:
- Right-click the frame of the view you want to move.
- Select View Positioning > Position Independently of Reference View.
- Drag the view to the desired location.
![]()