You can manage automatically the Thickness result as alternate shape.
Read Alternate Shape Management.
-
Click Thickness
 in the DMU Optimizer toolbar.
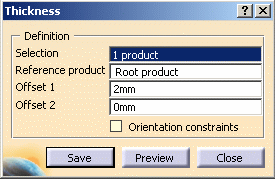
The Thickness dialog box appears. -
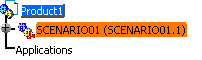
Select SCENARIO01.model in the specification tree.
-
Enter the Offset values. In our example, keep the default values:
- Offset 1=2mm
- Offset 2= 0mm
-
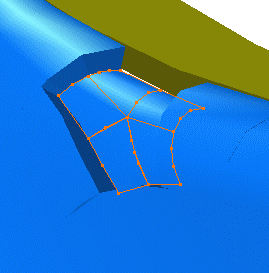
Click Preview to generate the thickness representation. The preview window is displayed.

The Orientation constraints option is disabled by default. The constraint propagation is done automatically. 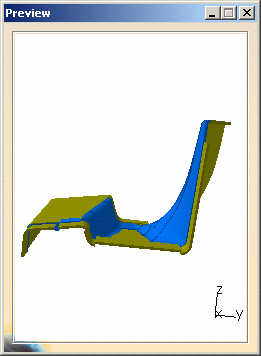
-
Zoom to visualize better the thickness result:
You are not satisfied with the result.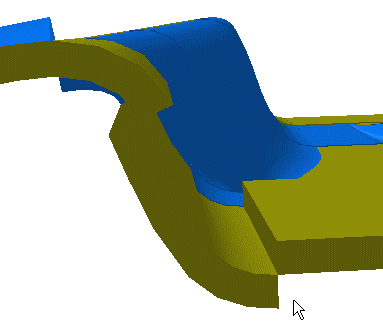
You are still in the Thickness command. -
Select the Orientation constraints check box:

-
Click Preview. The propagation of constraints is not complete. The surfaces concerned are highlighted.
-
Select again the Orientation constraints check box. When turned on you can define constraints on the initial representation.
-
Define constraints for the corresponding surfaces:
- Drag the cursor onto the surface
- When you are satisfied, click the left-hand mouse button.
The constraint is created.
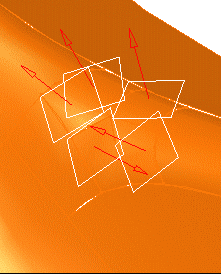
At anytime, you can delete a constraint, what you need to do is click on the white square.
Note that if you click the arrow, you reverse the constraint orientation. -
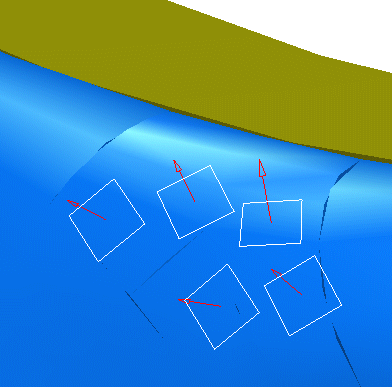
Click Preview when done. The surfaces are correctly positioned.
-
Click Save. The Save As dialog box is displayed
- Set the Type to .cgr
You can save your result as a .stl file. This format can be reused and imported in other CATIA products for design purposes.
For instance, with Digitized Shape Editor you will be able to recreate exact surfaces from the imported point shell.- Identify the folder in which you want to save the file
- Enter a file name

-
Click Save.
-
Click Close.
![]()