This scenario outlines the different operations you need
to perform when handling CATAnalysis documents in the
Generative
Structural Analysis workbench
![]() .
.
As you know, these documents are linked to specific files.
These require some customizations from your system administrator, but you
also need to rename them as explained below.
The different steps described are the following:
Performing an Analysis in CATIA Generative Structural Analysis
-
Retrieve the part to which a material has already been assigned.
-
For example, from the New Analysis Case dialog box, select Static Analysis as the type of analysis you wish to perform.
-
Define restraints and distribute the forces you want.
Refer to the CATIA Generative Structural Analysis Guide for reference information about mechanical analyses for 3D systems. -
Launch the computation
 .
.
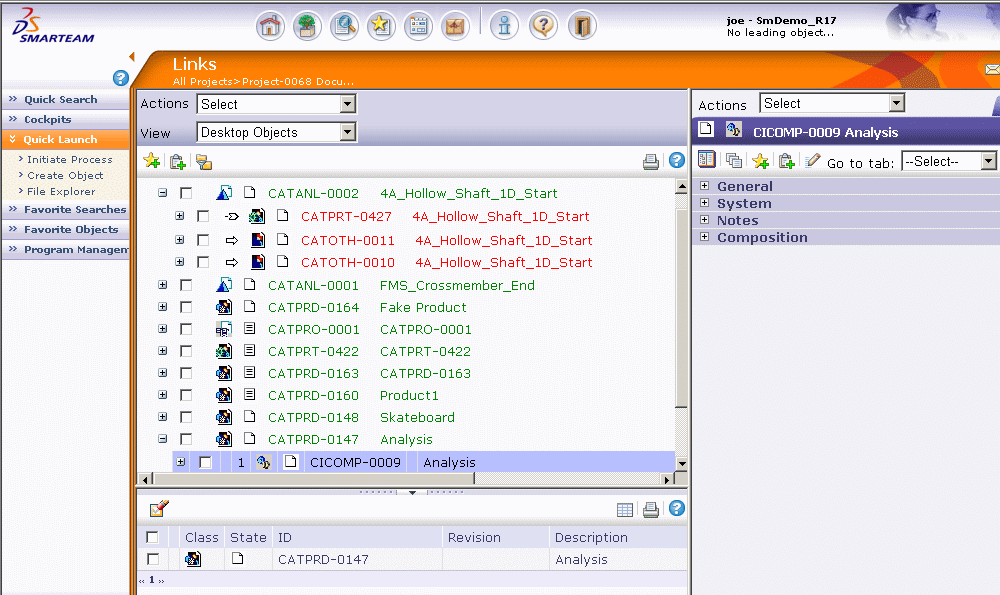
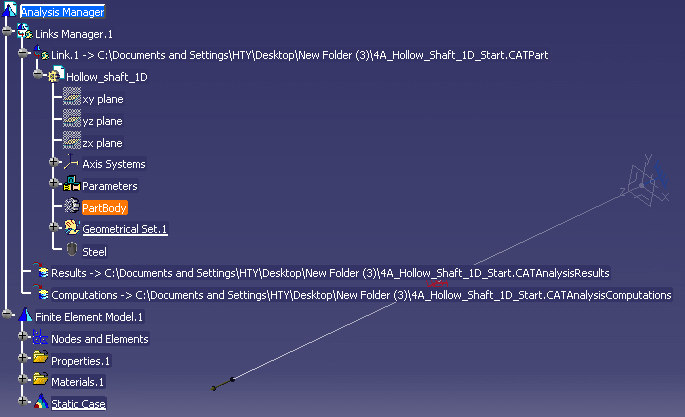
Among other things, two files are generated and their paths are also displayed in the specification tree. You obtain a result similar as this:E:\users\slg\AnalysisOutput\Analysis1_1.CATAnalysisResults
E:\users\slg\AnalysisOutput\Analysis1_1.CATAnalysisComputations
You can notice that the Results as well as the Computations files:
- are located in the appropriate directory defined by the system administrator, not in a temporary one.
- have a name which will not be unique in the SmarTeam database.
Renaming the Files Generated |
You may have noticed that the application provides names that cannot be easily reused in the SmarTeam database.
-
To ensure that both files will be identified with a unique name in the database, you need to rename them. To do so, right-click the file to be renamed and select Results object->Definition...
The External Storage dialog box is displayed. It is recommended to place the files in the user's workspace.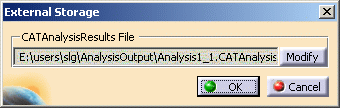
-
Press Modify and enter a unique name.
We recommend you use the names of the referenced Part or Product.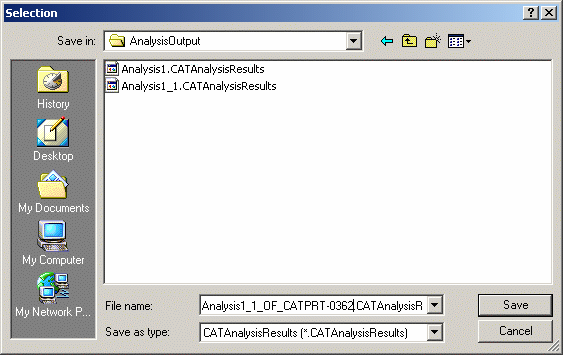
When done, the specification tree reflects the modifications. The name you have just modified are displayed.

Saving the CATAnalysis Document in SmarTeam |
-
Prior to saving CATAnalysis documents in SmarTeam, if you wish not to save the computation data in the vault, click
 to clear this data.
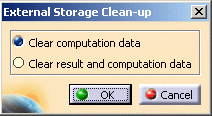
-
Save the documents in the SmarTeam database.
As soon as you save your CATAnalysis file, SmarTeam creates a link between this document and:- the CATPart document
- the two files generated after computation.
Notice the link icons to the CATAnalysisResults & CAtAnalysisComputations. It is indeed stored as a CATIA Result Link as these two files are a result of the analysis.
. 
-
To secure the documents in the electronic vault, select SmarTeam->Life Cycle->Check-In.

Checking Out the CATAnalysis Document |
|
-
In case you wish to modify the CATAnalysis document later on, perform an Open for Edit operation.
You will note that a check-out of the analysis proposes by default the check-out of the result files.