This task explains how to generate a user flange from a spine and a user-defined profile.
![]()
-
Select User Flange
") in
the Swept Walls sub-toolbar.
in
the Swept Walls sub-toolbar.The User Defined Flange Definition dialog box opens. 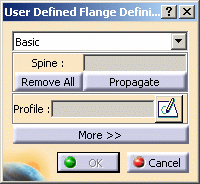
-
If you are using the NEWSweptWall01.CATPart document, click Sketcher
 ,
and define a profile in the yz plane as shown below:
,
and define a profile in the yz plane as shown below:
Then quit the Sketcher, clicking Exit
") .
.If you are using the NEWSweptWall04.CATPart, go directly to step 3 as the profile is already defined.
-
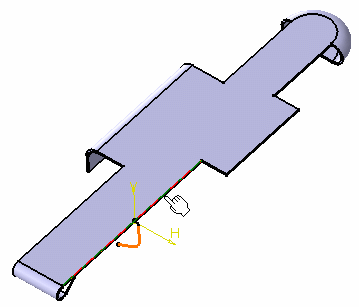
Select the edge and the profile, as shown in red.
-
Click the More button to display the Bend Allowance tab allowing you to locally redefine the bend allowance settings.
The value defined for the K factor in the Sheet Metal Parameters is used as the default value.You may need to deactivate the formula using the contextual menu on the K Factor field and choosing Formula -> Deactivate before editing the value.
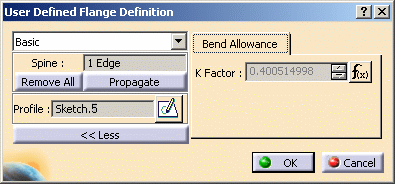
In this case, the new K Factor value overrides the value set in the Sheet Metal Parameters. -
Click OK to create the user flange.
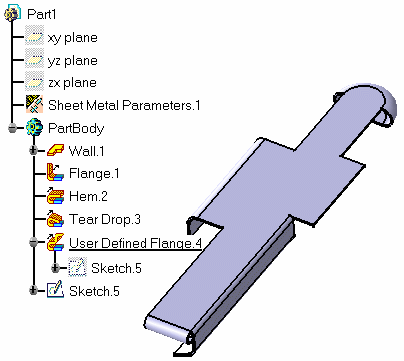
The feature is added in the specification tree. 
- Use the Remove All button to remove the selected edge(s).
- Use the Propagate button to select all tangentially contiguous edges forming the spine.

As far as the profile is concerned, remember that: - There must be a tangency continuity with the edge on which the flange is created,
- The plane must be normal to the spine.
![]()