You can select areas of the tool path by using:
- one point on the tool path and deciding whether you want to use the portion before or after it,
- two points and deciding whether you want to use the part of the tool
path
that is between the two points or outside of the two points, - a contour and deciding whether you want to use the part of the tool
path
that is inside or outside of the contour, - a polyline and deciding whether you want to use the part of the tool
path
that is inside or outside of the contour.
-
The tool path and the tool path area editor are displayed.

The tool path editor has options that let you select an area using: -
 one point,
 -
 two points,
 -
 a contour,
 -
 a polyline,
 -
 collisions points,
 - or by swapping
the selection for the area that is not selected
 ,
,
so that you can then choose whether you what to move or cut
 the area.
You can also predefine the selection value
 .
.
-
-
First select the area that you want to modify:
-
by selecting one point
on the tool path.
This selects the portion of the tool path after the point.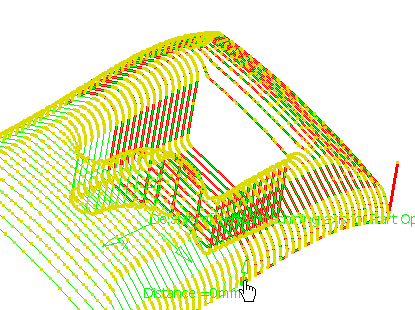
-
by selecting two
points on the
tool path.
This selects the portion of the tool path that falls between the two points.
-
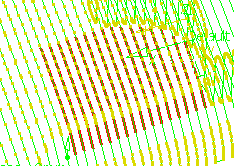
by selecting an existing closed
contour on the part.
This selects the area of the tool path that is within the contour.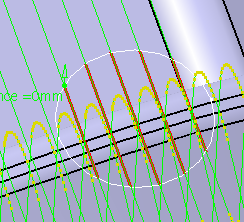
-
by clicking on the part to define a polyline.
-
by selecting one point
on the tool path.
-
Double click to end selection.
-
You can swap the selected area by clicking
 . So if you selected
the
area with:
. So if you selected
the
area with: - one point the part of the tool path that is before the point is now selected,
- two points the part of the tool path that is outside the two points is now selected,
- a contour the part of the tool path that is outside the contour is now selected.
Clicking the swap icon a second time will give you the original selection.
-
Click
 to
change the
default value of the
selected areas. Click it and this dialog box is displayed:
to
change the
default value of the
selected areas. Click it and this dialog box is displayed: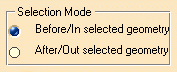
Depending on the button you pick, you can choose whether the part of the tool path selected is before or after the single point or inside or outside the two points or contour.
Whichever of the buttons you choose its effect will be applied to the next tool path selection action. -
Now you can either cut the area of the tool path with
 or
move it with
or
move it with
 .
. -
To move a tool path area
- grab the point at the end of the arrow beside the word
Distance and pull.
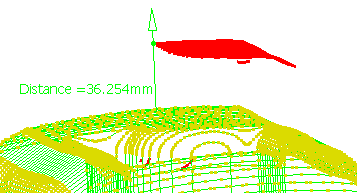
Distance reflects the distance that you move the area.
-
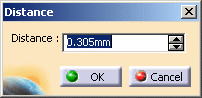
You can also double click the word distance and enter a value in the dialog box.
-
If you wish to translate the area along an axis other than the (default) tool axis,
use the contextual menu over the point at the end of the arrow beside
the word Distance and choose an axis.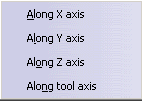
-
Once you are satisfied, push the Translate
icon.
- grab the point at the end of the arrow beside the word
Distance and pull.
-
If you cut an area and you do not reconnect the points, you will see the word "open"
after the tool path name in the specifications tree.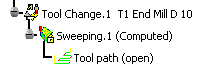
-
Before cutting an area of the tool path, you can choose to copy this area in the specification tree:
- Click Area selection
.
- Select the Copy transformation check box. Do not
forget to exit this dialog box by OK.
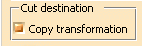
- Click Area selection
-
Click Cut
and select an operation in the
specification tree.
The Copy-Transformation is created after the selected operation.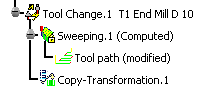
-
If you wish, you can change the tool of the Copy-Transformation you have created:
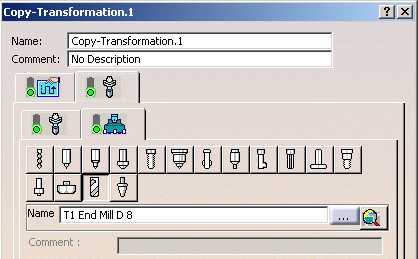
The specification tree will look like this:

-
Click OK to validate and revert to the main dialog box.
![]()