A plane system grid represents a set of perpendicular reference planes. Each line on the grid is a reference plane.
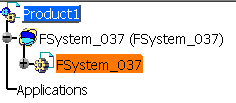
- a system in the Structure Functional System Design
workbench, using the Structure System command
 .
See Creating a System in the Structure Functional Design User's Guide.
.
See Creating a System in the Structure Functional Design User's Guide.
Or
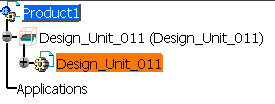
- a design unit in the Structure Detail System Design
workbench, using the Design Unit command
 .
See Design Unit Creation in the Ship Structure Detail Design User's
Guide.
.
See Design Unit Creation in the Ship Structure Detail Design User's
Guide.
The system/design unit you create displays in the specifications tree.
Double-click on the part on the specifications tree.
Make sure you are now in the Structure Functional Object Design workbench.
When you are in the Structure Detail System Design workbench, click the plus sign next to the design unit to expand the tree and display the part.
Make sure you are now in the Structure Detail Object Design workbench.
Select a support in the Support field in one of the following ways:
- You can select a plane in the 3-D session or specifications tree.
- You can select a planar structural object in the 3-D session or specifications tree.
- You can right click in the Support field and select Select Reference Plane.
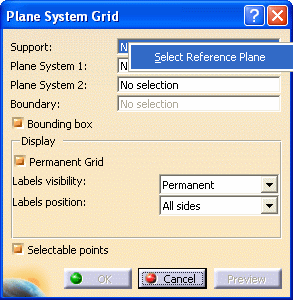
...the Plane Systems dialog box displays.
For information on using the Plane Systems dialog box, also known as the Reference Plane Browser, see Using the Reference Plane Browser, Basic Navigation in the Structure Functional Design User's Guide and in the Ship Structure Detail Design User's Guide.
Select a plane system from the Select System drop down list.
The appropriate sub-system displays in the Select Sub-System field and a list of planes displays under Select Planes.
Select a plane from the Select Planes list. Your selection displays in the Key in Planes field.
NOTE: Do not use the plus sign (+) when keying in a plane name. For instance, you can key DECK.1, but not DECK.+1.
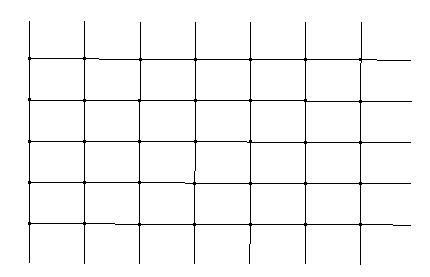
Click OK and you see the plane system grid that you created. The color of the grid lines match the color of the corresponding planes. If planes display as white, the corresponding grid lines display as a CATIA lowlight color.
The Support field on the Plane System Grid dialog box displays the selected plane.
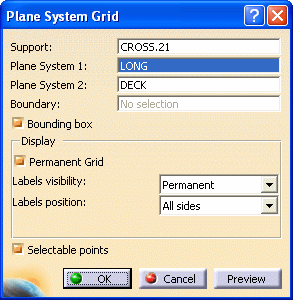
NOTE: When you select a planar structural object (such as a planar plate), the Support field displays the support of the structural object.
The Plane System 1 and Plane System 2 fields display plane systems based on your selection. These plane systems are perpendicular and complementary to each other.
- The data to define the clipped area is read from CATShipProjectEnvelope.xml and stored in the
Make the Boundary field active by unchecking the Bounding Box checkbox.
- When you select a surface or a volume in your 3-D session, you limit the grid. Your selection displays in the Boundary field.
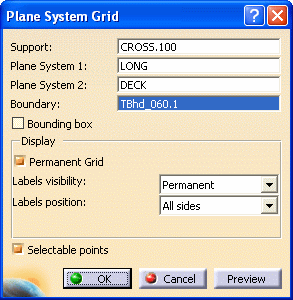
Click Preview to get the effect of the boundary.
In the Display section:
- If you check the Permanent Grid checkbox, the grid is always visible.
- If you do not check the Permanent Grid checkbox, the grid is visible only in normal view.
In the Labels Visibility drop down list, you can:
- Make the text visible at all times (Permanent).
- Make the text visible only in Normal View (Only in Normal View).
- Hide the text (None).
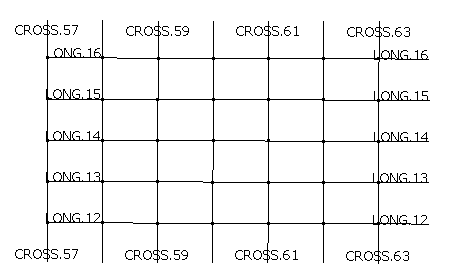
In the Labels Position drop down list, you can position the text:
- On all sides (All Sides).
- Only at the bottom/left (Bottom/Left).
If you check Selectable Points, you can select points at the intersection of grid lines. This enables you to place an object on the grid just by selecting the appropriate points.
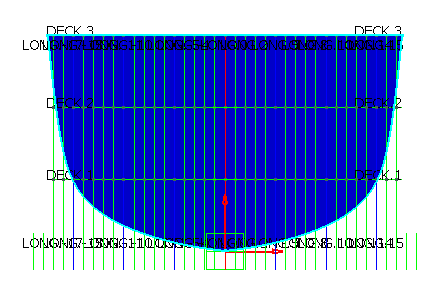
The following displays when:
- Permanent is selected from the Labels Visibility drop down list.
- All Sides is selected from the Labels Position drop down list.
- Only in Normal View is selected from the Labels Visibility drop down list.
- Bottom/Left is selected from the Labels Position drop down list.
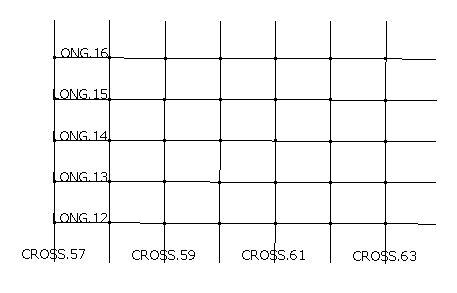
- None is selected from the Labels Visibility drop down list.
You can repeat this procedure and create more than one plane system grid. But you can only have one grid visible at a time.
Double click Plane System Grid on the specifications tree and the Plane System Grid dialog box redisplays.
Select the plane system grid in your document. Zoom In if necessary.
- When you select a different support on the plane system grid, the Support field in the Plane System Grid dialog box displays this support.
- When you select the Plane System 1 field, and then select a plane system in the specifications tree or in your 3-D session, the selected plane system displays in the Plane System 1 field.
- When you select the Plane System 2 field, and then select a plane system in the specifications tree or in your 3-D session, the selected plane system displays in the Plane System 2 field.