- We recommend that you import files in IGES 106 format using the
dedicated Import command rather
than the File/Open menu. - Files import from ENOVIA is not yet implemented.
- Available formats depend on the workbench you
are working in:
Digitized Shape Editor
-
Ascii free,

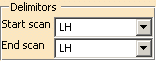
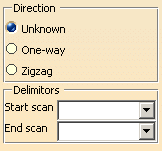
Perceptron (ascii) files can be imported by selecting the Ascii free format and
setting the Delimitors for Start scan and End scan to LH (do not forget a blank before LH).
- Atos (the quality of the points can be taken into account),
- Cgo,
- Gom-3d (as points, scans, grids or meshes, the quality of the points can be taken into account),
- Hyscan,
-
IGES: IGES Entities 116 are processed.
If the cloud to import is made of Entities 116 only, the result is a cloud of points.
Otherwise, the result is made of scans. - Kreon,
- Opton,
- Steinbichler (as points, grids or scans),
- STL (bin or ascii, with creation of free edges and facets, if requested),
- 3d-Xml (tessellated).
STL Rapid Prototyping
- STL (bin or ascii, with creation of free edges and facets, if requested) (default option),
- Cgo,
- Ascii free,
-
IGES: IGES Entities 116 are processed.
If the cloud to import is made of Entities 116 only, the result is a cloud of points.
Otherwise, the result is made of scans, - 3d-Xml (tessellated).
Shape Sculptor
- STL (bin or ascii, with creation of free edges and facets, if requested).
- In Cgo, Ascii free and IGES
formats, you can not process more than 10,000 points at each import,
in one or several files, e.g. you can not import 4 files of 3,000 points each in one shot but you can import them separately. - This limitation applies to the input files (before Sampling or resizing with the bounding box).
- If you try to import over 10,000 points in one shot, a fatal
error panel is displayed:
Too many points for this configuration.- If the Grouped option is active, no file is imported.
- If the Grouped option is not active, files are
imported as long as the sum of their points does
not exceed 10,000 points.
- Mesh Regeneration is not available on those files.
-
-
Click Import
 .
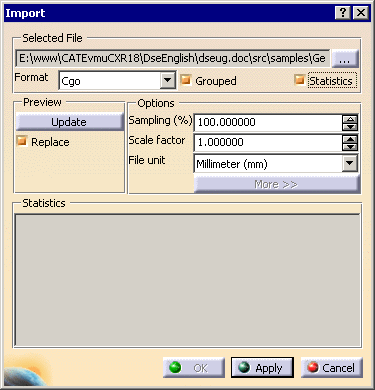
The Cloud Import dialog box is displayed.
.
The Cloud Import dialog box is displayed. -
Select the file format from the Format list.
-
In the Selected File area, click the browse button ... to browse your directories and select a file.
-
Select the check box Statistics to display information about the model you are importing.
If you want to import several files in one shot, please refer to the Grouped explanations. -
In the Options field:
-
Enter the Sampling percentage to apply;
The sampling value determines the percentage of points or scans or grids that will be read from the digit file.
-
Enter the Scale factor to apply to the model, as well as the Unit used in the file.
-
- If the extension of the file you have selected is consistent with the
list proposed, the Format field is updated automatically.
Otherwise, be careful to enter the correct format in that field. - Once you have performed an import operation, V5 proposes the last
entered file path and format as default.
If you click on ..., the last entered directory is proposed as default. - The File unit option is not relevant to the Steinbichler format, nor the Sampling percentage to the Stl format.
-
For some digit file formats, you may want to enter additional data that are displayed by clicking More>>
-
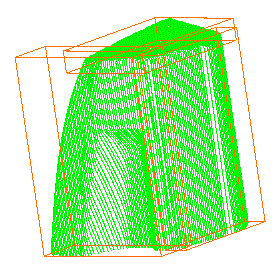
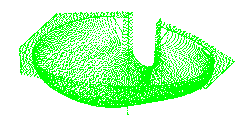
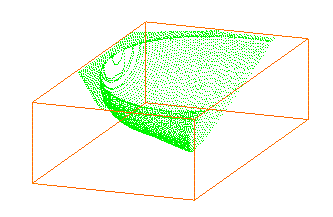
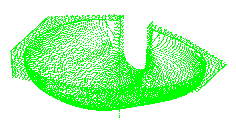
Click Apply to display the cloud of points or mesh:
-
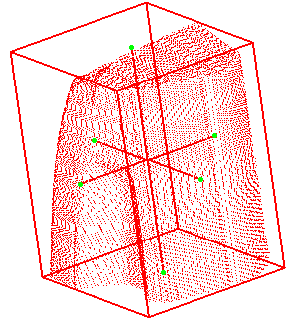
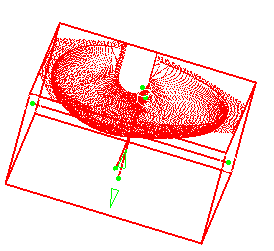
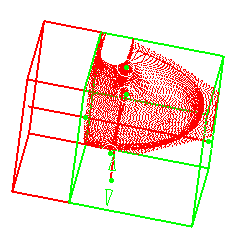
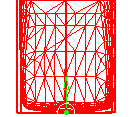
Click Update to display the bounding box of the cloud of points or mesh.
Use the green arrow to resize it in order to import only a part of the cloud of points or mesh.
Select the check box Replace to replace the current cloud of points or mesh by a new one.


 or
or
 or
or
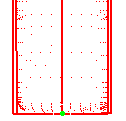
- The bounding box
appears every time the cursor passes over a cloud of points or a mesh.
Its size corresponds to that of the visible points. - If a local axis system is set as current, the file will be imported in
this axis systems.
If no local axis system is set as current, the file will be imported in the axis system of the current part. - Moreover, if a local axis system is set as current, the axis system of
the dynamic box used to select
a portion of the imported file when the Update button is pushed is parallel to the local axis system axis.
-
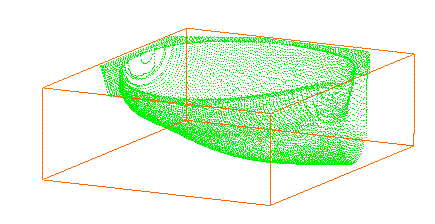
Once you are satisfied with the preview, click Apply and OK to finish the import of the cloud of points or mesh.
- The name of the element created in the specification tree is the name of the original file, without its extension.
- Undo and Redo are available.
- V5 memorizes the data of the last imported file and proposes them at the next import action.
![]()