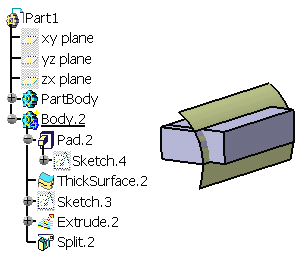
- Using Surface-based Features to Integrate Surface Modeling into Solid Modeling
- Using Boolean Operations to Integrate Volume Design into Solid Design
- Using Insert Added Volume to Integrate Volume Design into Solid Design
Using Surface-based Features to Integrate Surface Modeling into Solid Modeling
Using surface-based features (Split
![]() ,
Thick Surface
,
Thick Surface
![]() ,
Close Surface
,
Close Surface
![]() ,
Sew Surface
,
Sew Surface
![]() )
is not a new way of integrating surfaces into solid modeling. However, what
hybrid design changes is the fact that surfaces can now be included in the
same body as the features they support. Here is an example of what you can
now obtain:
)
is not a new way of integrating surfaces into solid modeling. However, what
hybrid design changes is the fact that surfaces can now be included in the
same body as the features they support. Here is an example of what you can
now obtain:
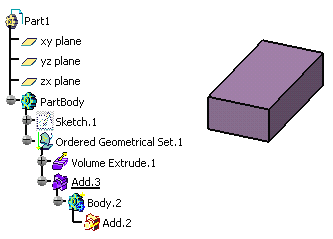
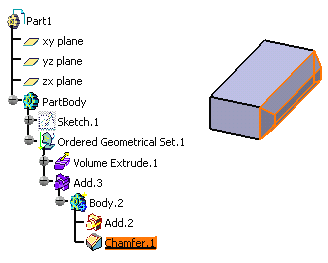
Using Boolean Operations to Integrate Volume Design Into Solid Design
You can use Boolean operations (Assemble
![]() ,
Intersect
,
Intersect
![]() ,
Add
,
Add
![]() ,
Remove
,
Remove
![]() )
to integrate volumes into bodies. Boolean features are the only features
that can reference volumes.
)
to integrate volumes into bodies. Boolean features are the only features
that can reference volumes.
-
Select Insert > Boolean Operations > Intersect...
The Intersect dialog appears. -
Select Volume Extrude.1. to create the intersection between the volume and the solid.
-
Click OK to compute the result:
The intersection is visible, and you can note that Intersect.1 has no children, it references Volume Extrude1. If you wish to, just use the Parents/Children command onto it to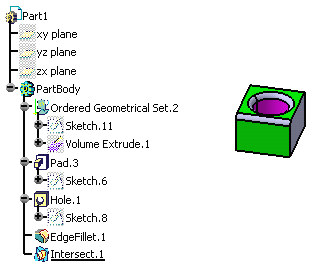

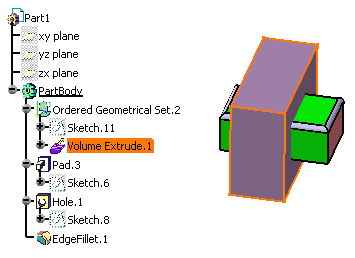
Using Insert Added Volume to Integrate Volume Design into Solid Design
|
|
This task shows you how it is now possible to apply Part Design capabilities onto volumes created in Generative Shape Optimizer product. Prior to applying these capabilities, you need to perform just one operation as illustrated in this scenario. | |||
|
|
To perform this scenario, create the volume of your choice. | |||
|
|
|