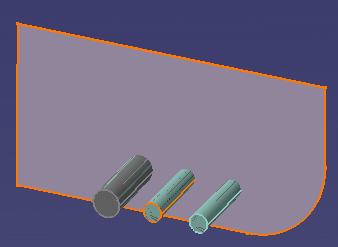
Select an object either from your document or on the specifications tree, then select the penetration from the Penetration Management dialog box. See Querying for Penetrations for a more detailed explanation.

The related objects highlight in your document, and will be used in calculating the penetration location.
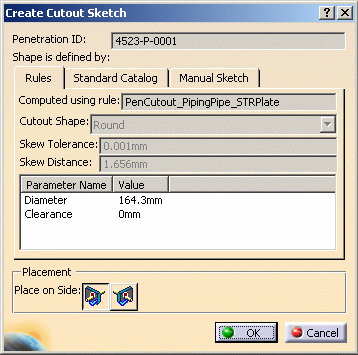
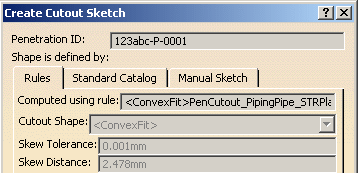
The Create Cutout Sketch dialog box displays the shape and size for the proposed sketch, as computed by the design rules.
Click OK if you accept it.
Select the Standard Catalog tab and the Catalog Browser
button ![]() .
.
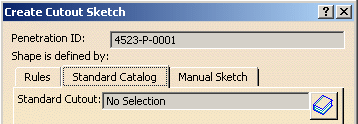
The Catalog Browser displays. Double-click a sketch to place it.

Select the
Manual Sketch tab and click the Open Sketcher
button ![]() .
.
The Sketcher opens. Create your sketch and click the Exit Workbench button. The sketch is placed in your document.
 allow you to place the
cutout sketch on one side or the other of a structure, and is used for
visibility purposes.
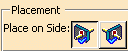
allow you to place the
cutout sketch on one side or the other of a structure, and is used for
visibility purposes. The cutout sketch is associated with the penetration and will be saved when you save to ENOVIA.
The Computed using rule field shows the list of rules used, prefixed by <ConvexFit>.
The Cutout Shape field displays <ConvexFit>, indicating that a system algorithm was used to combine multiple shapes that were computed from the rules.
Review the cutout sketch and click OK if you accept it.
Save your document to save the data in ENOVIA.