 |
This procedure describes how to
create
tags. Tags are created within previously created tag groups.
Individual tags or tag groups can then be assigned to robot sequences.
The distances between tags can also be measured. The first three parts of this procedure correspond to the three ways of
creating tags:
The final part of the procedure describes how to
measure the distance
between any two tags. |
 |
The steps in this procedure are illustrated using the
file
BodySide_1.CATProcess. |
 |
|
| |
-
Click New Tag  . .
-
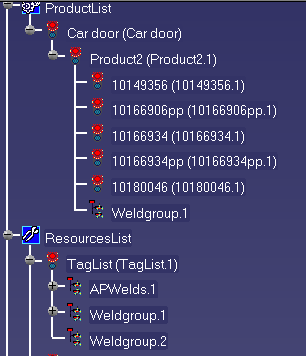
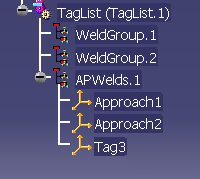
Select a tag group (e.g., APWelds.1) from the PPR tree.
 |
| The Define Plane dialog box appears. For an
explanation of the options available using Define Plane,
see 3D Simulation for Manufacturing User's Guide : User Tasks:
Controlling the Process Environment : Using Offset Planes and
Advanced Offset Planes. |
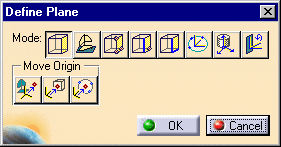 |
-
From the dialog box, select the appropriate plane
definition for the tag or tags you want to add.
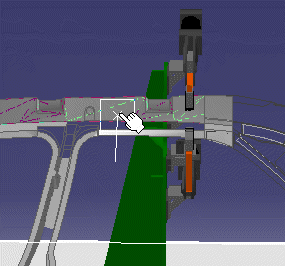
| The possible plane orientation of the tag appears on the 3D
geometry. You may wish to zoom in to get a better view. |
 |
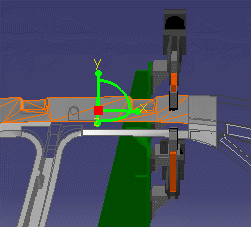
-
Once you have correctly positioned the tag, click on
the geometry.
-
Select the OK button of the Define
Plane dialog box.
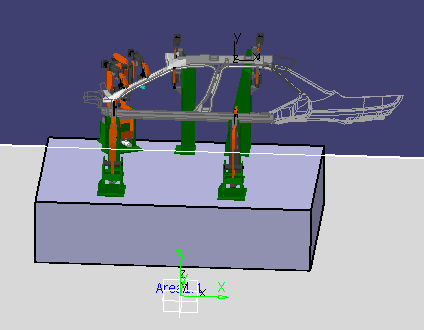
| The new tag appears on the geometry: |
 |
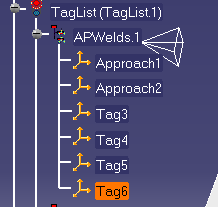
| And under the selected tag group: |
 |
|
 |
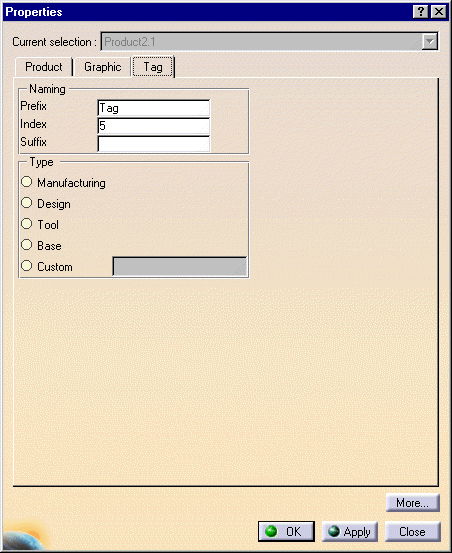
Once you have created a tag, you can change its name by
right-clicking the tag on the PPR tree, selecting Properties,
and then selecting the Tag tab from the Properties
dialog box. |
|
 |
|
Enter the desired tag name, the tag type, and click
OK. |
|
The table below explains the
tag types. |
|
| Tag type |
Purpose |
| Manufacturing |
Used to define a manufacturing target |
| Design |
Used, for example, to create joints between parts |
| Tool |
Used to define the tool action point of a device.
This is used when mounting the device. (See Mounting a Device on a
Robot in Robot Task Definition User's Guide.) |
| Base |
Used to define the base of a device. This definition of
base is used when mounting the device. (See Mounting a Device
on a Robot in Robot Task Definition User's Guide.) |
| Custom |
For user-specific purposes. |
|
|
|
| |
-
ClickNew Tag .
-
Select a tag group from the PPR tree.
-
Click on a space in the 3D geometry where there is no
data (e.g., no parts or resources).
| The new tag appears on the geometry at the 0,0,0 coordinate: |
 |
| And under the selected tag group: |
 |
|
|
|
| |
-
Click
New Tag .
-
Select a tag group from the PPR tree.
-
Select a product from the PPR tree.
| The new tag appears at the local origin of the product. |
|
| |
Measuring the Distance Between Two Tags
|
| |
-
|
|
-
|
|
-
-
|
|
|