 |
The attach function creates a one-way relationship
between a manikin segment and one or more objects in its environment. The
attached object becomes a slave to the segment. Once attached, this
object will move with the same matrix as its master segment. This task
is divided into three parts:
|
 |
- It is important to note that the attach is a one-way
relationship; the object follows the segment, not the opposite. If
the object is moved (i.e., using the compass) after the attach is made,
the segment will not follow the object's motion.
- When doing any attach, the compass may be snapped to manikin skin
points, not just the central point of a segment.
- Refer to the status bar for information and instructional prompts.
|
 |
|
| |
-
From the main menu, select File > Open.
Select the
Attach.CATProduct file from the samples directory.
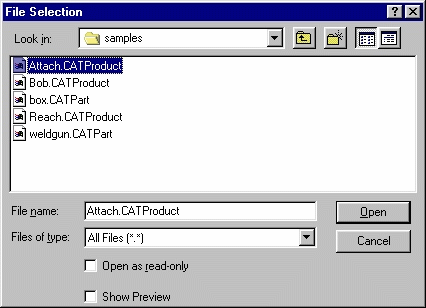
-
Open the file.
-
Position the manikin with respect to the geometry that
will be attached. The Process opens with the Manikin holding the weld
gun.
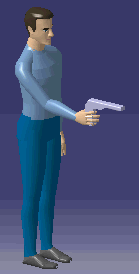
 The
user could also select the
Load from Manikin Attributes from a Catalog
command The
user could also select the
Load from Manikin Attributes from a Catalog
command
 and choose Attach_sample posture from the "Attach" catalog. This places
the manikin posture so that it appears to be handling the tool with its
right hand.
-
Select the Attach/Detach icon.

-
Select the object to attach (in this case, the tool).
-
Select the manikin segment to which the geometry will
be attached (in this case, the manikin's right hand).

-
If there is multiple attaches, the Attach/Detach dialog
box appears with other selections.

-
Once the object is attached, it will follow the motion
of its master segment. Move the hand (master segment) using forward
kinematics and inverse kinematics. The tool will follow the hand's
motion. This is also the case when a posture is applied to the manikin
or if the manikin as a whole is moved within the 3D environment.
|
 |
|
| |
-
Access the newly-created Attach. To do this, in the PPR
tree, right click on the manikin, and select Properties.
-
The Properties dialog box appears.
Select the
Attaches tab for the information.
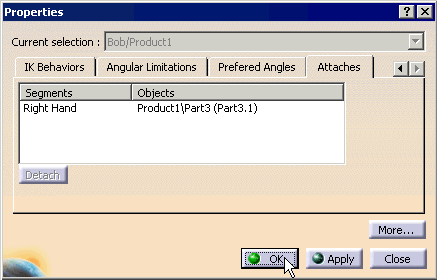
-
Another way to reset the Attaches is through
Settings.
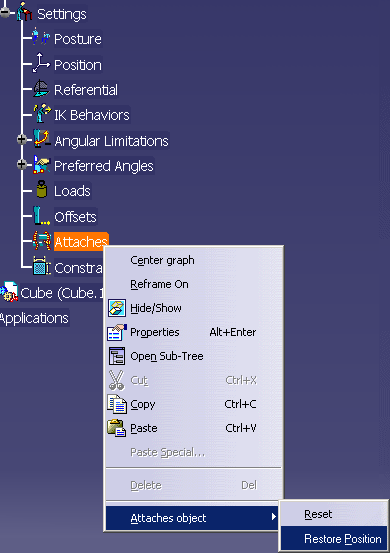
|
 |
- An object may be attached to one segment at a time.
- Several objects may be attached to a single segment.
|
| |
|
 |
Detach an object from manikin segment through the
Properties dialog box.
|
| |
-
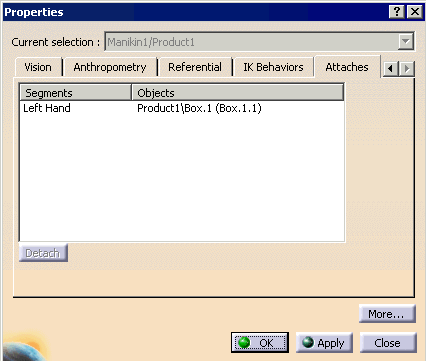
In the PPR specification tree, right-click on the Manikin
select Properties, the Attaches tab.
-
Select the object to detach and select the Detach
button becomes active. After selecting the Detach, the
Segment is removed from the list.
-
Click the Apply button. The selected object
is detached from the manikin segment.
 The
Apply button must be pressed for the selected object to
be detached. The
Apply button must be pressed for the selected object to
be detached. |
|
|
| |
-
In the PPR tree, right click on the manikin, and select
Properties.
-
The Properties dialog box appears.
Select the
Attaches tab for the information.

-
Another way to reset the Attaches is through
Settings.

|


