This task explains how to create planar patches, that is planar surfaces.
Open a new CATPart document.
The solid planes of the 3D compass indicate in what plane any action is to be performed.
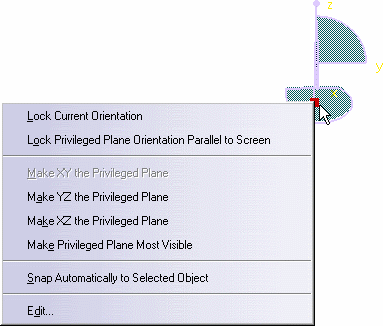
By default the creation plane is the XY plane. However, you can right-click the compass to display other options:
-
Make XZ the Privileged Plane: elements are created in the XZ plane
-
Make YZ the Privileged Plane: elements are created in the YZ plane
-
Make Privileged Plane Most Visible: the plane in which elements are created is the plane seen most.
Keep the default working mode.
The surface is created in the current active
plane as defined using the Current plane orientation toolbar containing the
Flip to UV or XY
![]() ,
Flip to VW or YZ
,
Flip to VW or YZ
![]() or Flip to WU or XZ
or Flip to WU or XZ
![]() icons.
icons.
To find out more about the compass, see Moving Objects Using the 3D
Compass.
-
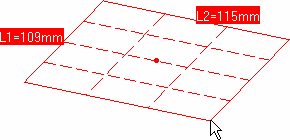
Click anywhere in the window.
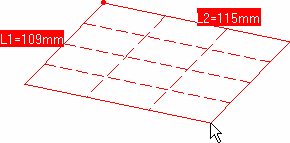
An outline appears and evolves as you move the pointer in the main window. Two values are displayed indicating the length and width of the patch.
If you call the function when a plane is selected, the surface is created in the selected plane otherwise it is created as described in the following cases.
-
If the 3D compass is in the model, the surface is created in the plane defined by the base.
-
If the 3D compass is in the upper-right corner of the screen, the surface is created in the plane parallel to the compass base and passing through:
-
the origin of the model if the first point selected is in space.
-
the first point selected on geometry.
-
-
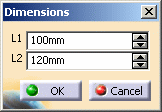
Right-click and choose Edit dimensions.
If you do not explicitly enter the dimensions of the surface, simply click again when you have reached the adequate size.
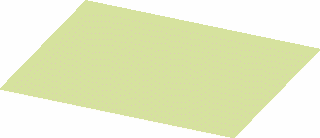
The planar patch is created.
-
Once the first point is defined, right-click anywhere, and choose the Edit Orders menu item, to edit the surface degree (in U and V) using the Orders dialog box just like you edited the dimensions.
-
Using the Ctrl-key, the planar patch is centered around the point corresponding to the initial click, otherwise, by default, this point corresponds to one corner or the patch.
Available capabilities from the Dashboard are: datum creation, and auto detection.