In this task, you will learn how to modify an area fill. Once the area fill is created, you can still:
modify the shape of an area fill
define if the area fill should be isolated or associative
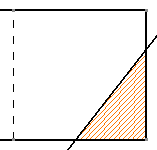
Open the IntDrafting_Area_Fill_Mod.CATDrawing document. This area fill has been created in a drawing containing a mix of sketched and generative elements. This is an associative one.
-
Select the area fill.
-
Click Area Fill Modification
 in the Dress-Up toolbar.
The Tools Palette toolbar appears.
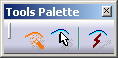
Check that Automatic Detection
") is selected in the Tools Palette toolbar and click
the geometry
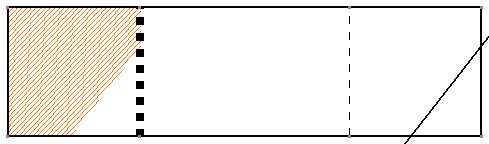
as shown below.
is selected in the Tools Palette toolbar and click
the geometry
as shown below.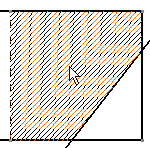
The Tools Palette toolbar disappears.
The area fill is now associative with another set of elements.
For the purpose of this scenario, you will isolate this area fill, then move it.-
Click Area Fill Modification
in the Dress-Up toolbar.The Tools Palette toolbar appears.
Activate the Create Datum
") icon and click the area
fill.
icon and click the area
fill.You can now drag the area fill
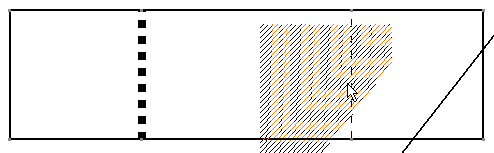
then drop it on the left corner of the geometry.
About Area Fill Modification
For more information about area fills and the Tools Palette toolbar, read More About Area Fill Creation, in the Creating Area Fill user task.
You can also select the Isolate and Area Fill modification options from the Contextual Menu.
![]()