 |
This reference describes what
you should know to create assembly constraints:
|
| |
Rules
|
 |
Setting constraints is rather
an easy task. However, you should keep in mind the following::
- You can apply constraints only between the child components of the
active component.
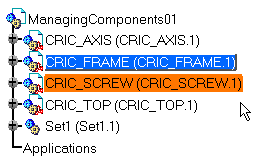
Do not mistake the active component for the selected component:
- The active component is blue framed (default color) and underlined.
It is activated by double-clicking.
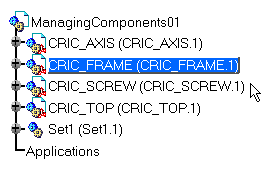
- The selected component is orange framed (default color). It is
selected by clicking.
- You cannot define constraints between two geometrical elements
belonging to the same component.
- You cannot apply a constraint between two components belonging to the
same subassembly if this subassembly is not the active component.
- If you modified any geometrical elements of a constraint, take care
if it already exists to solve the constraint, example, the axis of the
spot facing in a counterbored hole disappears when the hole type is
changed.
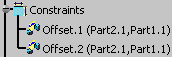
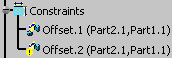
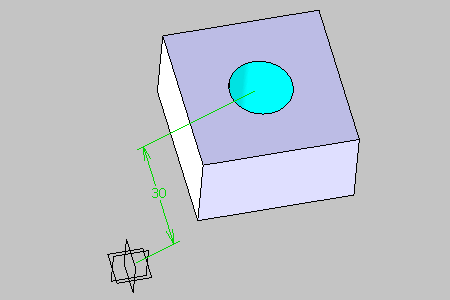
- There are two offset constraints:
- Offset.1 between the Part2 and the axis of the hole (sky blue) in
Part1.
- Offset.2 between the Part2 and the axis of the spot facing of the
hole (orange) in Part1.
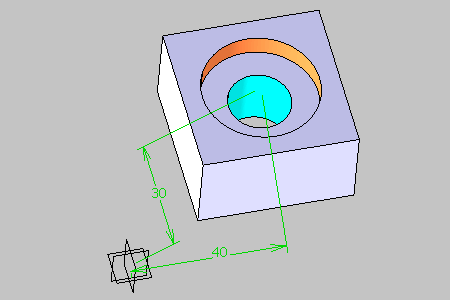
- When changing the hole type from Counterbored to Simple, the spot
facing is deleted as its axis.
- The Offset.2 constraint is disconnected:
- The following example illustrates what you are allowed to do:
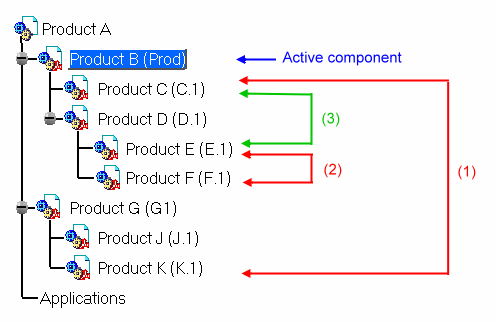
- (1) The constraint cannot be
applied because Product K does not belong to the active
component Product B. To define this constraint, Product
A must be made active.
- (2) The constraint cannot be
applied because Product E and Product F both
belong to a component other than the active component Product B.
To define this constraint, Product D must be made active.
- (3) The constraint can be
applied since Product C belongs to the active component
Product B and also Product E is contained within
Product D which is contained within the active component
Product B.
- When you set a constraint, there are no rules to define the fixed and
the movable component during the selection. If you want to fix a
component, use the Fix command. See
Fixing a Component.
|
| |
Symbols
|
| |
The following table lists the
symbols used to represent the constraints you can set between your
components: |
| |
| Constraints |
Symbol used in the
geometry area |
Symbol displayed in
the specification tree |
| Coincidence |
|
 |
Contact
(point) |
|
 |
Contact
(line) |
|
 |
| Contact(annular) |
|
|
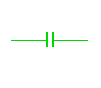
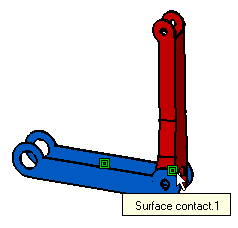
| Contact(surface) |
|
 |
| Offset |
 |
 |
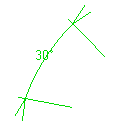
Angle
Planar Angle |
 |
 |
| Parallelism |
 |
 |
| Perpendicularity |
 |
 |
| Fix |
 |
 |
|
| |
Note also that deactivated
constraints are preceded by the symbol
( ) in the specification tree. |
| |
Tip
|
| |
The name
of a constraint displays when passing the mouse over that constraint. |
| |
 |
| |
Geometry
|
| |
To set constraints it is possible
to select the geometry (plane, line or point) resulting from intersections,
projections or offsets from the specification tree. For more about these
operations, please refer to Generative Shape Design User's Guide. |
| |
Customizing Constraints
|
| |
The application lets you
customize the creation and the
display of constraints. For more information, please refer to
Customizing Assembly Constraint and Customizing Constraint
Appearance. |
| |
Selection
|
| |
To facilitate alternative
selections when the geometry to be constrained is not directly accessible,
the Other Selection... contextual command allows to you select
the desired geometry. |
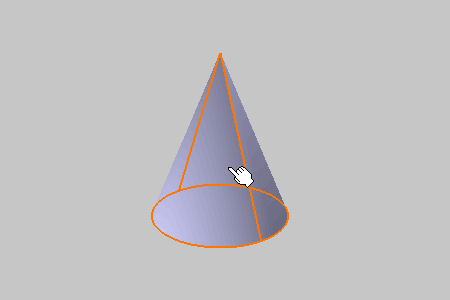
| |
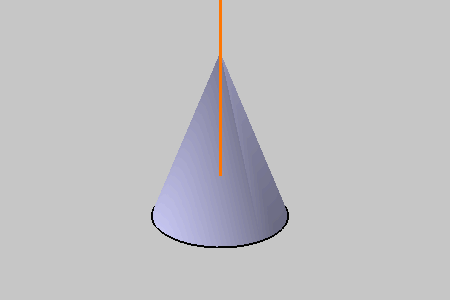
In a cone example, its face is
selected when you select the Other Selection... contextual
command. |
| |
 |
| |
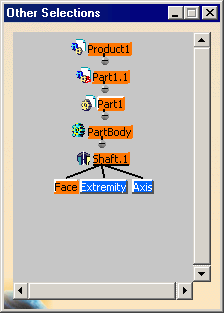
The Other Selections
dialog box appears, the Face geometry element is selected. |
| |
 |
| |
In the the dialog box you can
directly select the Extremity or the Axis geometry
elements of the cone and show this selection in the geometry window as in
the following images: |
| |
 |
| |
 |
| |
V4 Interoperability
|
| |
You can set a constraint on a
SOLIDE (solid exact) CATIA V4 feature, but you cannot set set a constraint
on a SOLIDM (solid mockup) CATIA V4. |