This task shows you how to translate one, or more, point, line or surface element.
Open the Translate1.CATPart document.
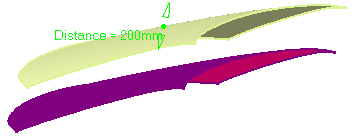
Direction, distance
-
Select a line to take its orientation as the translation direction or a plane to take its normal as the translation direction.
You can also specify the direction by means of X, Y, Z vector components by using the contextual menu on the Direction field. -
Specify the translation Distance by entering a value or using the spinners.
Point to Point
-
Select the Start point.
-
Select the End point.
Coordinates
-
Define the X, Y, and Z coordinates.
In the example besides, we chose 50mm as X, 0mm as Y, and -100 as Z. -
When the command is launched at creation, the initial value in the Axis System field is the current local axis system. If no local axis system is current, the field is set to Default.
Whenever you select a local axis system, the translated element's coordinates are changed with respect to the selected axis system so that the location of the translated element is not changed. This is not the case with coordinates valuated by formulas: if you select an axis system, the defined formula remains unchanged.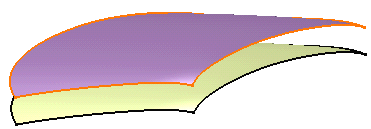
-
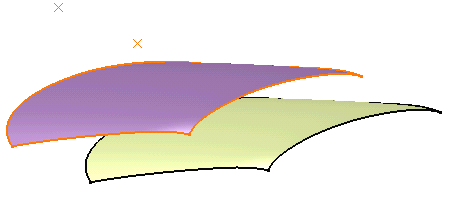
Click OK to create the translated element.
The element (identified as Translate.xxx) is added to the specification tree.
The original element is unchanged.
- You can select an axis system as the Element to be translated, providing it was previously created.
The element is identified as Translate.xxx in the specification tree, however the associated icon is the axis system's.
- Click Hide/Show initial element to hide or show the original element for the translation.
- Choose whether you want the result of the transformation to be a surface or a volume by switching to either Surface or Volume option.
This capability is only available with the Generative Shape Optimizer product.
This switch only concerns volumes since the transformation of a surface can only be a surface. Thus in case of multi-selection of volumes and surfaces, the switch only affect volumes.
Note:
- Replacing an input element does not change the result type,
- The switch between surface and volume is grayed out when editing the feature.
To have further information about volumes, refer to the corresponding chapter.- Check Repeat object after OK to create several translated surfaces, each separated from the initial surface by a multiple of the Distance value.
Simply indicate in the Object Repetition dialog box the number of instances that should be created and click OK.
- If you select a solid as the input element, the result will either be a surface or a volume.
- The selection of the feature prevails over the selection of the sub-element.
To select a sub-element, you need to apply the ''Geometrical Element'' filter in the User Selection Filter toolbar.
For further information, refer to the Selecting using a Filter chapter in the CATIA Infrastructure User's Guide.
- You can edit the translated element's parameters. Refer to Editing Parameters to find out how to display these parameters in the 3D geometry.
- The following capabilities are available: Stacking Commands and Selecting Using Multi-Output.
![]()