|
The multi-view mode is a capability
allowing you to customize your multi-view configuration within a 3D viewer.
The manual configuration is defined in the Manual tab of the
Views and Layout dialog box. |
| |
For detailed information on the other tabs
provided in this dialog box, refer to Creating a
Multi-View: Automatic Configuration and
Creating a Multi-View: Standard Views' Customization. |
| |
Before you start
In order to take full advantage of this scenario, you need to be
familiar with the basic vocabulary:
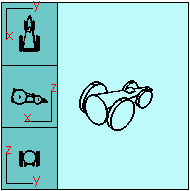
- "Viewer" is the screen area in which 3D objects are drawn
- "View" is a part of the viewer. Usually, the viewer has one single
view but it can also be divided into 4 parts representing a different
view each. When a viewer is split into several views, it is identified as
a "multi-view" viewer
- "Viewpoint" is the set of parameters required for defining a 3D view
volume, i.e. the eye of the user, the view direction, the focus point and
the axis system defining the position of the user. It can be defined as
the position in model coordinates at which the eye is looking
- "Layout" defines how the viewer is divided into different areas (=
views) and how these areas are located
- "Configuration" is a layout made up of views, each of them being
defined with a viewpoint.
Bear in mind that the multi-view configuration remains active throughout
the whole Version 5 session but it is not saved when selecting File >
Save As. For instance, if you apply a multi-view configuration then
save and close your document before reopening it, this document is
displayed in a single-view configuration using the last active view before
the save.
However, the configuration is
stored in the CATSettings directory and therefore, you can reuse it from
one session to another by clicking Create Multi-View
 in the View toolbar. If no customization has been defined, the
default configuration is applied.
in the View toolbar. If no customization has been defined, the
default configuration is applied. |
 |
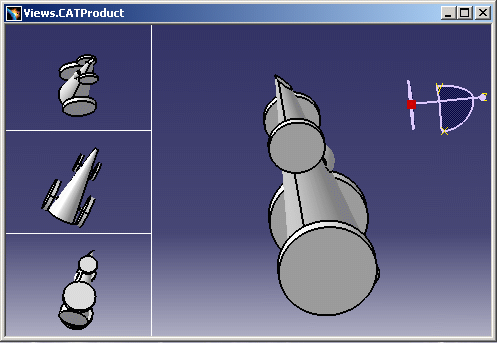
Open the
Views.CATProduct document. |

|
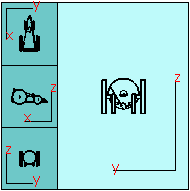
-
Select View > Navigation Mode > Multi-View Customization
to open the Views and Layout dialog box then select the
Manual tab:
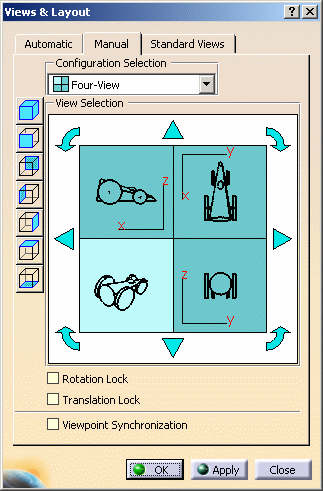 |
This dialog box is made up of five areas:
- Configuration Selection lets you select a predefined
multi-view configuration from the list
- View Selection lets you set the current view as well as the
orientation of the selected viewpoint
- Viewpoint Manipulation lets you manipulate the viewpoint
using the following options:
- Rotation Lock: locks the viewpoint rotation
- Translation Lock: locks the viewpoint
translation
- Viewpoint Synchronization: imposes a
synchronization between the views when a viewpoint
transformation (rotation, translation or zoom) is made in one
of them. Note that you cannot activate both Translation
Lock and Viewpoint Synchronization
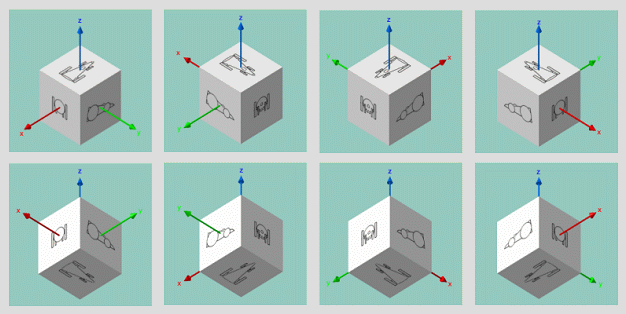
- Standard Views icons let you set the desired
standard view as
the current view. The standard views displayed in the left part
of the dialog box are identical to the one of the Quick View
toolbar
- Confirmation: lets you validate or cancel the configuration.
|
-
In the Configuration Selection area, select the desired
configuration from the list of predefined configuration.
|
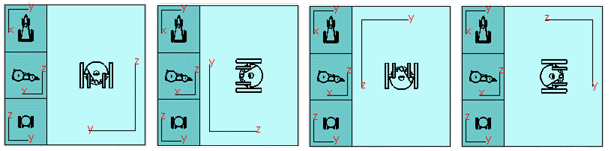
As soon as a configuration is selected, the four
views displayed in the View Selection area are automatically
updated accordingly.
Each view composing the configuration represents a standard view
and the current view is identified by a lighter color.
You can choose among the following configurations: |
|
|
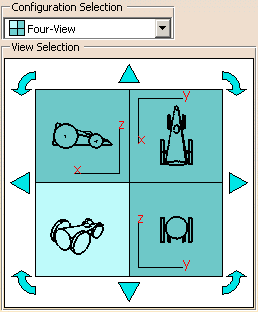 |
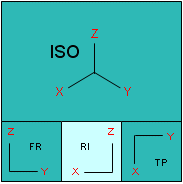
| In this configuration, the viewer is
divided into four equal views, each of them being identified as
follows: |
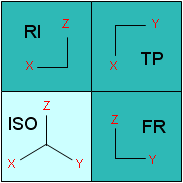 |
RI = Right View TP = Top View
FR = Front View
ISO = Isometric View
|
|
|
|
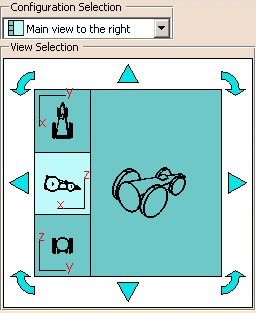 |
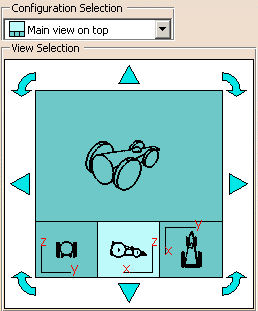
| In this configuration, the viewer is
divided into two parts. The main view is displayed to the right and
three auxiliary views are displayed to the left: |
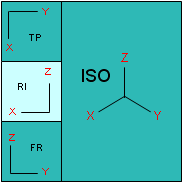 |
RI = Right View TP = Top View
FR = Front View
ISO = Isometric View |
|
|
|
 |
| In this configuration, the viewer is
divided into two parts. The main view is displayed on top and three
auxiliary views are displayed at the bottom: |
 |
RI = Right View TP = Top View
FR = Front View
ISO = Isometric View |
|
- Two-view horizontal tiling
|
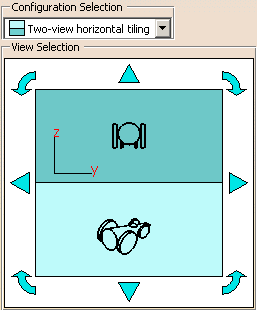 |
| In this configuration, the viewer is
divided into two parts. The views are organized horizontally with
respect to each other. The first view is displayed on top and the
second is displayed at the bottom: |
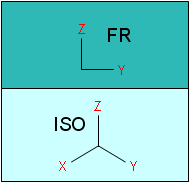 |
FR = Front View ISO = Isometric View |
|
|
|
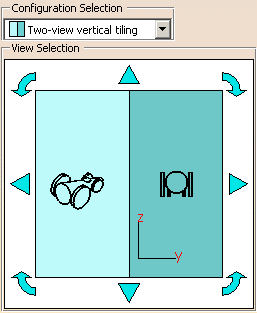 |
| In this configuration, the viewer is
divided into two parts. The views are organized vertically with
respect to each other and are displayed in the right and left part
of the screen, respectively: |
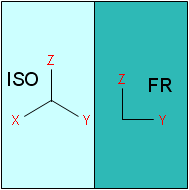 |
FR = Front View ISO = Isometric View |
|
| In our example, we select Main
view to the right. |
-
Click Apply to apply the selected
configuration to the current 3D viewer and keep the Views and Layout
dialog box displayed:
 |
As soon as you apply a configuration to the current
viewer, Create Multi-View
in the View toolbar changes to
 to indicate that
the multi-view mode is now active. to indicate that
the multi-view mode is now active. |
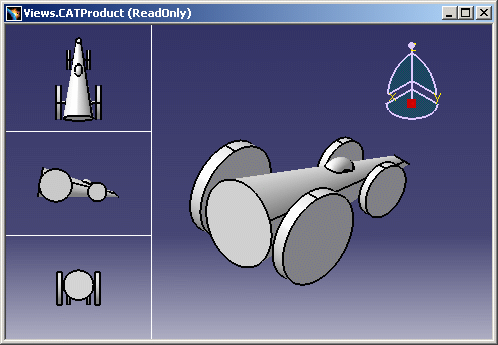
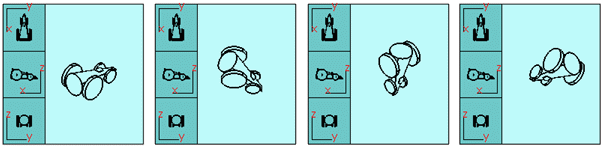
| When you manipulate a viewpoint in one of the four
views, the other three viewpoints are not modified and you can
manipulate them independently: |
 |
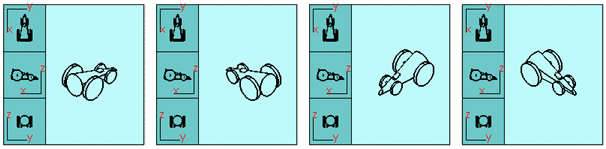
-
To set a view as the current view, click it in the View
Selection area. In the example below, the isometric view has been set as
the current view:
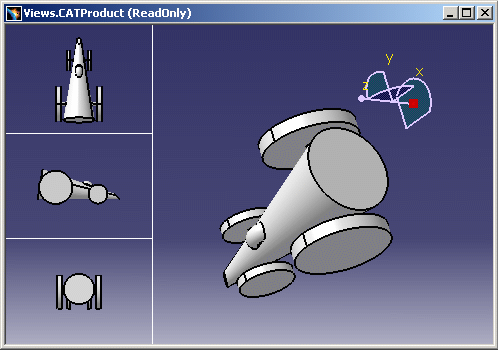
-
Select one of the standard views displayed to the left to
apply it to the current view: for instance, click Back View
 to set the Back View as the current view as shown below:
 |
| When you click Apply,
the selected standard view is applied to the corresponding view you
in the viewer. |
 |
Another way to apply a standard view in
the viewer is to select in the viewer the view you want to modify
(in that case, the compass is displayed in the top-right corner of
the selected view) then select a standard view from the Quick
View toolbar.
However, do not forget that if you do not also change the
corresponding view in the View Selection area, the modification you
made in the viewer is not kept when clicking Apply. |
The View Selection area
also contains four rotation arrows (such as
 ) enabling you to change
the orientation of the current base view: one click on an arrow
rotates the base view by 90 degrees in the arrow's direction. ) enabling you to change
the orientation of the current base view: one click on an arrow
rotates the base view by 90 degrees in the arrow's direction. |
-
Click the arrow
repeatedly and check the result in the View Selection area. Below is an
example with starting position displayed to the left:
 |
| Note that if the current view is an isometric view,
the rotation step will be 60 degrees and not 90 degrees: |
 |
You also have the ability to use the four view
selectors (such as  ) to
change the view direction by predetermined increments. ) to
change the view direction by predetermined increments. |
-
Click the arrow
repeatedly and check the result in the View Selection area. Below is an
example with Back View as the current view and the starting
position displayed to the left:
-
Activate the lock options (+ click Apply) if
needed:
|
|
 |
Rotation Lock or
Translation Lock and Viewpoint Synchronization
cannot be activated simultaneously. Activating Rotation Lock
or Translation Lock automatically deactivates
Viewpoint Synchronization, and inversely. |
-
Select the Viewpoint Synchronization check box
then click Apply if you want the other three viewpoints to be
modified simultaneously when you manipulate one of them.
|
In the example below, the main viewpoint has been
modified and the three others have been updated accordingly: |
 |
-
When satisfied with your configuration, click OK
(or Apply then OK) to validate and close the
Views and Layout dialog box.
|
| |
When you reselect View > Navigation Mode >
Multi-View Customization, the Views and Layout dialog
box the last used tab is activated with the last applied configuration.
|
| |
To go back to the standard viewer, click Create Multi-View
in the View
toolbar.
|
|
 |