-
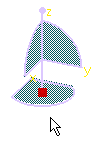
Point to the compass manipulation handle (the red square located on the privileged plane at the base of the compass).
The cursor shape changes to: 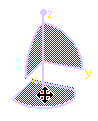
-
Drag the compass.
As you drag the compass, the cursor shape changes to: ") ,
and the compass now looks like this:
,
and the compass now looks like this: ")
The axis is the Z axis by default. The square base represents the current privileged plane. The privileged plane is realigned with one of the planes on the object and is snapped to the object.
-
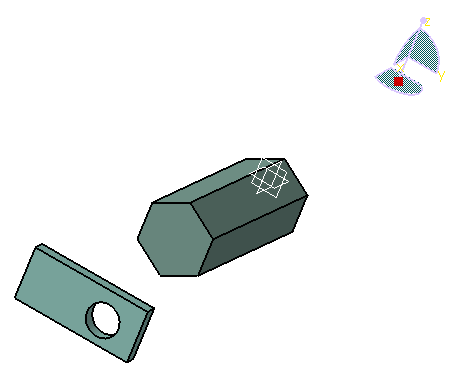
Release the mouse button to drop the compass onto the object.
Dropping the compass onto the object snaps the compass to the object and selects it. The compass changes color; the default color is light green. You set this color using the Handles list in Tools > Options > General > Display > Visualization. In our example, drag and drop the compass onto the part. One possible result could look like this:
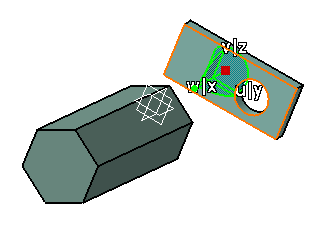
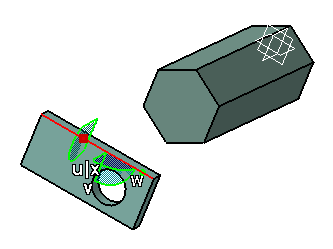
In our example, the compass could also be oriented differently, depending on where you drop the compass. Note that the X axis is now w|x, the Y axis u|y, and the Z axis v|z; an extra letter is added is this way to indicate that the axis in question is no longer oriented the same way as the absolute reference axis in the bottom right corner. When the compass is snapped onto an object, the letters identifying the compass axes are displayed differently from the usual color and size: they are white (with a dark surround) and their size is bigger for greater readibility whatever the background color.
This enables you to see more clearly the compass orientation, which is especially useful when the compass is snapped onto objects with many different colors or with many small details.Once the compass is snapped to the object, you can begin to manipulate the object. You do so by simply dragging certain parts of the compass, exactly as you do to manipulate viewpoints as explained in Manipulating Viewpoints Using the Mouse and Compass. This time, the object (and not the viewpoints) will be manipulated.
-
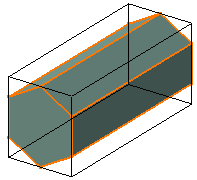
In our example, drag the X axis of the compass to move the part to the other side of the block, then drop to reposition the part.
While dragging, the compass and a representation of the part are moved. The distance from the origin of the axis (the red square or compass manipulation handle located on the compass base) is displayed in real time as you move the object. The value displayed will be preceded by the "-" sign (negative) if you move the object in the direction opposite to the compass orientation.

The translation increments are preset: you cannot reset the translation increments displayed. When you drop the compass, the pad is now positioned approximately like this: 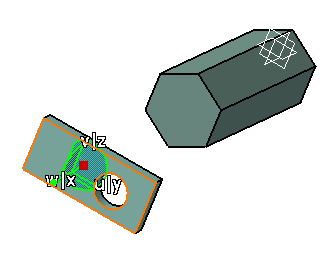
You can also: - rotate the object in a plane (by dragging one of the compass arcs): the degree of rotation is also displayed in real time
- move the object in a plane (by dragging one of the compass planes): the distance from the origin to the new location (along both axes in the plane) is displayed in real time
- rotate freely about a point on the compass (by dragging the free rotation handle at the top of the compass)
as explained in Manipulating Viewpoints Using the Mouse and Compass.
-
Drag the compass away from the selected object and drop it.
The compass is now disconnected from the object, but maintains its orientation: 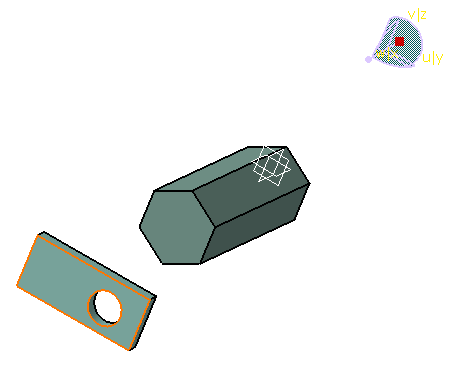
-
To reorient the compass the same way as the absolute reference axis, and restore the compass to its original position in the top right corner of the document, drag and drop the compass onto the absolute reference axis.
More About the Object Manipulation
Multiselection is supported when manipulating objects with the compass. However, note that if you select an object and its container (part or product), then the object might be moved twice the distance of the compass:
- the first move will correspond to the move of the object's container (which implies moving the object as well)
- the second move will correspond to the move of the object itself.
This behavior depends on the positioning constraints between the object
and its container: in standard assemblies, the part remains linked to its
container, therefore there is no double move whereas in flexible assemblies
and in processes, the object moves twice the distance of the compass.
![]()