Note that this scenario
takes the Generative Shape Design workbench as an example but
the look and number of icons available in the User Selection Filter
toolbar varies according to the workbench in which you are working.
For detailed information on icons dedicated to a specific workbench, refer to the documentation of
interest.
- A Version 5 - P2 Generative Shape Design configuration is required to follow this scenario.
- A .CATProduct containing a .CATPart must be open and one or more
features created.
You can also open the SelectionFilter.CATProduct document - Activate the User Selection Filter toolbar by selecting View > Toolbars > User Selection Filter.

The toolbar is divided into several sections:
Filter type
-
Point Filter
 to filter points
 -
Curve Filter
 to filter curves
 -
Surface Filter
 to filter surfaces
 -
Volume Filter
 to filter volumes.
Filter mode
-
Feature Element Filter
 selects the whole feature whether it is a sketch, product, pad, join,
etc.
 -
Geometrical Element Filter
 enables to sub-elements of a feature such as faces, edges or vertices.
Work on Support selection state

This command is used in conjunction with the Work on Support command and lets you select sub-elements from the grid. Refer to "Working with a 3D Support" in the Version 5 - Generative Shape Design User's Guide for detailed information. This command is only available with the Automotive Body in White Templates product.
Quick Select

This command lets you perform a quick selection of geometry. Refer to "Quick Selection of Geometry" in the Version 5 - Generative Shape Design User's Guide for detailed information. This command is only available with the Generative Shape Design 2 product.
Intersection edges activation

This command
enables to create an intersection edge: the selection of the edge is
propagated to the whole intersection. It ensures a better stability as
the intersection edge is automatically recomputed when the shape of the
feature on which it lies is modified.
The intersection edge can only be applied on a modification feature.
Refer to "Creating Edge Fillets" in the Version 5 -
Generative Shape Design User's Guide for detailed information.
This command is only available with the Generative Shape Design 2 or Part
Design products.
Tangent Intersection Edges activation

Reset Selection Filters
Lets you deactivate the filter icons that have been previously activated in the User Selection Filter toolbar (i.e. icons listed in the Filter type section detailed above, other icons are not impacted). To use this command, you can choose between the following three methods:
- type
c:Reset Selection Filtersin the power input field: all the icons are deactivated - select View > Commands List then select Reset Selection Filters from the list before clicking OK to validate: this deactivates all the icons in the toolbar
- select Tools > Customize, access the Commands tab, select All Commands in the Categories list then drag and drop the Reset Selection Filters command onto the User Selection Filter toolbar (or any other toolbar):
You can then check Reset Selection Filters when needed to deactivate the toolbar icons.
-
Click Feature Element Filter
 as shown:
By default, all the icons are deactivated which means that no filter is applied but you can restrict the selection to specific element types by clicking the corresponding icons.
For instance, if you want to select only points and surfaces, you need to activate the Point Filter and Surface Filter icons as shown below:

- If you deselect a type, it cannot be selected in the geometry anymore unless all other types are deselected
- If you deselect a mode, it cannot be selected anymore for each active type unless other modes are deselected
- It is not possible to activate both filter modes simultaneously (it does not make sense anyway). Only two states are available: either Feature Element Filter or Geometrical Element Filter is activated or both modes are deactivated.
Depending on the filter you select, the following cursors are used:
- When the selection is forbidden, the shape
 is used and this,
whatever the filter you select
 - When a filter other than Geometrical Element Filter
(e.g. Feature Element Filter, Point Filter,
etc.) is activated , the cursor shape is
 when pointing at an
element and the hourglass is displayed after selecting the
element
 - When Geometrical Element Filter is activated, the
cursor shape is
 when
pointing at an element and the hourglass is also displayed after
selecting the element.
-
Click Extrude
 in the Surfaces toolbar.
The Extruded Surface Definition dialog box appears: 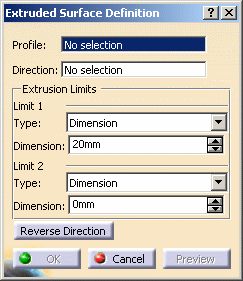
-
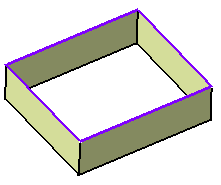
Select "Sketch 1" as the profile and xy plane as the direction.
-
Click OK to create the surface.
-
Click Offset
 in the Surfaces toolbar.
The Offset Surface Definition dialog box appears: 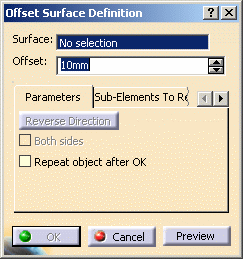
-
Click Geometrical Element Filter
 :
as soon as you click, the Feature Element Filter mode is
deactivated in the User Selection Filter toolbar:
-
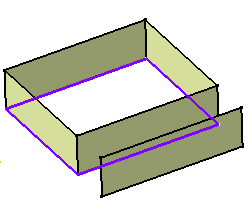
Select any face of the extruded surface.
-
Enter 20mm as the offset value.
-
Click OK to create the surface.
-
Double-click the extruded surface.
The Extruded Surface Definition dialog box is displayed.

The Feature Element Filter mode is still deactivated. -
Select any edge of Sketch 2.
The Update Error dialog box appears: an element of the part is no longer recognised and needs to be updated.

-
Click OK.
-
Click OK in the Extruded Surface Definition dialog box to create the surface.
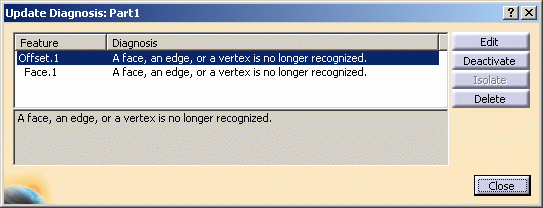
The Update Diagnosis: Part1 dialog box appears.
-
Click Edit.
The Offset Surface Definition dialog box is displayed.
-
Select the extruded surface of Sketch 2.
-
Click OK in the Offset Surface Definition dialog box.
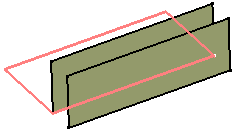
The offset surface is created for Sketch 2.
![]()
