This task explains how to unload the CATIA Version 5 code from scratch on a single workstation running UNIX.
The concepts, procedures and look and feel of the installation procedure for Windows have been carried over to the UNIX environment in order to provide a common Version 5 installation interface for all supported operating systems.
This installation procedure steps you through a CATIA installation, for illustration purposes. The installation steps are the same for installing ENOVIA DMU Navigator and DELMIA configurations.
Support for 64-bit Architecture Capabilities for AIX 5L
There are both 32-bit code installation CD-ROMs which you can install on normal AIX, and 64-bit code installation CD-ROMs which you can install only on AIX 5L.
This means that on AIX, only 32-bit installations are possible, whereas on AIX 5L both 32-bit and 64-bit installations are possible.
How To Display the Target ID of Your Computer Before Ordering Your Products
Before ordering a nodelock license, you need to obtain the target ID of your computer. The target id must accompany the license order. The Certificat.lic file is generated using the target ID of your computer.
Before installing the software, the application has no way of determining the target ID. In this case, if you have installed IBM License Use Management Runtime (LUM), you can use the tools provided by LUM to obtain the target ID.
For example, you can run the following command to obtain the "PREFERRED LUM Target ID":
located in:
/usr/opt/ifor/ls/os/aix/lum (AIX)

     /opt/lum/ls/os/hpux/bin (HP-UX)

     /opt/lum/ls/os/solaris/bin (Solaris)
How To Display the Target ID of Your Computer Once You Have Received the CD-ROM
There are two executable programs provided on the CD-ROM:
- i4target.exe (Intel platform)
- i4tgtid.exe (Intel platform).
The latest versions of each can be found at:
http://www.software.ibm.com/is/lum/lumdownl.html
If you double-click on i4tgtid.exe, a message box displaying the
win32mac target id of the machine will be presented. The target id is a
number represented in hexadecimal notation. Make sure that the string
"win32mac" is also displayed alongside with the target ID.
Depending on the network configuration of your machine, the win32mac target
id might not be available. This is when i4target.exe in command-line mode
is needed:
- Open a Command Prompt window and set the directory to your CD-ROM drive.
- Run "i4target -z".
This will list network adapters that can be used for the target ID. - Run "i4target -d xxx"
where "xxx" is one the network adapters listed in step 2. - Run i4target or i4tgtid.
You should obtain the same target ID as in step 2.
NOTE: Do not repeat step 2 once you have a valid win32mac target ID.
The Target ID of your computer is also displayed:
- in the "Import Certificate" dialog box when installing the software
- at the top of the License Manager dialog box, access via the Tools->Options... command when running the application
- by the Nodelock Management tool.
Officially Supported Tools for Obtaining Target IDs
On AIX, the CATNodelockMgt tool displays a target ID
different from what is displayed by the uname -m AIX command.
This command is not the correct way for getting the AIX target ID. Given
that it has never been documented, it is not supported. The correct ways
are listed above.
Note that, by chance, the results obtained by running both the
uname -m and i4target -O command were identical until
V5R10 or LUM 4.6.5. This is no longer the case on subsequent levels because
IBM LUM changed the algorithm which is used to compute the AIX target ID.
However, even if V5R11 displays an AIX target ID different from the one
displayed by V5R10, for backward compatibility reasons V5R11 and above
continue to consider as valid the licenses generated with a target ID equal
to that obtained by running the command uname -m. This
compatibility will be removed in a future release.
Additional information about obtaining target IDs can be found in the
description of the i4target command in the manual Using
License Use Management Runtime - Version 4.6.7.
Phase 1: Mount and Declare the CD-ROM
Note: before proceeding, you must first must create a filesystem into which the ENOVIA V5 VPM product files will be unloaded (the filesystem must be dedicated to ENOVIA V5).
- Logon as root.
- Enter the command:
df -k
in order to verify that you have enough free disk space in the file system in which you intend to unload the code.
- Insert the CD-ROM for your UNIX operating system into the drive.
If the software is on a suite of CD-ROMs, insert the first CD-ROM.
If you are running Solaris, inserting the CD-ROM declares and mounts the CD-ROM automatically (unless you disabled this feature).
If you are running AIX or HP-UX, check whether the CD-ROM drive is declared.
On AIX, run the command:
lsdev -C -c cdromIf a line like this is not displayed:
cd0 Available 00-01-00-30-CD-ROM Driveyou need to add the CD-ROM drive by using the smit AIX command, for example.
On HP-UX, run the command:
cat /etc/fstabIf a line like this is not displayed:
/dev/dsk/c201d1s0 /CDROM cdfs ro 0 0 0you need to add the CD-ROM drive, by using the sam HP-UX command, for example.
If you are running Solaris, inserting the CD-ROM declares and mounts the CD-ROM automatically (unless you disabled this feature).
- If you are running AIX and HP-UX, check whether the CD-ROM drive is
mounted.
If the CD-ROM drive is not mounted, you will have to mount it before proceeding. You can determine if the drive has already been mounted by typing the command:
mountIn the output lines, you should see a list of mounted file systems. The CD-ROM drive has already been mounted on your local system if a line similar to one of the following lines appears in the list:
/dev/cd0 cdrom cdfrs "date" ro(AIX)cdrom on device readonly on "date"(HP-UX)
where "date" is the current date.
- If you are running AIX and HP-UX, mount the CD-ROM drive, if
necessary, by typing the commands:
mount -v cdrfs -r /dev/cd0 /cdromIf you are running HP-UX, mount the CD-ROM drive like this:
mount /cdromYou are now ready to begin the installation.
- On all UNIX platforms, change directory to the CD-ROM mount point.
Phase 2: Unload the Files From the CD-ROM
- Check that the DISPLAY variable is exported appropriately before
continuing, then enter the command:
to start the installation procedure, or:
./start -sif you want to start the installation procedure without the accompanying music.
The Version 5 setup program will be run. The setup program checks you have the correct prerequisites. Then, the Welcome dialog box greets you. The setup program invokes a full self-explanatory graphical interface which walks you through the installation.
The Welcome dialog box is then displayed on a background window. Note that the screenshots illustrating the installation procedure were taken without the background window:
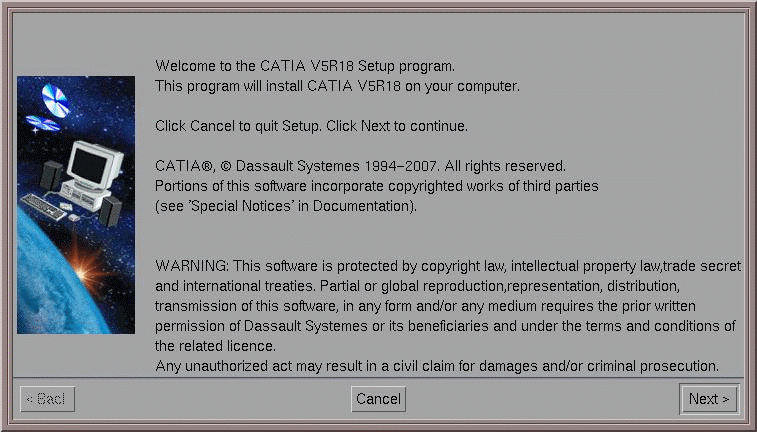
- Click the Next button to move to the next step.
The License dialog box appears, asking you if you want to enter a nodelock license key for the computer on which you are installing the software.
Note that the target id of the computer on which you are performing the installation is displayed after the dialog box title.
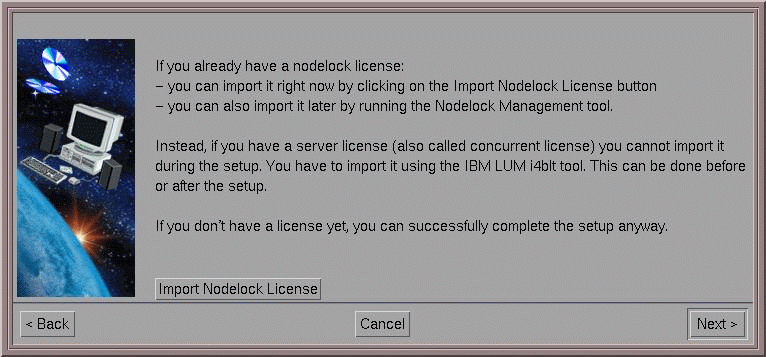
If you want to enter a nodelock license, click the Import Certificate button to access the Import Certificate dialog box.
This dialog box lets you import the license certificate (that is, if you received your license certificate by electronic mail, and provided you detached it and stored it on your disk).
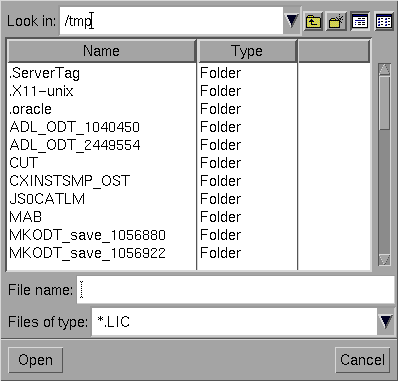
Explore your environment containing the license certificate (ending with the suffix ".LIC"), then click OK.
This creates a nodelock file on your computer, and stores your license by default in the nodelock file on all UNIX platforms in:
/var/ifor/nodelock (AIX)

       /opt/lum/ls/conf/nodelock (HP-UX, Solaris)
If you already installed LUM elsewhere, the nodelock file will be updated in the correct LUM environment.
If you decide to skip the licensing step, or if you have a license enrollment certificate in paper format only (and not in electronic format), you can enroll your licenses later, after the installation has been completed. For more information, refer to Enrolling Nodelock Licenses After the Installation.
- Click the Next button to move to the next step.
The Choose Destination Location dialog box appears. A default destination folder is already proposed:
/usr/DassaultSystemes/B18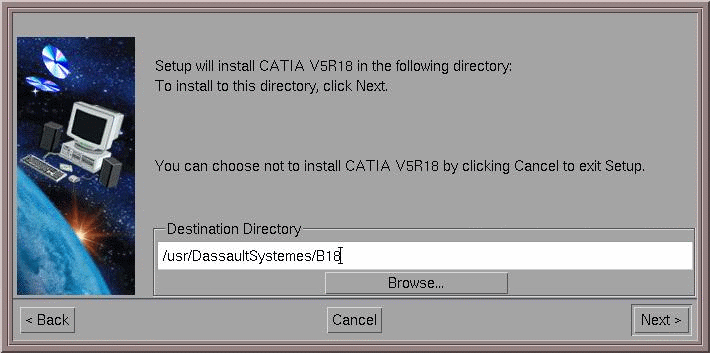
- If the default destination directory is suitable, click the Next
button to move to the next step.
Click Yes if prompted to create the directory if it does not exist. Or, click the Browse... button and navigate to select another folder and click OK.
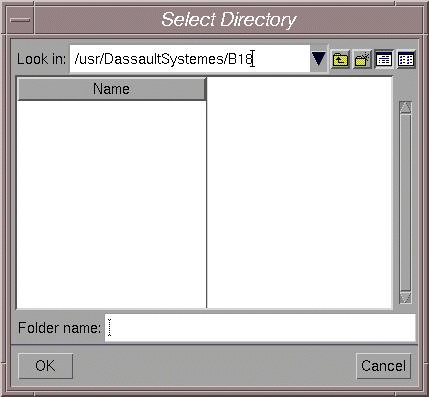
The folder you choose must be empty. You can also specify a new folder: the folder will be created after confirmation.
- Click the Next button to move to the next step.
The Choose Environment Location dialog box appears:
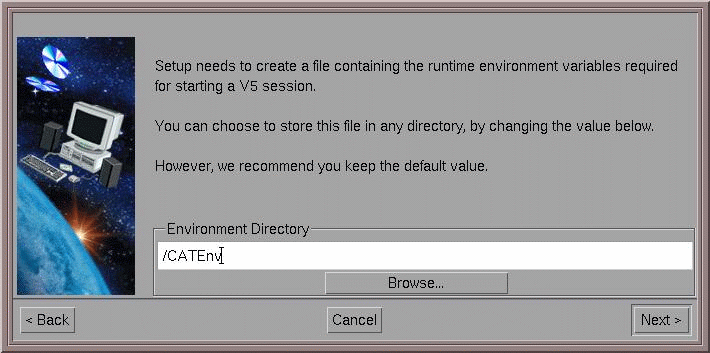
A default destination folder is already proposed:
/CATEnv - If the default directory is suitable, click the Next button to move
to the next step, or click the Browse... button and navigate to select
another folder and click OK.
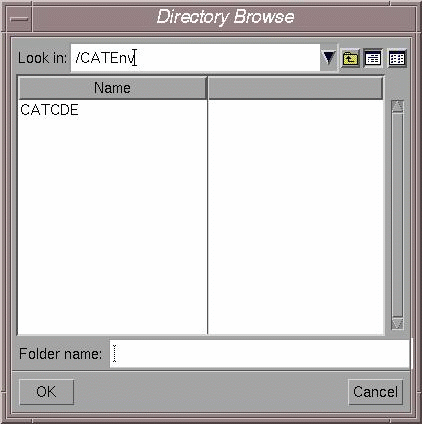
The directory you choose must be empty. You can also specify a new folder: the directory will be created after confirmation.
For more about environment files, refer to About the Environment Created on Your Workstation on UNIX.
- Click the Next button to move to the next step.
The Setup Type dialog box appears:
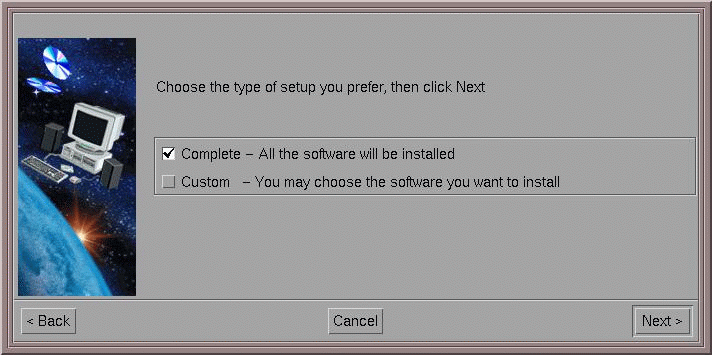
This dialog box lets you specify whether you want to install all of the software on the CD-ROM, or select the configurations and/or products to be installed:
- Complete: specifies you want to install all the software, and moves on to the next installation step (installation of online documentation files) when you click Next
- Custom: lets you choose the configurations and/or products to be
installed.
- If you want to choose which configurations and/or products to
install, check the Custom option and click the Next button to move to the
next step.
The Install Language-Specific File and Fonts dialog box appears:
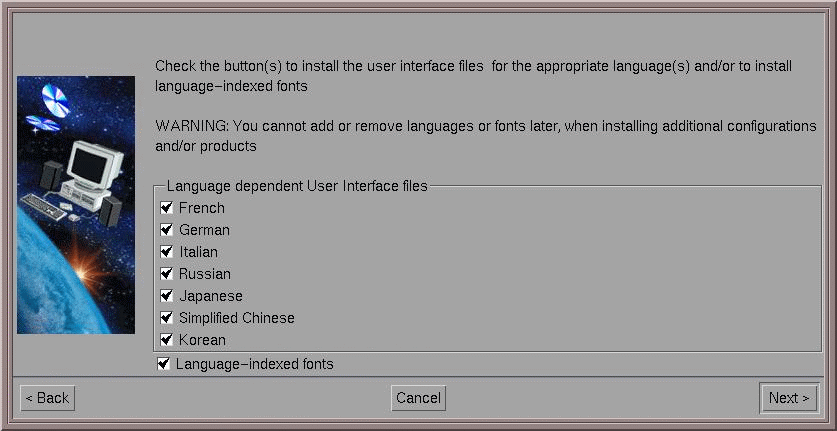
Check the buttons to install the user interface files for the appropriate language(s) and/or to install language-indexed fonts. Uncheck the buttons for the language files you do not want to install. Uncheck the buttons for the language files you do not want to install. This will let you skip the installation of unnecessary language files and fonts and enable you to save disk space.
The following language-indexed fonts are all installed by default:
- Simplified Chinese
- Traditional Chinese
- Japanese
- Korean
- SSS4 (miscellaneous).
If you intend to access data containing language-indexed fonts for a specific language environment, for example, drawing documents, if you have not installed the fonts beforehand, you will obtain a message when opening the document, saying that a font is missing and that it will be replaced by another font.
To avoid this problem, we recommend that you check the option to install the language-indexed fonts.
Note that the choice you make at installation is definitive: you cannot add or remove languages or fonts later when installing additional configurations and/or products.
- Click the Next button to move to the next step.
The Select Software dialog box appears:
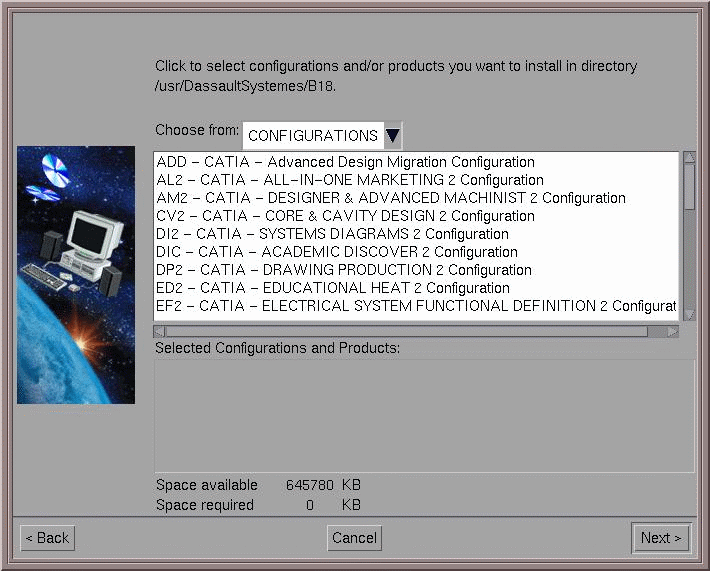
By default, the list of all the configurations on the CD-ROM is displayed.
- Choose whether you want to install configurations and/or products by
using the list box provided.
Depending on what you chose, the list will display the names of all the configurations or products on the CD-ROM.
- Click on the configurations and/or products to select them.
The selected configurations and/or products are listed in the Selected Software list.
In our example, we chose to install the DP2 - CATIA - Drawing Production 2 and MD2 - CATIA - Mechanical Design 2 configurations:
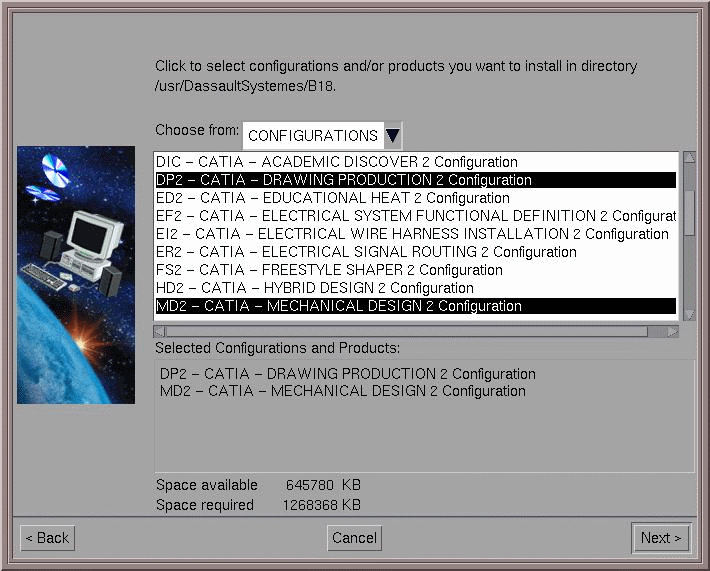
The dialog box specifies the space available for the installation. Clicking on each configuration or product also specifies the amount of space required for installing those configurations or products; the space required is updated progressively as you select from the list.
At this stage, and depending on the space required for the configurations you are installing, you may be informed that there is not enough space in the destination directory. If so, go back and choose another destination directory where this enough space.
There is nothing to prevent you from installing all the configurations and products on the CD-ROM. However, you will be able to use only the software for which you have enrolled licenses, except if you are using a demo mode license as explained in Running in Demo Mode.
- Click the Next button to move to the next step.
Depending on the configurations and/or products you chose, the Install Extra Products dialog box may appear:
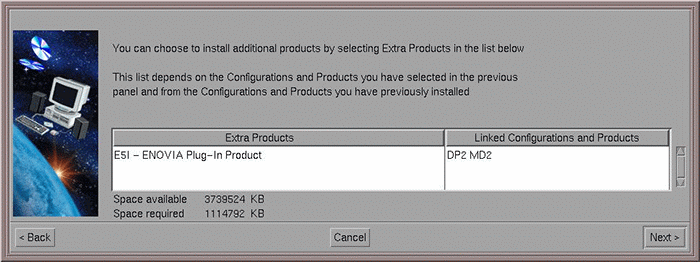
An extra product is a standard product associated with certain configurations and products. You can choose to install or not to install an extra product.
For more information, refer to Extra Products.
- Click the Next button to move to the next step.
If your configuration requires you to configure Orbix, the Choose Orbix Configuration dialog box appears.
Orbix is used for server-client communications. You can accept the default values.
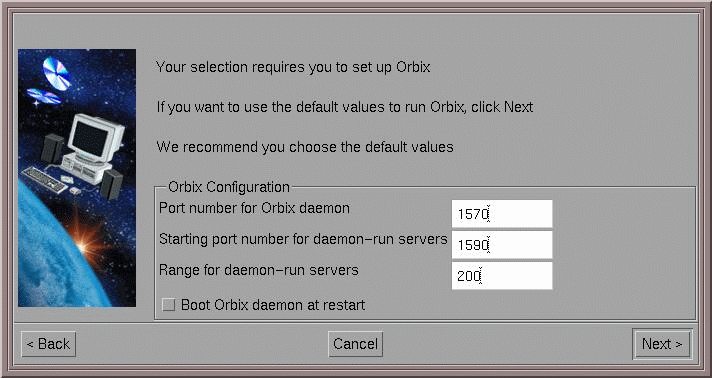
Note that the default values are set to 1570/1590/200. If CATIA or DMU have been installed previously, these values are already taken. If this is the case, use different values than the CATIA and DMU port numbers.
For Port Number for Orbix daemon, the default is 1570. A check is performed to determine if the port if free. If it is not free, the port number proposed is incremented by "1" until a free port is found.
For Starting port number for daemon-run servers, the default is 1590. No check is performed to determine if the port if free. If it is not free, the port number proposed is incremented by "20".
Check the option Boot Orbix daemon at restart if you want the Orbix daemon to be restarted the next time you reboot your workstation.
- Click the Next button to move to the next step.
The Server Timeout Configuration dialog box is displayed if your configuration uses servers run by the server manager:
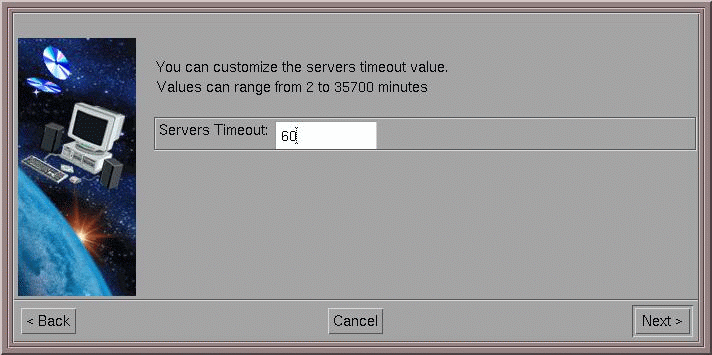
This value corresponds to the duration in ms after which the server exits if it has not been contacted by the associated client.
You enter a value in minutes, then the value is internally transformed into ms and stored in the
CATIAServerManager.impfile. When launching a server under its responsibility, the server manager passes the timeout value to it. The default value is 60 mn. The value can be increased up to 35.700 mn (1 month). The value can be decreased down to 2 mn. The increment is 1 mn.This behavior is valid for all servers run by the server manager: ENOVIA V5 VPM, 3dcom, and the settings server for example. Only servers managed by the server manager take into account the timeout parameter. For example, the workbook server is not impacted by the timeout value.
You can customize this value by editing the SERVER_TIMEOUT parameter in the appropriate file after the installation and setting it to a value different from the default one (1 hour).
Modifying Server Timeouts
This task explains how to modify the timeout of the ENOVIA V5 VPM, 3d com and Settings servers. Note that the Settings server is common to both ENOVIA V5 VPM and 3d com. You can control the timeout settings either globally or individually for each server.
Controlling the Timeout of all Servers
To control the timeout of all servers globally, add the following line:
export SERVER_TIMEOUT=<value in milliseconds>to the beginning of the file:
$install_path/code/command/runServerManagerNote: The default value is 3600000 milliseconds. The maximum value is 2142000000 milliseconds.
All processes started by the server manager then inherit the same environment.
Controlling the Timeout of Servers Individually
You can override the timeout value defined in the
runServerManagerfile to control the timeout of servers individually.To control the Settings server timeout, add the following line:
export SERVER_TIMEOUT=<value in milliseconds>to the beginning of the file:
$install_path/code/command/runServerSettingEnvNote: The maximum value is 2142000000 milliseconds.
To control the ENOVIA V5 VPM server timeout, add the following line:
export SERVER_TIMEOUT=<value in milliseconds>to the beginning of the file:
$install_path/code/command/runServerVPM_CXR1.shNote: The maximum value is 2142000000 milliseconds.
To control the 3d com server timeout, add the following line:
export SERVER_TIMEOUT=<value in milliseconds>to the beginning of the file:
$install_path/code/command/runServerCXEnv.shNote: The maximum value is 2142000000 milliseconds.
- Click the Next button to move to the next step.
The Vault Client Configuration dialog box is displayed.
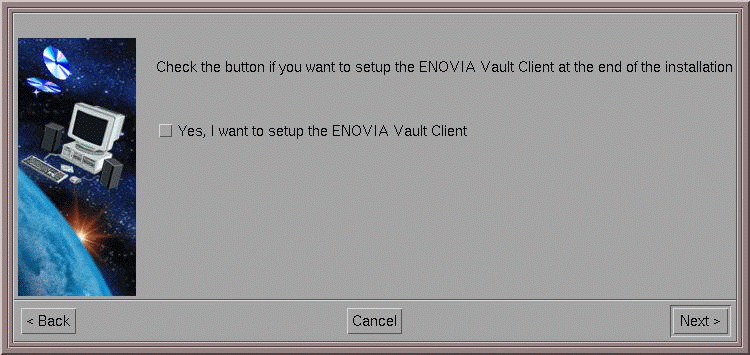
When installing a Version 5 product which contains a potential vault client, this dialog box prompts you to indicate if you want to configure a vault client once the code has been installed. If you choose to configure a vault client, you will be prompted to do so in another dialog box which will be displayed before the enoviadbsetup process is started.
After installation, you can run the VaultClientSetup command in order to catalog another vault server, modify the parameters of an existing one, or remove an existing one. The VaultClientSetupB command provides the same functionalities in batch mode.
Note: you can only install a vault server by using a configuration belonging to the ENOVIA V5 VPM brand.
For more detailed information about the vault, refer to Setting Up Vault Servers and Clients.
- Click the Next button to move to the next step.
If you are installing from scratch, the Choose Communications Ports dialog box is displayed:
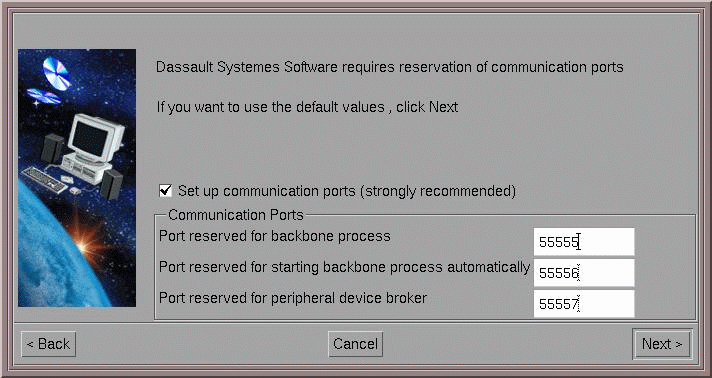
This allows you to set up on your computer:
- a port reserved for the communications backbone process
- a port reserved for starting the communications backbone process automatically
- a port reserved for processing events when using peripheral devices (spaceball, spacemouse, joystick).
By default, the Set up communication ports option is checked because it is strongly recommended.
This installation step adds lines to various system files. For more information about the communications backbone and which files are concerned, refer to Communications Backbone Files.
The installation setup analyses the file in question. If the three lines are present (for example, due to a previous installation), the dialog box will not appear.
Furthermore, if the installation path is different, the installation path referenced in the /etc/inetd.conf file is updated. This means that the most recent installation takes priority.
- Click the Next button to move to the next step.
This displays the Start Copying Files dialog box.
The central area lists the current settings you set in the previous steps. The result looks something like this (depending on which software you chose to install):
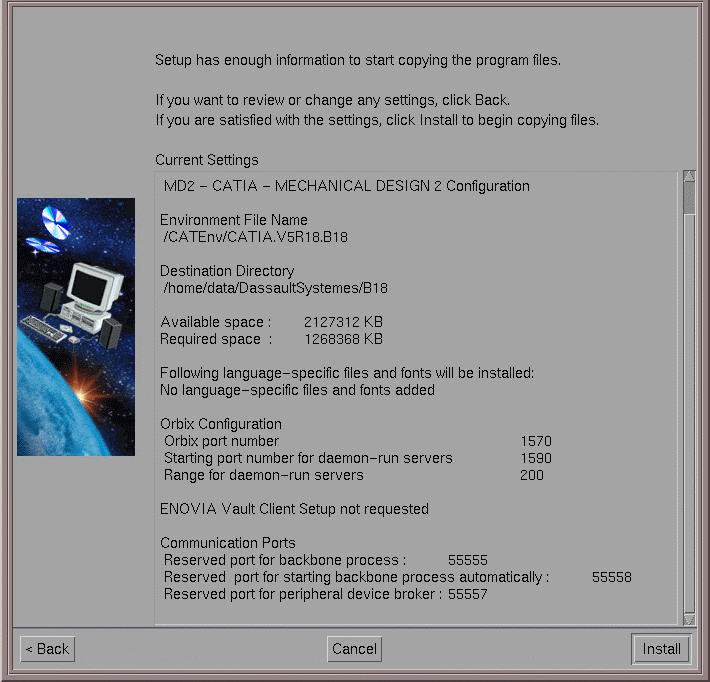
- Click the Install button to start copying the files to your computer.
A progression indicator appears:
 \
\
Depending on your UNIX platform, the software may be provided on a suite of CD-ROMs. Once the software on the first CD-ROM has been installed, you will be prompted to insert the next CD-ROM, and click OK to continue the installation until you have inserted the last CD-ROM.
Note that you must install all the software CD-ROMs: you cannot, for example, install only one out of two. If you click the Cancel button before installing the final CD-ROM, the software previously installed will be uninstalled.
Vault Client Setup
- If you indicated earlier that you want to set up a vault client, the
Vault Client Setup dialog box appears:
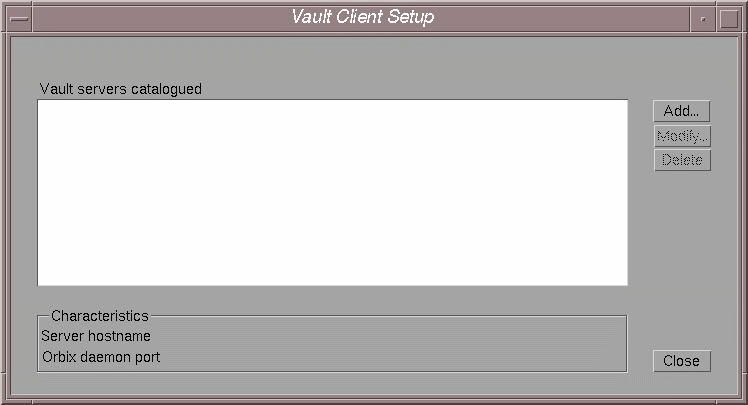
- Click the Add... button to display the following dialog box:
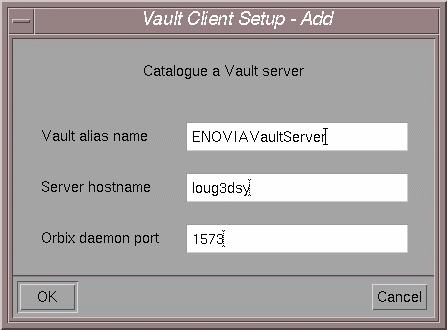
- Specify the Vault alias name, Server hostname and Orbix daemon port,
then click OK.
The Vault Client Setup dialog box is now updated like this:
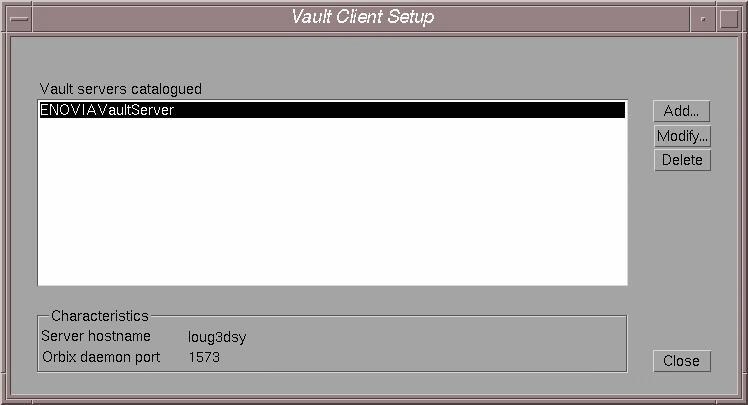
- Use the Modify... and Delete
For more detailed information about the vault, refer to Setting Up Vault Servers and Clients.
- Click the Close button to continue.
- Once the product files have been copied, the Setup Complete dialog
box informs you that the installation has been completed.
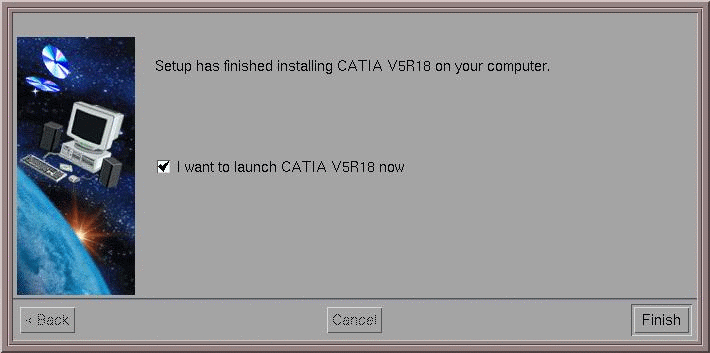
- Click the Finish button to start a Version 5 session.
The Version 5 window will look like this, for example, if you installed the DP2 - CATIA - Drawing Production 2 and MD2 - CATIA - Mechanical Design 2 configurations:
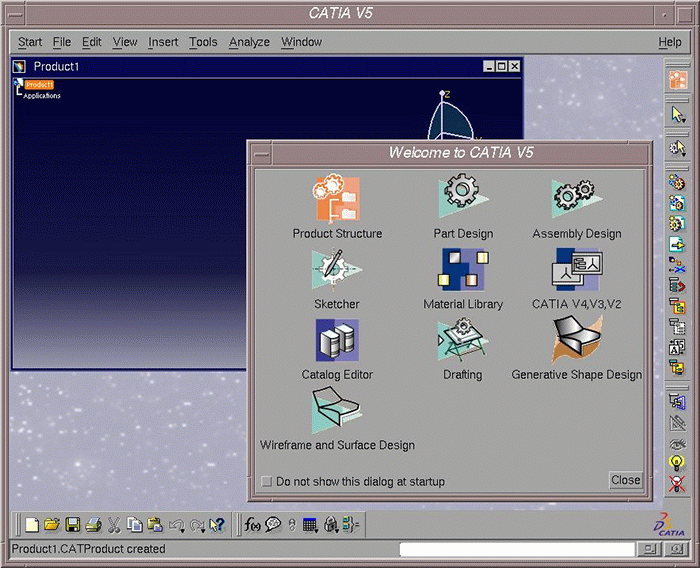
An installation log is created (or the existing log is updated) in the current temporary directory, located by default in:
$HOME/CXINST.log
If you did not import a NODELOCK license certificate
If you chose to run Version 5 now, but did not import a nodelock license certificate, a message window appears informing you that you have not yet requested a configuration or product license:
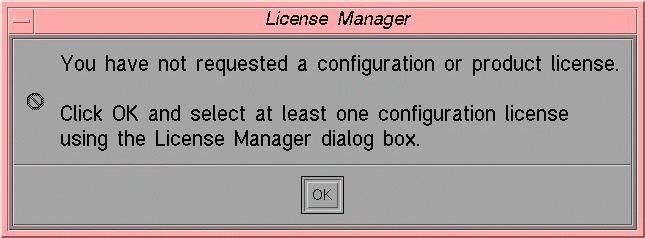
Click the OK button.
The License Manager dialog box is then displayed in front of the application window, and contains a list of the names of installed software. The configuration/product names are grayed out.
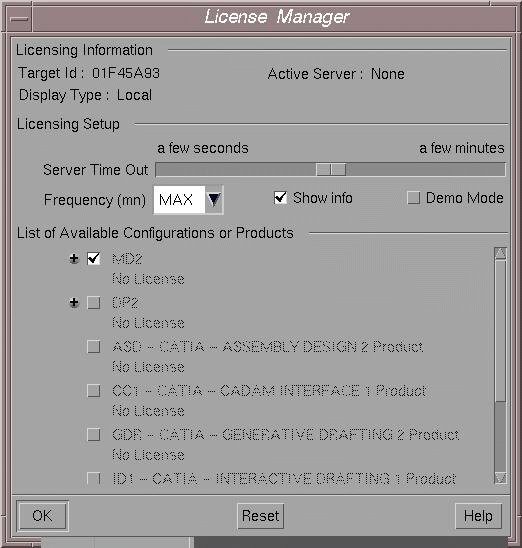
In our example, we installed the DP2 - CATIA - Drawing Production 2 and MD2 - CATIA - Mechanical Design 2 configurations.
Note that the field below each license specifies: "Not Granted". This is because this is the first time you are starting Version 5, and you have not yet reserved any licenses.
At this stage, if you click the OK button, a session will still be started, but you will not be able to work with the product: menu commands will be grayed out, and you will only be able to use the File->Exit command.
Resetting the Server Manager After Installing Different Product Lines in the Same Location
When you install configurations including orbix software, you also install software components which run the orbix daemon. During this process, the Server Manager is registered to the orbix daemon, and the following file is created:
/usr/DassaultSystemes/B18/OS/startup/orbix/config/Repositories/ImpRep/CATIAServerManager.imp
where "OS" is:
- aix_a
- hpux_b
- solaris_a.
This file contains:
server_path -env environment_name -direnv environment_directory
If, for example, you first install another product line (CATIA, DELMIA,
ENOVIA DMU Navigator or 3d com) and the configurations you install include orbix, and you then install
ENOVIA V5 VPM in the same installation directory,
the name of the environment referenced in the CATIAServerManager.imp
file will be (if you installed CATIA, for example):
CATIA.V5R18.B18
and not:
ENOVIA_V5_VPM.V5R18.B18
which will lead to problems.
You have two solutions to avoid this problem.
You could install ENOVIA V5 VPM first before installing any other product lines.
Or, if you installed other product lines first, perform the following steps as "root":
- Regenerate the
CATIAServerManager.impfile by running the following command:
/usr/DassaultSystemes/B18/OS/code/command/runRegisterServerManager -env ENOVIA_V5_VPM.V5R18.B18 - Stop the orbix daemon.
- Restart the orbix daemon running the following command:
/usr/DassaultSystemes/B18/OS/code/command/catstart -run runOrbix
![]()