You can also install an ENOVIA VPM Product Editor on the same machine or on a different workstation from the server and which does not contain any server code.
The screen captures in this section illustrate the case where the ENOVIA VPM Product Editor is installed on a different machine from the server. If you install it on the same machine as the server, the dialogue will be the same as for installing an additional product.
- Orbix must be running on the server machine
- the database must be running on the server machine.
Phase 1: Mount and Declare the CD-ROM
- Logon as root.
- Enter the command:
df -kin order to verify that you have enough free disk space in the filesystem in which you intend to unload the code.
- Insert the CD-ROM for your UNIX operating system into the drive.
If the software is on a suite of CD-ROMs, insert the first CD-ROM.
If you are running Solaris, inserting the CD-ROM declares and mounts the CD-ROM automatically (unless you disabled this feature).
If you are running AIX or HP-UX, check whether the CD-ROM drive is declared.
On AIX, run the command:
lsdev -C -c cdromIf a line like this is not displayed:
cd0 Available 00-01-00-30-CD-ROM Driveyou need to add the CD-ROM drive by using the smit AIX command, for example.
On HP-UX, run the command:
cat /etc/fstabIf a line like this is not displayed:
/dev/dsk/c201d1s0 /CDROM cdfs ro 0 0 0you need to add the CD-ROM drive, by using the sam HP-UX command, for example.
If needed, create an entry in
/etc/pfs_fstab, for instance:/dev/dsk/c0t0d0 /CDROM pfs-rrip ro,suid 0 0Check if the
pfs_mountdandpfsddaemons are running. If not, execute the commands:/usr/sbin/pfs_mountd& and /usr/sbin/pfsd&If you are running Solaris, inserting the CD-ROM declares and mounts the CD-ROM automatically (unless you disabled this feature).
- If you are running AIX and HP-UX, check whether the CD-ROM drive is
mounted.
If the CD-ROM drive is not mounted, you will have to mount it before proceeding. You can determine if the drive has already been mounted by typing the command:
mountIn the output lines, you should see a list of mounted file systems. The CD-ROM drive has already been mounted on your local system if a line similar to one of the following lines appears in the list:
- /dev/cd0 cdrom cdfrs "date" ro (AIX)
- cdrom on device readonly on "date" (HP-UX)
where "date" is the current date.
- If you are running AIX and HP-UX, mount the CD-ROM drive, if
necessary, by typing the commands:
mount -v cdrfs -r /dev/cd0 /cdrom (AIX)
mount /cdrom (HP-UX)You are now ready to begin the installation.
- On all UNIX platforms, change directory to the CD-ROM mount point.
Phase 2: Unload the Files From the CD-ROM
- Check that the DISPLAY variable is exported appropriately before
continuing, then enter the command:
to start the installation procedure, or:
./start -sif you want to start the installation procedure without the accompanying music.
The Version 5 setup program will be run. The setup program checks you have the correct prerequisites. Then, the Welcome dialog box greets you. The setup program invokes a full self-explanatory graphical interface which walks you through the installation.
The splashscreen appears and remains displayed in the background throughout the entire installation procedure, and the different dialog boxes you will interact with will be displayed in the foreground.
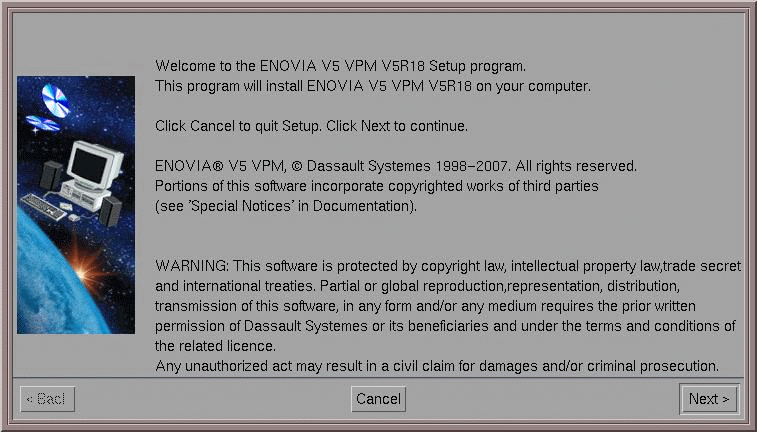
- Click the Next button to move to the next step.
The Choose Destination Location dialog box appears. A default destination folder is already proposed:
/usr/DassaultSystemes/B18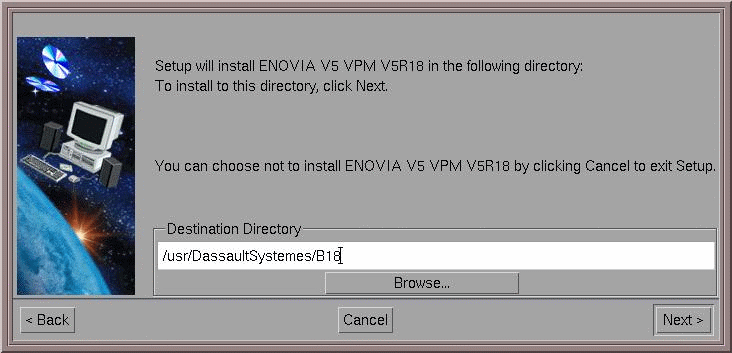
If the default destination directory is suitable, click the Next button to move to the next step.
Click Yes if prompted to create the directory if it does not exist.
Or, click the Browse... button and navigate to select another folder and click OK.
The folder you choose must be empty. You can also specify a new folder: the folder will be created after confirmation.
- Click the Next button to move to the next step.
The Choose Environment Location dialog box appears:
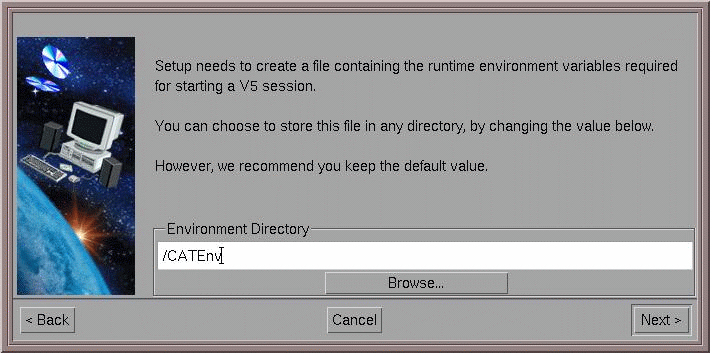
A default destination folder is already proposed:
/CATEnv
- If the default directory is suitable, click the Next button to move
to the next step, or click the Browse... button and navigate to select
another folder and click OK.
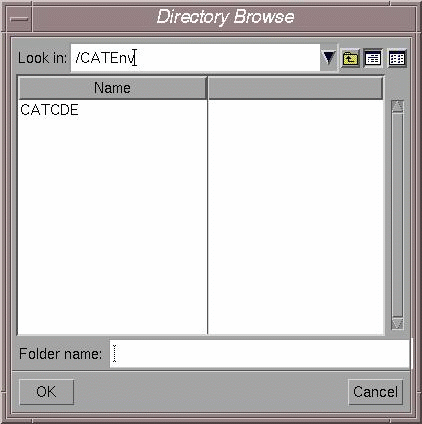
The directory you choose must be empty. You can also specify a new folder: the directory will be created after confirmation.
For more about environment files, refer to About the Environment Created on Your Workstation on UNIX.
- Click the Next button to move to the next step.
The Setup Type dialog box appears:
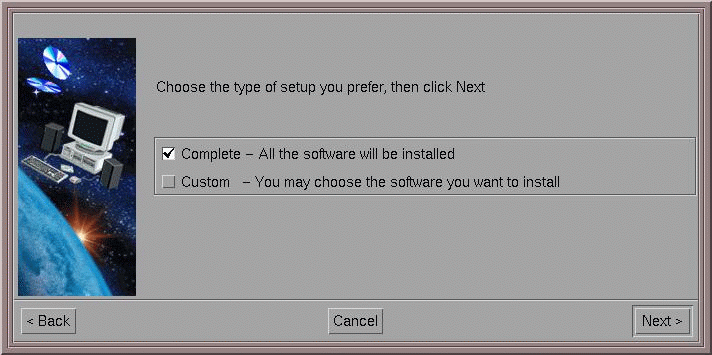
- Check the Custom option and click the Next button to move to the next
step.
The Install Language-Specific File and Fonts dialog box appears:
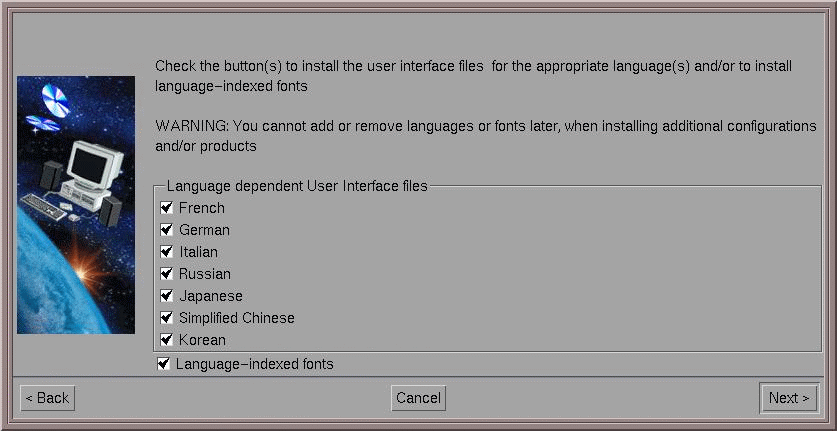
Check the buttons to install the user interface files for the appropriate language(s) and/or to install language-indexed fonts. Uncheck the buttons for the language files you do not want to install. Uncheck the buttons for the language files you do not want to install. This will let you skip the installation of unnecessary language files and fonts and enable you to save disk space.
Note that the choice you make at installation is definitive: you cannot add or remove languages or fonts later when installing additional configurations and/or products.
- Click the Next button to move to the next step.
The Select Software dialog box appears:
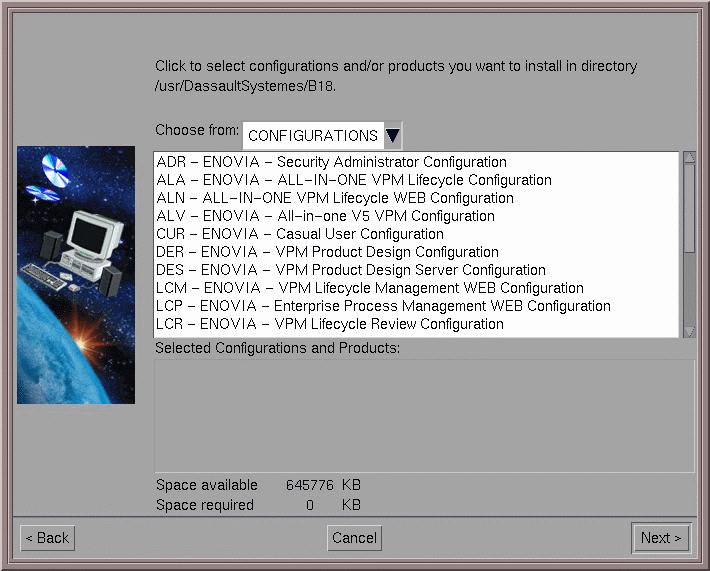
- In the Choose from: field, click to select PRODUCTS:
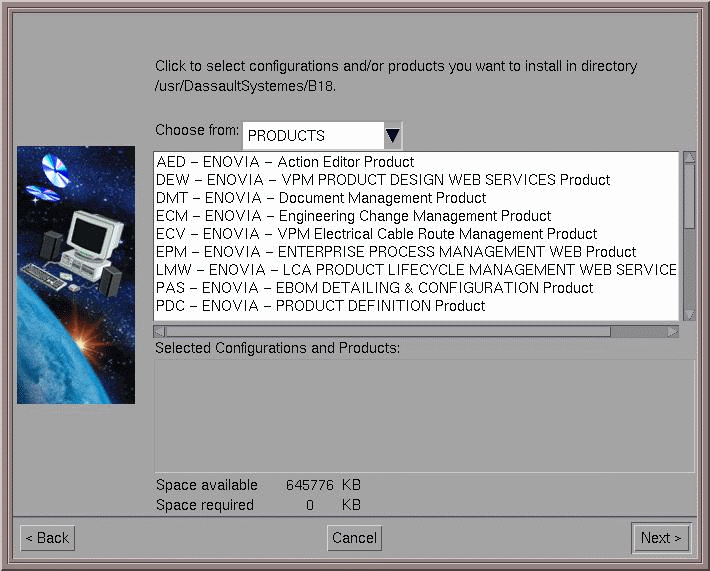
- Select the VPC - ENOVIA Client Product:
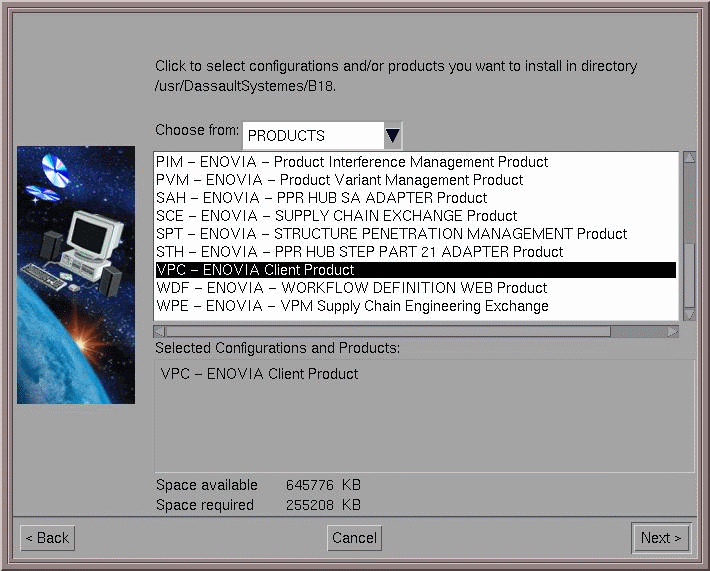
- Click the Next button to move to the next step.
The CATIA V5 - ENOVIA V5 VPM interoperability information dialog box appears:
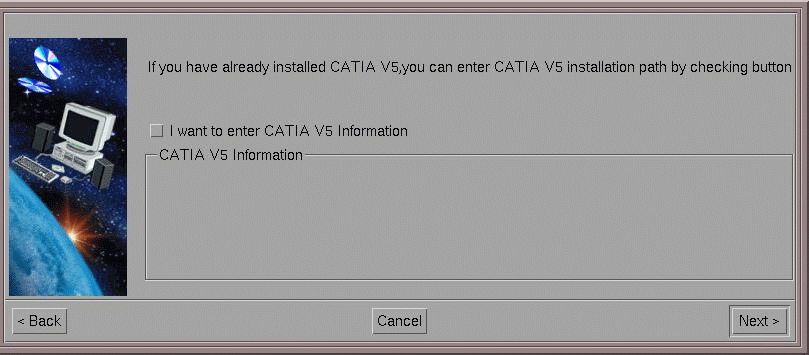
- If you already installed CATIA V5, check the I want to enter CATIA
V5 Information button to enter information about your CATIA V5
installation,
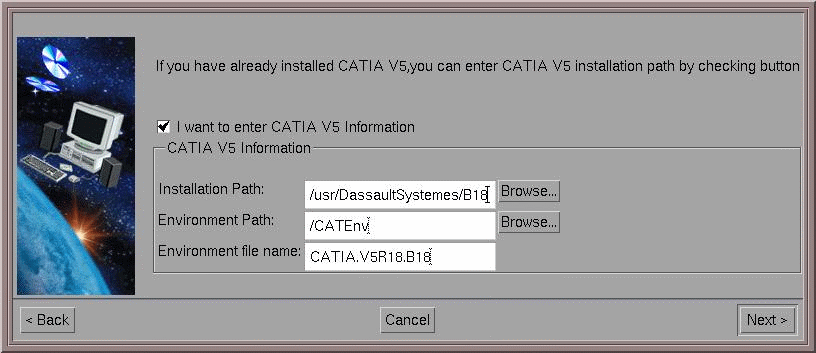
- Click the Next button to move to the next step.
The Choose Orbix Configuration dialog box appears. Orbix is used for server-client communications. You can accept the default values.
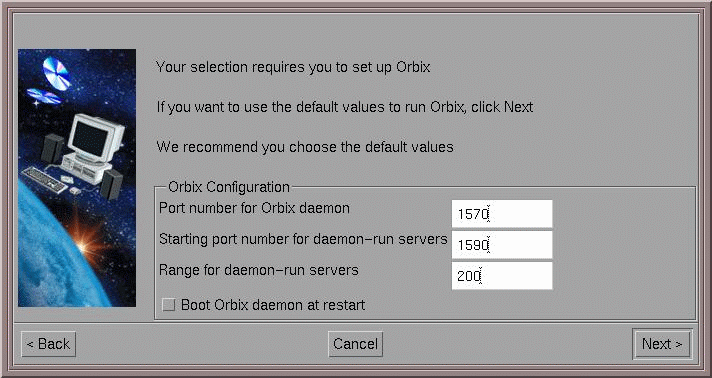
Note that the default values are set to 1570/1590/200. If CATIA or DMU have been installed previously, these values are already taken. If this is the case, use different values than the CATIA and DMU port numbers.
For Port Number for Orbix daemon, the default is 1570. A check is performed to determine if the port if free. If it is not free, the port number proposed is incremented by "1' until a free port is found.
For Starting port number for daemon-run servers, the default is 1590. No check is performed to determine if the port if free. If it is not free, the port number proposed is incremented by "20".
- Click the Next button to move to the next step.
The Vault Client Configuration dialog box is displayed.
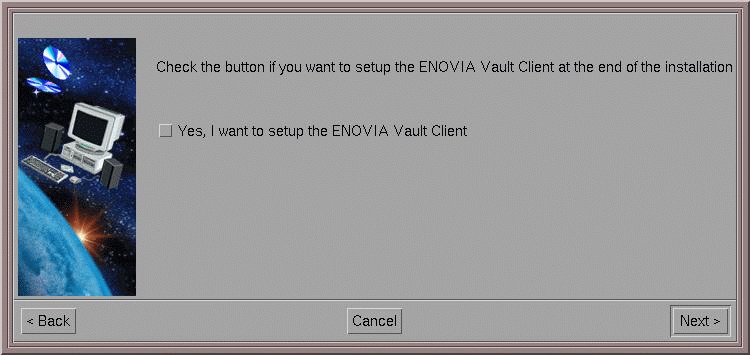
When installing a V5 product which contains a potential vault client, this dialog box prompts you to indicate if you want to configure a vault client at the end of the enoviadbsetup process.
If you choose to configure a vault client, another dialog box will be displayed at the end of the installation, allowing you to enter the parameters of the vault server(s) you want to catalog: vault name, machine name, orbix port and orbix service name. This information is added in the VaultClient.properties file.
After installation, you can run the VaultClientSetup command, in order to catalog another vault server, modify the parameters of an existing one, or remove an existing one.
The VaultClientSetupB command provides the same functionalities in batch mode.
- Click the Next button to move to the next step.
The Choose Communications Ports dialog box is displayed if you did not set up the ports when unloading the server code:
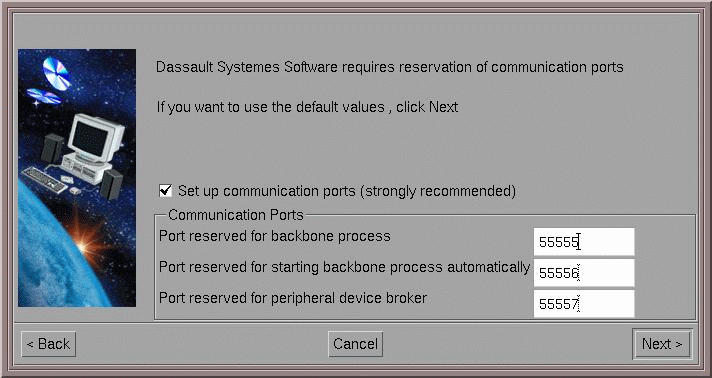
- Use the default values, so click the Next button to move to the next
step.
The Data Directories Selection dialog box is displayed:
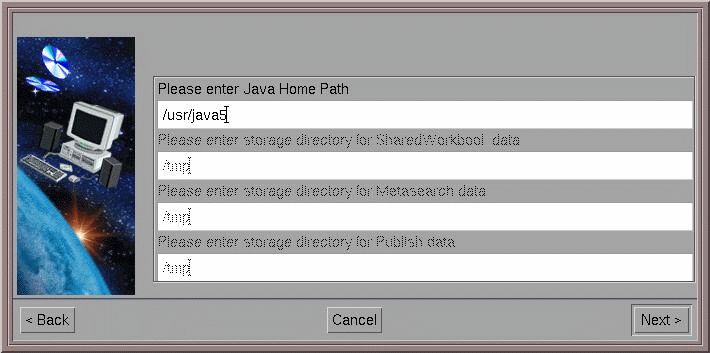
- Enter the Java home path.
For the Java path, the following variables are set up. This is an extract of an environment resulting from the installation of an ENOVIA V5 VPM client:
JAVA_HOME_aix_a=/usr/jdk_baseJAVA_HOME_hpux_b=JAVA_HOME_solaris_a=JAVA_HOME=\$JAVA_HOME_$OSDSYou can ignore the grayed out fields: they are not applicable to an ENOVIA VPM Product Editor client installation.
- Click the Next button to continue.
This displays the Start Copying Files dialog box:
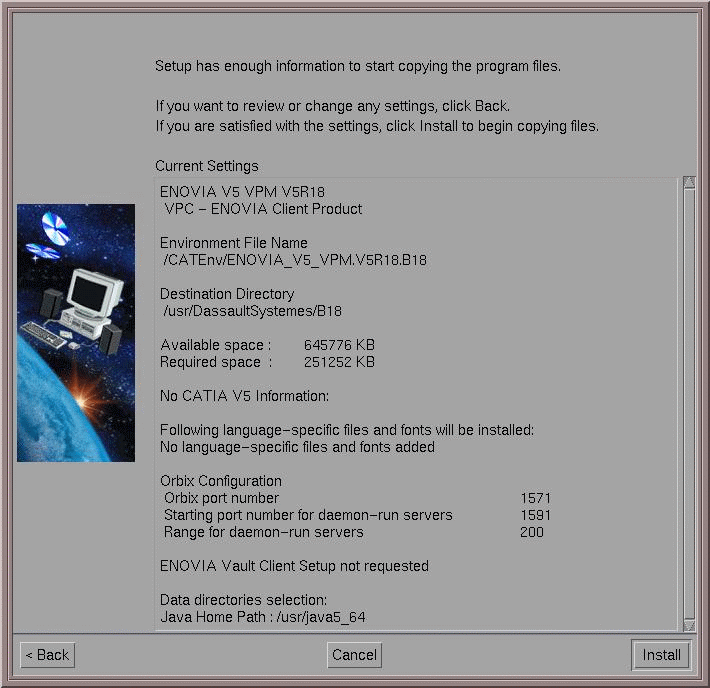
The central area lists the current settings you set in the previous steps:
- the name of the product being installed: in this case, VPC - ENOVIA Client Product
- the environment file name
- the destination directory
- the space required for the installation of the client
- vault client setup
- the communication port and Orbix configurations.
- If you indicated earlier that you want to set up a vault client, the
Vault Client Setup dialog box appears.
For more information about setting up the vault client, refer to Vault Client Setup.
- Click the Install button to start copying the files to your computer.
A progression indicator appears. Once the files have been installed, the Setup Complete dialog box is displayed:
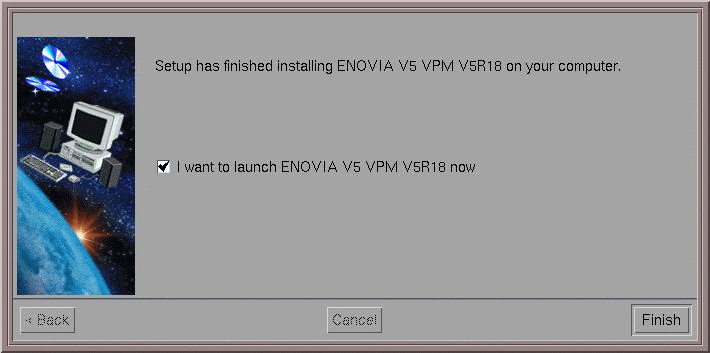
- If you do not want to run ENOVIA V5 VPM V5R18 now, uncheck the check box prompting you to run ENOVIA V5 VPM V5R18 now, then click the Finish button.
![]()