What Is Group Licensing?
Group licensing is an optional licensing mechanism allowing administrators to allocate end users to groups, then allocate licenses to those groups. Then, only the users belonging to those groups can acquire the corresponding licenses. This ensure that the administrator has total control over who uses which licenses. The ability to set up licenses per groups of users allows an organization to better manage its license requirements when several categories of users exist and connect to the same server.
In previous releases, the Licensing tab allowed end users of ENOVIA VPM Lifecycle Navigator products to directly acquire licenses. However, from a license administration viewpoint, this was not satisfactory since end users had control over which licenses they used. The configuration of the licenses was shared by all users. A license, checked by the administrator, was used by all users connected to the portal. For instance, if ENOVIA VPM Lifecycle Navigator was installed, the ENOVIA V5 VPM licenses checked by the administrator were shared and used by all users. All users were able to access all portals.
The desired behavior is to have, for each user, a list of allowed product and/or configuration trigrams, and a run-time verification that a given user, identified when the user logs on, is using products to which access is authorized for the user's group by the administrator.
For example: A company wants to provide its suppliers access to the Navigator server that is also used internally. The internal users have access to enterprise process manager but not the suppliers. The administrator will be able to define an "Internal User" group consisting of the internal users, and a separate group for the suppliers. The administrator then uses the License Group tab to allocate the different licenses to the different groups.
How Are the Groups Set Up?
Two methods are available for setting up groups:
- LDAP: you can use the group syntax in your LDIF file to be
imported into your LDAP server: you define the groups using this
syntax, and assign users to the groups.
Refer to LDIF File for Webtop Applications for an example of an LDIF file with groups. - File: you can also use a simple text file.
You set up groups using the P&O tab. The following screenshot shows what the P&O tab looks like after a typical installation in which your WAS is secured on an LDAP server:

If you double-click on the line:
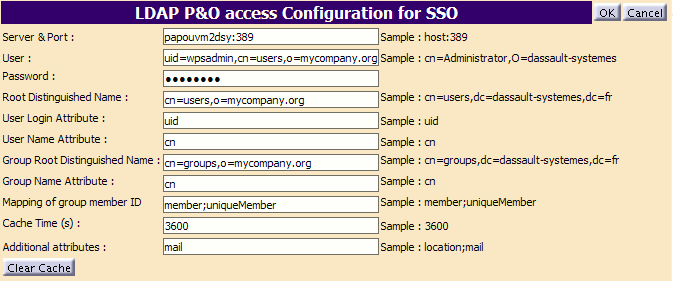
1 SSO LDAP
you access the LDAP security setup parameters:

Setting Licenses
To allocate licenses to groups:
- Log onto the portal as administrator (for example, as
wpsadmin). - Click the Administrative and Preferences button
 in the Main Access area. The Administration window
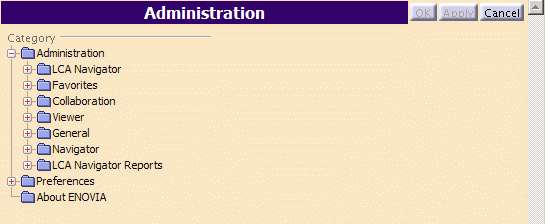
appears:
- Expand the Administration folder:

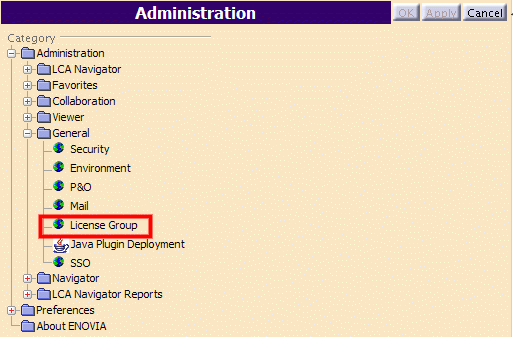
- In the Administration page, click the General
folder, then the License Group icon:

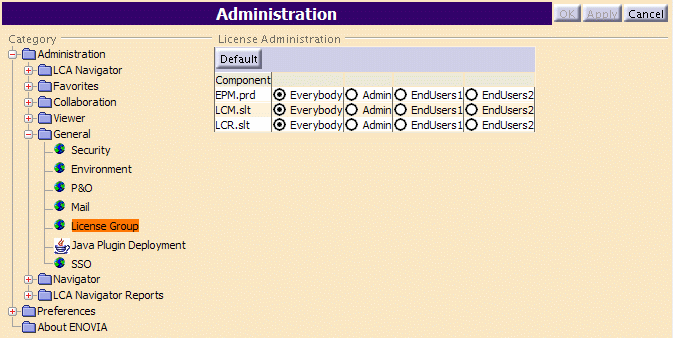
to display the License Group tab:

The Component column lists the licenses installed. To the right, you see:
- the Everybody check button
- and a check button for each of the groups; in our example,
the groups are Admin, EndUsers1 and EndUsers2.
- Opposite each license, check the button for the group to which
you want to allocate that license.
If you want all end users to be able to use the license (irrespective of which group they belong to), check the Everybody button. This is a way of ignoring group licensing. The Everybody option is the default group. A user can belong to more than one group. If a user belongs to groups A and B and a license is selected for Everybody, group A and group B, then the licenses selected for all three will be taken.
If a license is selected for two groups and a user belongs to the two groups, only one license will be taken.
- Click Apply or OK to save and exit.
License settings are saved in the Settings database.
Then, when end users log on, they will only be able to access the functions provided by the group license set by the administrator.
![]()