What Is an LDAP Repository?
In its most simple expression, an LDAP repository is a list. The list can contain either all the employees in a company, this is your corporate LDAP repository, for example, or a list of users on a computer network.
There are many mechanisms for implementing lists of users, some in simple files, others in databases requiring more complex client and server software, for example:
- Active Directory (Microsoft)
- IBM Tivoli Directory Server
- etc.
For the purposes of illustration, this scenario is based on the use of IBM Tivoli Directory Server 6.0 on Windows Server 2003, which is used as a sample LDAP server. Note, however, that you can use any LDAP server supported by WAS 6.0.2.
Installing and Configuring IBM Tivoli Directory Server 6.0
Installing and Configuring
You must log onto the machine to host the directory server as any user in the default Administrators group (Windows) or as root (UNIX).
To get you started, this section highlights the main phases of the installation and pinpoints certain aspects to keep in mind:
- IBM Tivoli Directory Server 6.0 must be installed on a server-type Windows operating system: our scenario is based on Windows Server 2003 Standard Edition
- there is an installation phase and a directory server instance configuration phase:
the Instance Administration Tool automatically runs at the end of the
installation so that you can create a directory server instance and
complete configuration. Before you can use the server, you must:
- create a directory server instance
- set the administrator DN and password for the instance
- configure the database that will store the directory data
- in our scenario, we installed all the components except the database (DB2 was already running on the server machine)
- for ease of administration, we recommend that you install the Web Administration Tool and the embedded version of WebSphere Application Server - Express required for running the Web Administration Tool
- you need to create a number of user IDs before the installation, before you can successfully create a directory server instance.
For detailed information, please refer to your IBM Tivoli Directory Server Installation and Configuration Guide Version 6.0 which walks you through a typical installation and explains how to configure the directory server.
After You Install and Configure
You then have to:
- start the directory server instance
- start the application server to use the Web Administration Tool
- start the Web Administration Tool.
Starting the Directory Server Instance
In our scenario on Windows, we start the directory server instance through the Services folder. To start the directory server instance, in the Services folder, click IBM Tivoli Directory Server Instance V6.0 - instancename. Then click Actions --> Start.
Starting the application server to use the Web Administration Tool
To start the application server if you are using the embedded version of WebSphere Application Server - Express as your application server, type one of the following at a command prompt:
WASPath\bin\startServer.bat server1 (Windows)
WASPath/bin/startServer.sh server1 (AIX, Solaris, or HP-UX)
where WASPath is the path where you installed the embedded version of WebSphere Application Server - Express.
In our scenario, the full path for the command is:
This path is:
c:\Program Files\IBM\LDAP\V6.0\appsrv\bin\startServer.bat server1
Starting the Web Administration Tool
After you have started the application server, type the following address from a Web browser:
http://localhost:12100/IDSWebApp/IDSjsp/Login.jsp
where localhost is the name of the machine hosting the
directory server and Web Administration Tool. For example:
http://papouvm2dsy:12100/IDSWebApp/IDSjsp/Login.jsp
The IBM Tivoli Directory Server Web Administration Login Tool page is displayed:
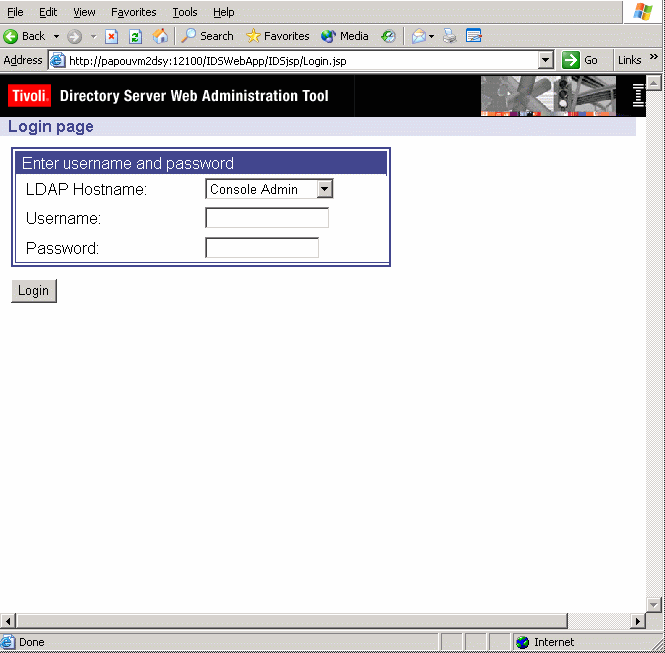
Then:
- Make sure that Console Admin is displayed in the LDAP Hostname field.
- In the Username field, type:
superadmin
- In the Password field, type:
secret
- Click the Login button.
The IBM Tivoli Directory Server Web Administration Tool console is displayed:
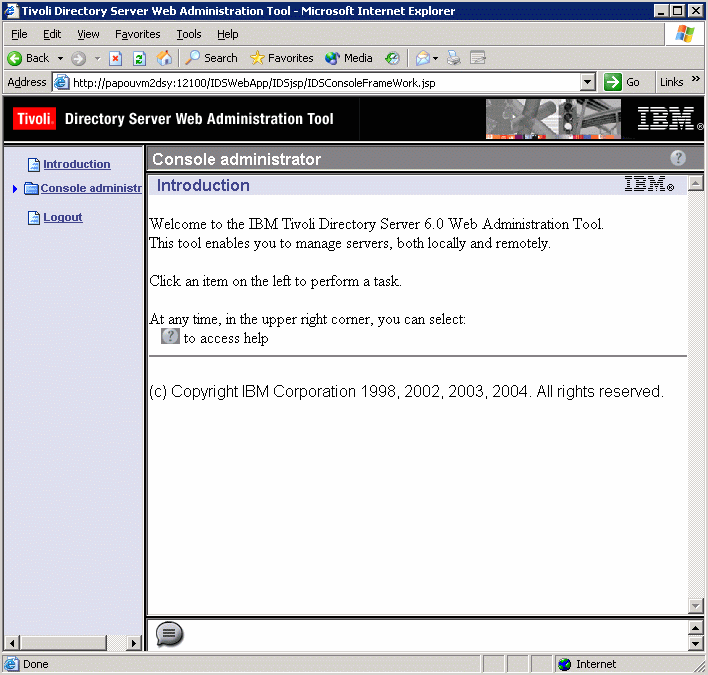
Then, refer to the section "Starting the Web Administration Tool" in the IBM Tivoli Directory Server Installation and Configuration Guide Version 6.0 which explains the rest of the steps needed to add your directory server to the console.
Logging in as the directory server instance administrator
Once your server has been declared, on the IBM Tivoli Directory Server Web Administration Login Tool page:
- Select the LDAP host name or IP address for your computer from the drop-down menu for the LDAP Hostname field.
- Type the administrator DN and the password for the directory server instance. You specified these fields during instance creation.
- Click Login.
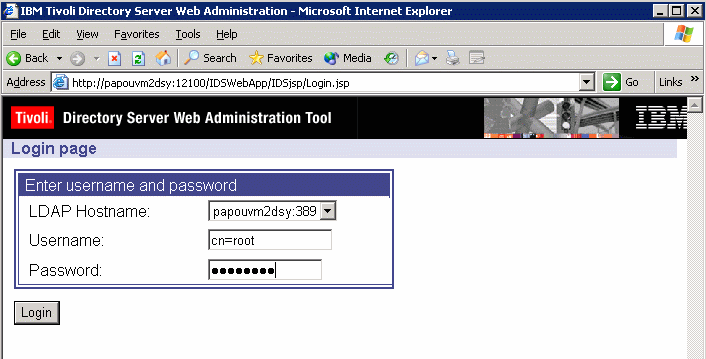
You now have access to all the functions of the Directory Server Web Administration Tool:
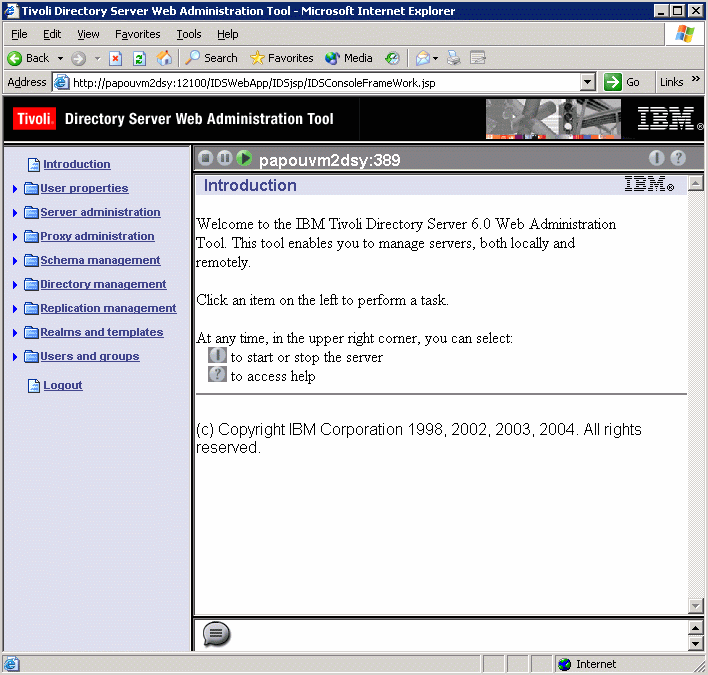
The directory server then has to be customized by importing users into it.
Customizing the LDAP Repository
The following scenario is a default implementation and involves editing your corporate LDAP repository by adding three users: wpsadmin, ServerManager and Steve Evans). However, if you do not want to edit your corporate LDAP repository, you are not obliged to do so, as explained later.
For the purposes of our scenario, we continue to use IBM Tivoli Directory Server 6.0 on Windows, and use the IBM Tivoli Directory Server Configuration Tool (idsxcfg).
For detailed information about the tools and techniques described in this section, refer to the section "Configuration - Using the IBM Tivoli Directory Server Configuration Tool (idsxcfg) - Importing and Exporting LDIF data" in your IBM Tivoli Directory Server Installation and Configuration Guide Version 6.0.
- Still logged onto the machine hosting the directory server as any
user in the default Administrators group (Windows) or as root (UNIX),
type the following command at a command prompt:
idsxcfgto start the IBM Tivoli Directory Server Configuration Tool:
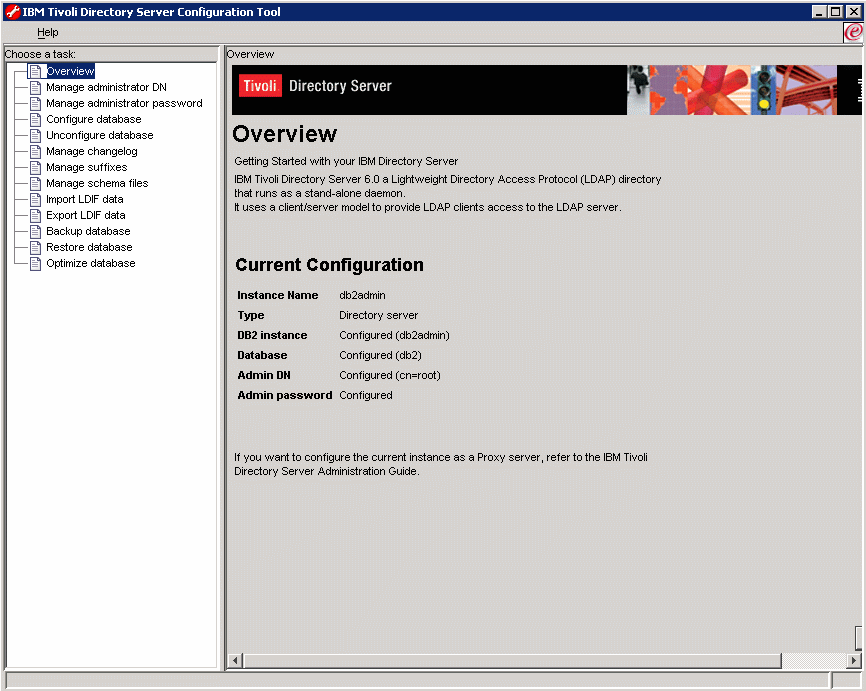
- Click on Manage Suffixes:

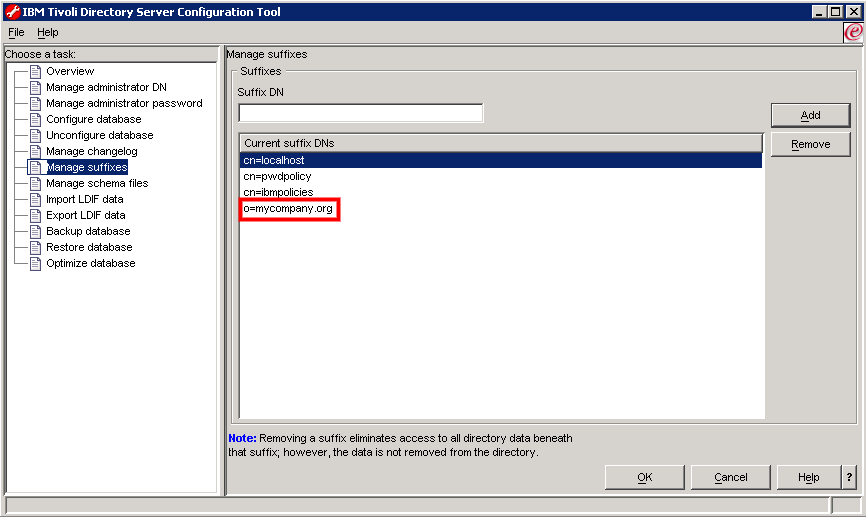
A suffix is a distinguished name (DN) that identifies the top entry in a locally held directory hierarchy. Because of the relative naming scheme used in LDAP, this DN is also the suffix of every other entry within that directory hierarchy.
- Type an appropriate suffix in the Suffix DN field, for example:
o=mycompany.organd click Add, then OK. The suffix is added to the list:
- On the machine hosting the directory server, create an LDIF (LDAP Data Interchange Format) file to be imported
later to create your LDAP directory.
Different LDIF Files for Different Applications
The types of LDIF files you can import depends on whether you are deploying Webtop or Wintop applications.
LDIF File for Wintop Applications
If you are deploying Wintop applications, a straightforward LDIF file like the following will suffice:
version: 1dn: o=mycompany.org
objectclass: top
objectclass: organization
o: mycompany.orgdn: cn=users,o=mycompany.org
objectclass: container
objectclass: top
cn: usersdn: cn=groups,o=mycompany.org
objectclass: top
objectclass: container
cn: groupsdn: uid=wpsadmin,cn=users,o=mycompany.org
objectclass: organizationalPerson
objectclass: person
objectclass: top
objectclass: inetOrgPerson
uid: wpsadmin
sn: admin
givenname: wps
preferredlanguage: en
userpassword: wpsadmin
cn: wps admindn: CN=ServerManager,cn=users,o=mycompany.org
cn: ServerManager
uid: ServerManager
objectclass: top
objectclass: person
objectclass: organizationalPerson
objectclass: inetOrgPerson
userpassword: ServerManager
sn: ServerManager
givenname: ServerManager
title: ServerManager
description: ServerManagerdn: CN=Steve EVANS,cn=users,o=mycompany.org
cn: Steve EVANS
uid: ses
mail: ses@ds-fr.com
objectclass: top
objectclass: person
objectclass: organizationalPerson
objectclass: inetOrgPerson
userpassword: ses
sn: EVANS
givenname: Steve
telephonenumber: 01.55.49.68.27
title: ses
description: sesIn this sample, three users are created:
wpsadmin,ServerManagerandSteveattached to the hierarchymycompany.orgwhich is the suffix you created earlier.LDIF File for Webtop Applications
If you are deploying Webtop applications, you can:
- use a straightforward LDIF file like the one illustrated for Wintop applications
- or, optionally, use groups in your LDIF schema to provide support for group licensing which you manage in Webtop applications using the License Group tab.
The following is an example of a typical LDIF file for group licensing purposes:
version: 1dn: o=mycompany.org
objectclass: top
objectclass: organization
o: mycompany.orgdn: cn=users,o=mycompany.org
objectclass: container
objectclass: top
cn: usersdn: cn=groups,o=mycompany.org
objectclass: container
objectclass: top
cn: groupsdn: cn=Admin,cn=groups,o=mycompany.org
objectclass: groupOfUniqueNames
objectclass: top
description: nop
cn: Admin
IBM-ENTRYUUID: 36b532f6-5bac-46f7-9b46-30b078a3770b
uniqueMember: uid=wpsadmin,cn=users,o=mycompany.orgdn: cn=EndUsers,cn=groups,o=mycompany.org
objectclass: groupOfNames
objectclass: top
description: nop
cn: EndUsers
IBM-ENTRYUUID: eaed433b-97f6-4c67-8af1-fcc0cbf0525b
member: uid=ServerManager,cn=users,o=mycompany.org
member: uid=ses,cn=users,o=mycompany.orgdn: uid=wpsadmin,cn=users,o=mycompany.org
objectclass: organizationalPerson
objectclass: person
objectclass: top
objectclass: inetOrgPerson
uid: wpsadmin
sn: admin
givenname: wps
preferredlanguage: en
userpassword: wpsadmin
cn: wps admindn: CN=ServerManager,cn=users,o=mycompany.org
cn: ServerManager
uid: ServerManager
objectclass: top
objectclass: person
objectclass: organizationalPerson
objectclass: inetOrgPerson
userpassword: ServerManager
sn: ServerManager
givenname: ServerManager
title: ServerManager
description: ServerManagerdn: CN=Steve EVANS,cn=users,o=mycompany.org
cn: Steve EVANS
uid: ses
mail: ses@ds-fr.com
objectclass: top
objectclass: person
objectclass: organizationalPerson
objectclass: inetOrgPerson
userpassword: ses
sn: EVANS
givenname: Steve
telephonenumber: 01.55.49.68.27
title: ses
description: sesIn this sample, three users are created and organized into different groups:
wpsadmin: this user belongs to the groupAdminServerManagerandSteve Evansbelong to the groupEndUsers.
For the purposes of this scenario, we are using a straightforward LDIF file without groups.
- Stop the directory server, for example using the Directory Server Web Administration Tool.
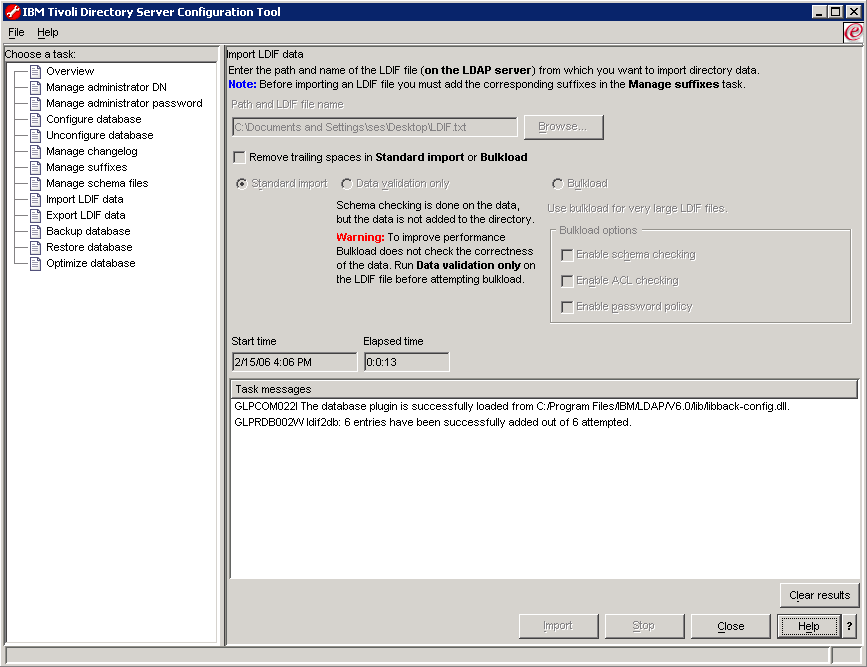
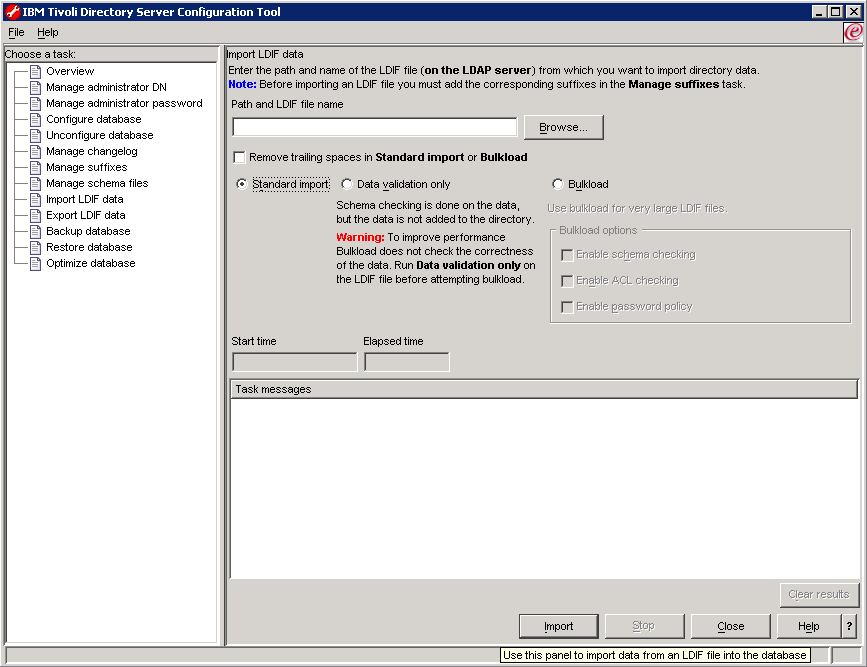
- In the IBM Tivoli Directory Server Configuration Tool, click on Import LDIF data:
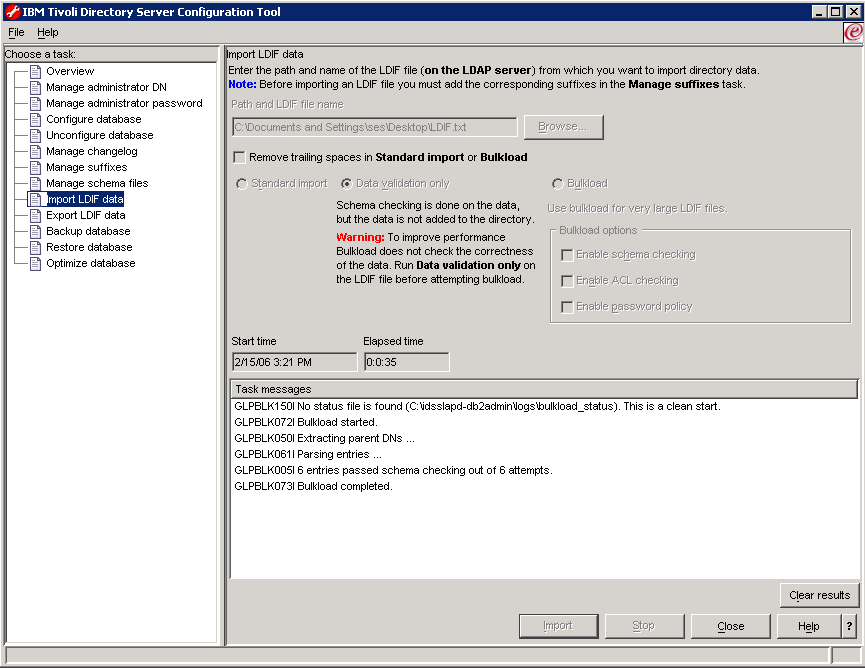
- Check Data validation only and click the Import button if you want to check the validity of the LDIF file to be imported:
- Check Standard Import and click the Import button to import the LDIF file containing
the user data into the mycompany.org hierarchy. The
result looks like this:
What has been created?
The following entries have been made in the LDAP repository:
- wpsadmin (with an encrypted userpassword and possessing special authorizations) is required later on to administer single sign-on (SSO). This user is a recommended, special Websphere Application Server administrator user.
- ServerManager is required to allow communication between the Server Manager process and the LDAP repository; this is an internal user and must be created as is.
- The user Steve is an end user who will connect to web
applications in a single sign-on context.
Note: as mentioned earlier, you are not obliged to create the wpsadmin and ServerManager users, however the underlying function of each user continues to exist. You can replace each user by existing users in your corporate LDAP repository, as long as you follow the instructions described in Activating Single Sign-On.
- Restart the directory server.
- Using the Directory Server Web Administration Tool, select the Directory Management -> Manage entries command for browsing your
directory hierarchy, expand the hierarchy mycompany.org,
then expand Users to check that the users imported are
visible:
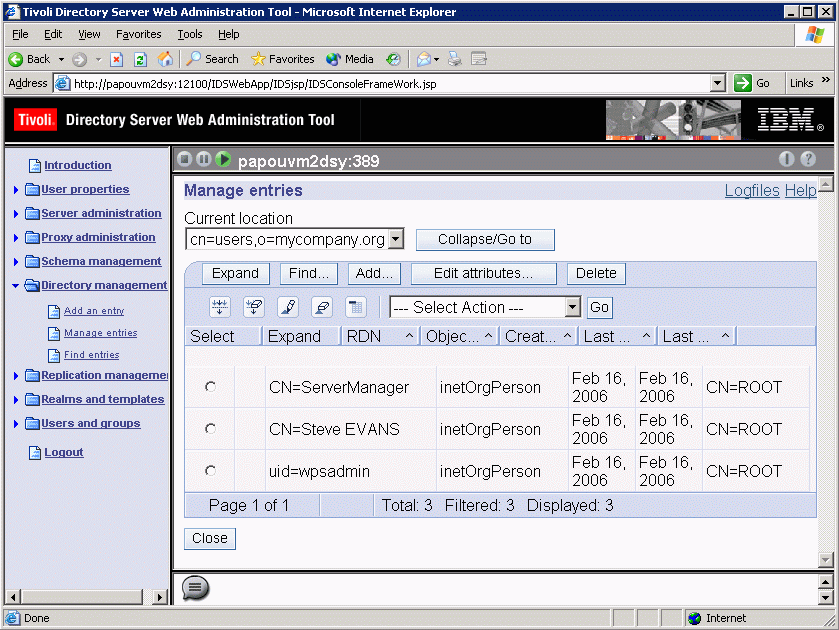
The three users visible in the Users group are:
- ServerManager
- Steve Evans
- wpsadmin.
An LDAP password is required by all three users to connect to LDAP. Importing the LDIF file as explained above sets up this password, since it is contained in the imported file: you do not have to set it up yourself interactively.
This userid and password are the generic userid and password that will be used for all users to connect to the web application.
![]()