The Drafting tab contains five categories of options letting you
customize your lines drawings:
|
Geometry to Display

Select the option defining how the shape of the ship is shown on lines
drawings: Wireframe only or Surface only,
or Both.
 By default, the option is Wireframe only.
 For a body plan, ensure Wireframe only is selected.
 |
|
 |
Waterlines View

Select the option defining the view looking at the ship from above:
Symmetrical or Asymmetrical depending on
whether or not the ship is symmetrical about the centerline. This
generates a half-breadth or full-breadth view respectively.
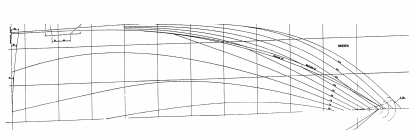
Typical half-breadth view:

 By default, the option is Asymmetrical.
 |
|
 |
Waterline Position
 |
Select WaterLine reference plane
If this option is selected, the waterline is located at the selected
reference plane in the 3D document. |
Specify value (absolute z coordinates
If this option is selected, the waterline is located along the Z
direction at the absolute coordinate entered in the Absolute Z coordinate
box.
 By default, the option is Specify value.
 |
|
 |
Body Plan

Select the option defining the view showing the shapes of the frame
lines: Symmetrical or Asymmetrical depending on
whether or not the ship is symmetrical about the centerline.
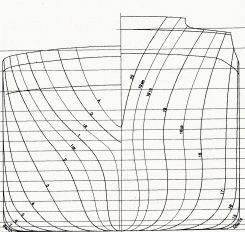
The generated view is made of two parts. If the ship is symmetrical,
only one side of the ship is shown (usually the portside) and the
right-hand part looks aft at the forward portside of the ship, while the
left-hand part looks forward at the after half of the portside. If the
ship is asymmetrical, both sides of the ship are shown.
Typical body plan:

To generate this drawing, you need to define the midship position (see
below).
 By default, the option is Asymmetrical.
 |
|
 |
Midship Position
 |
Select middle station
If this option is selected, the midship is located at the selected
reference plane in the 3D document. |
Specify value (absolute x coordinates)
If this option is selected, the midship is located along the X
direction at the absolute coordinate entered in the Absolute X coordinate
box.
 By default, the option is Specify value.
 |
| |
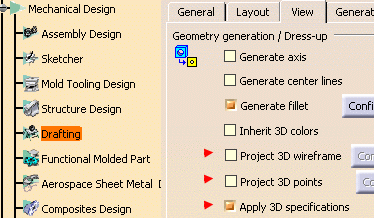
For the options in this tab page to be taken into account, you
need to select Project 3D wireframe, Project 3D
points and Apply 3D specifications located in
Mechanical Design -> Drafting -> View -> Geometry
generation/Dress-up frame. |
 |
 |
| |
 By default, Project 3D wireframe and Project 3D
points check boxes are cleared, and the Apply 3D
specifications check box is selected.
 |
 |
|