| |
 |
| |
This tab deals with
the following categories of options:
|
| |
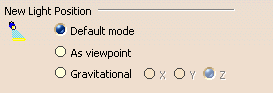
New Light Position
|
| |
 |
| |
This area lets you
define how the new light sources you are going to create will be
positioned. You can choose between three modes: |
| |
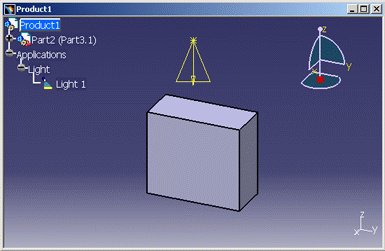
Default mode
The light source is positioned in the upper part of the geometry area,
oriented down and centered: |
|
 |
| |
Spot light source -
Default mode |
|
 By
default, this option is activated. By
default, this option is activated. |
|
|
 |
| |
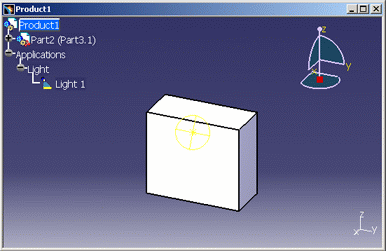
As Viewpoint
The light source is positioned according to the user's viewpoint:
|
|
 |
|
Spot light source -
As viewpoint mode
By default, this option is cleared. |
|
|
|
| |
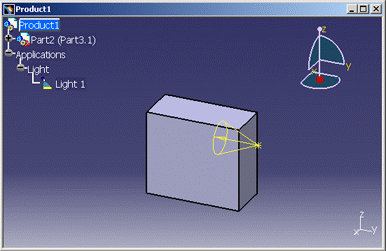
Gravitational
The light source is positioned along the X, Y or Z axis of the model.
The axis to be used is defined by selecting the appropriate option next to
Gravitational: |
|
 |
|
Spot light source -
Gravitational mode along Y axis
By default, this option is cleared. |
|
|
|
| |
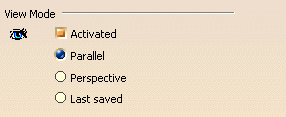
View Mode
|
| |
 |
| |
This area lets you
activate/deactivate the view mode to be used by default when entering the
Real Time Rendering workbench: |
| |
Parallel
If this option is selected, it means that when entering the Real Time
Rendering workbench, your model is displayed in a parallel view.
By default, this option is activated. |
| |
Perspective
If this option is selected, it means that when entering the Real Time
Rendering workbench, your model is displayed in a perspective view.
By default, this option is cleared. |
| |
Last saved
If this option is selected, it means that when entering the Real Time
Rendering workbench, each model you open is displayed in the view (i.e.
perspective or parallel) used to display the model at the time it was
saved.
For instance, if you are working with a product in a perspective view then
save it before closing the document, re-opening this product after clicking
Last saved automatically displays it in a perspective view.
Note: once your model has been saved, if you change the viewpoint
afterwards then close the model without saving it again, the new viewpoint
will not be used when clicking Last saved.
By default, this option is cleared. |
|
|
|
| |
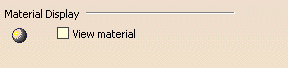
Material Display
|
| |
 |
| |
View material
If this option is activated, it means that when entering the Real Time
Rendering workbench, the visualization mode is automatically switched to
Shading with Material.
The Shading with Material rendering style lets you display
materials that have been applied onto your model.
Therefore, you do not need to select View > Render Style > Shading
with Material or click Shading with
Material
 anymore.
 |
| |
By default, this option is cleared. |
|
|
|
|
|
| |
 |
| |
|
| |
|
| |
 |
|
| |
|