This task explains how to set up pad options in order to perform viewing
operations using the Tablet Pen on a Tablet PC.
Note that you can use the pad to visualize both 2D and 3D objects.
Transformation Pad
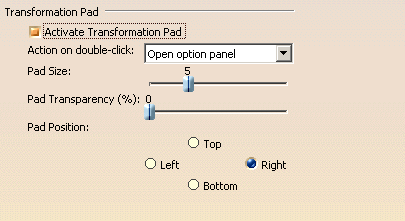
Activate Transformation Pad
If this option is selected, it means that the pad display is activated in the geometry area.
By default, the pad is displayed to the right as shown below:

Action on double-click
Lets you select the action to be triggerred when double-clicking. You can choose among the following actions:
Open option window
This action opens the Tablet Support dialog box directly in the geometry area. You can then modify your pad options without having to re-access the Tablet Support tab:

- Reframe
Zooms in or out to fit all the geometry into the available space- Center location
Centers the geometry at a specific location- No action
Means that no action is performed when double-clicking. This can be useful, for instance, to avoid involuntary actions when manipulating the Tablet Pen.For more information on the various viewing operations you can perform with the Tablet Pen, refer to Activating Viewing Tools.
Pad Size
Lets you set the size of the pad using the slider. You can choose a value comprised between 1 and 15.
Pad Transparency
Lets you define how transparent the pad is: the higher the value, the more transparent the pad.


Pad Position
Lets you position the pad by selecting the appropriate option:
-
to the top
-
to the bottom
-
to the left
-
to the right.
By default, the pad is located to the right part of the screen.
![]()
Gesture Pad
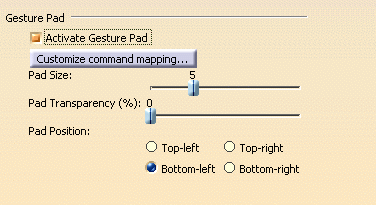
Activate Gesture Pad
If this option is selected, it means that the gesture pad is activated in the geometry area. Note that the gesture pad is displayed only after clicking OK.
A gesture is a set of strokes that are used as keyboard shortcuts. The gesture pad captures the gestures you draw and translate them into keyboard shortcuts for standard commands such as Cut, Copy or Delete.
Customize command mapping
 Delete
 Copy
Copy  Cut.
Cut.
However, you can modify the command mapping by clicking Customize command mapping... to open the following dialog box:
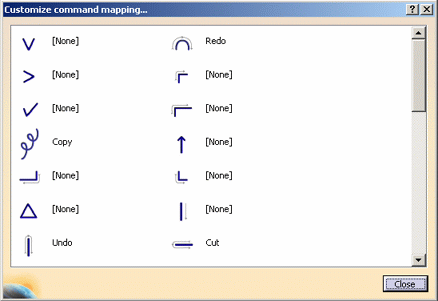
[None] and assign it a command.
Selecting a symbol opens the Command Chooser which lets you
choose among a list of commands the command to be associated with the
selected symbol: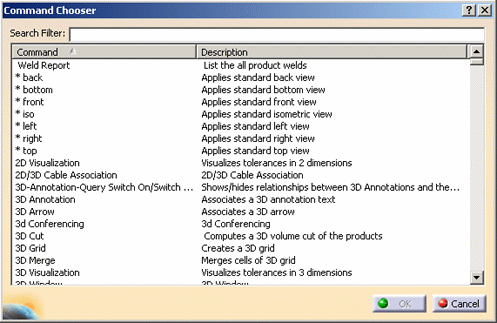
For instance, entering
annotation displays only the commands
containing the string "annotation" as shown below:
*), nor operators (+,
&, -) to filter your search.When finished mapping your commands, click OK to validate and close the Command Chooser then Close to close the Customize command mapping... dialog box.
Pad Size
Lets you set the size of the gesture pad using the slider. You can choose a value comprised between 1 and 15.
Pad Transparency
Lets you define how transparent the gesture pad is: the higher the value, the more transparent the pad.


Pad Position
Lets you position the gesture pad by selecting the appropriate option:
-
Top-left
-
Top-right
-
Bottom-left
-
Bottom-right.
By default, the pad is located in the bottom-left part of the screen.
![]()