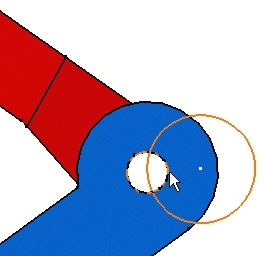
Do not bother about positioning the circle.


The part is designed.
|
|
This task consists of designing the part you have just added to the assembly. It shows how to access the tools required for designing components in an assembly context. | ||
|
|
1. | Double-click CRIC_JOIN in the specification tree to access the Part Design workbench. | |
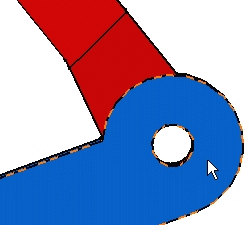
| 2. | Select the blue face as shown and
click the Sketch icon
|
|
|
| 3. | Now that you are in the Sketcher,
click the Normal View
Do not bother about positioning the circle. |
|
|
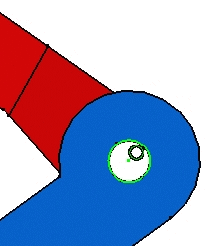
| 4. | Now to
obtain the same radius value as the one used for CRIC_JOIN circular edge. To make sure that this circular edge and the circle share the same
axis, use the Constraints Defined in Dialog Box command
|
||
|
|
|||
| After validating the operation, the circle is coincident with the circular edge. You must obtain this: | |
||
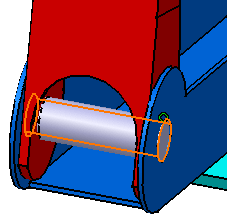
| 5. | Exit the
Sketcher and use the Pad command
|
||
|
|
|||
| After validating the operation, you
should obtain this cylinder: The part is designed. |
|||
|
|
|||
|
|
For information about Part Design and designing in context, refer to Part Design User's Guide and Designing in Assembly Context respectively. | ||
![]()