 |
This task shows you how to edit the diameter in fasteners
using:
|
 |
Open the MeasureDistance.CATProduct
document. |
|
|
Edit Formula Capability
|
 |
|
 |
-
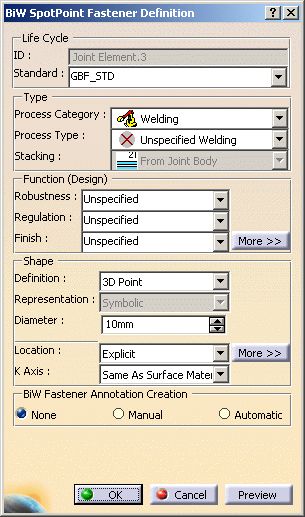
Double-click the fastener Joint Element.3 from the specification tree or
3D geometry.
| The BiW SpotPoint Fastener Definition dialog box is displayed. |
 |
-
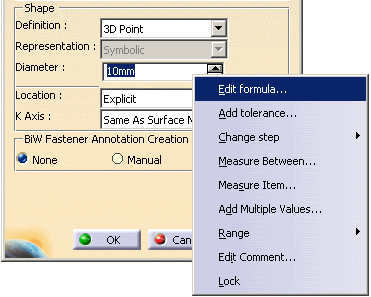
Right-click in the Diameter field to display
the contextual menu.
-
Select Edit formula....
 |
| The Formula Editor dialog box is displayed. |
-
Select Length from the Members of
Parameters column.
-
Enter the formula for the diameter. In this case use the parameter
Thickness of the material (from the specification tree) to define the formula for
the diameter.
-
Click OK.
You can see that the diameter field is grayed out in the
BiW SpotPoint Fastener Definition dialog box with a value of
8mm.
-
Modify the Material Thickness parameter to
modify the diameter of fastener.
Double-click Thickness1 and
modify the thickness value to 2mm and keep Thickness2 as it
is.
-
Update the CATProduct.
-
Double-click the Joint Element.3. You can see that the
diameter has changed to 13mm.
|
|
|
Formula Editor Capability
|
 |
|
 |
-
Select the fastener Joint Element.9 from the
specification tree or 3D geometry.
-
Click Formula
 in the Knowledge toolbar.
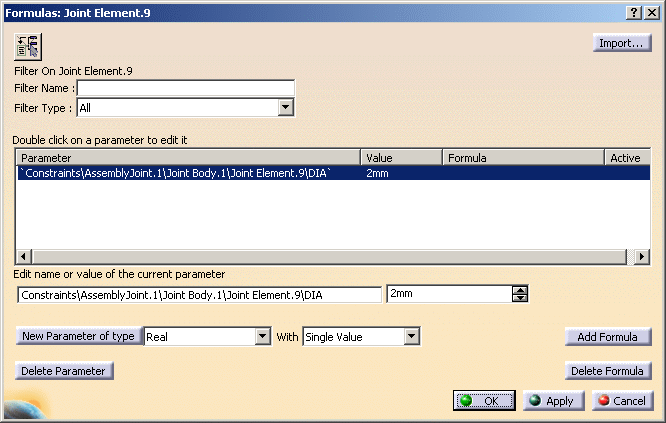
| The Formulas dialog box is displayed. |
 |
-
Click Add Formula button or double-click the
parameter Constraints\AssemblyJoint.1\Joint Body.1\Joint Element.9\DIA.
| The Formula Editor dialog box
is displayed. |
-
Select Length from the Members of
Parameters column.
You can enter the formula for the diameter. In this case the
Material Thickness parameter is used to define the formula for the diameter.
Click OK.
The fastener diameter is updated to this new value in the
Formulas dialog box.
-
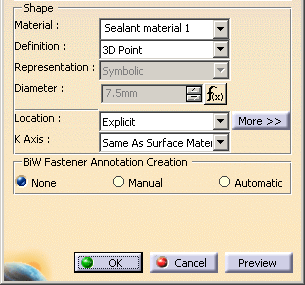
Double-click Joint Element.9 from
specification tree or in the 3D view.
| The BiW SpotPoint Fastener Definition dialog box is
displayed with the new value of diameter 7.5mm with the diameter field is
grayed out. |
 |
-
Modify the Material Thickness parameter to
modify the diameter of fastener.
-
Double-click Thickness1 and
modify the thickness value to 3mm and keep Thickness2 as it
is.
-
Update the CATProduct.
-
Double-click the Joint Element.9. You can see that the
diameter has changed to 12mm.
|
|
|
Add Multiple Values
Capability
|
 |
|
 |
-
Double-click the fastener Joint Element.2 from the specification tree or
3D geometry.
| The BiW SpotPoint Fastener Definition dialog box is displayed. |
-
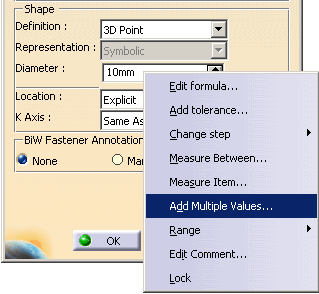
Right-click in the Diameter field to display
the contextual menu.
-
Select Add Multiple Values....
 |
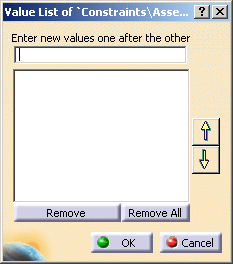
| The Value List dialog box is displayed. |
 |
-
Add three new values of diameter in the Enter new
values one after the other field.
For instance, we added 11mm, 9mm and 12mm.
- Click
OK.
You can see that the Diameter field is updated
with the first value entered in the list.
-
Modify the diameter using the drop-down list.
- Modify the
diameter values by right-clicking in the Diameter
field to display the contextual menu.
- Select
Multiple
Values > Update Values...
to display the Value List of
dialog box.
- Add or remove
the diameters.
In this case remove the diameter value 9mm and add a new diameter value
14mm in the Value List
dialog box.
- Click
OK
in the Value List
dialog box
- The newly added
value is updated in the drop down list.
- Similarly, select
Multiple Values > Suppress Values...
to suppress all the declared diameter values. The value present in the
Diameter
field will be taken as the default diameter.
|
 |
For pre-R18 fasteners, it is not possible to define a formula on a diameter
attribute. |
|
 |