This walkthrough shows a simple installation of SuSE Linux 7.3 on a 7043-140. As there are a large number of different options during the installation it cannot show everything.
Note: this walkthrough starts after you have loaded the SuSE installation ramdisk. Refer to the booting walkthrough for how to get to this point.
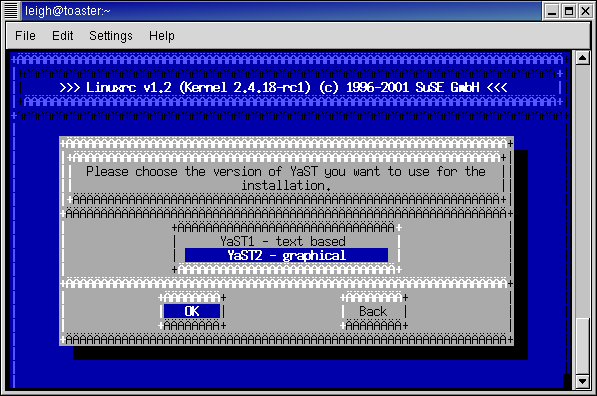
The first screen you will see when the installer loads is shown below:
SuSE has two installation programs, called YaST1 and YaST2. Although it says that YaST1 is text and YaST2 is graphical, that is not strictly true. Or, rather, it's totally false. In fact, the YaST2 text mode installer is far superior to the YaST1 one (IMO), so we'll use that one. Ensure YaST2 is selected then press ENTER to proceeed.
YaST2 will first prompt for you to select the type of terminal your are using to perform the install. I am using minicom so I selected option 2, VT102:
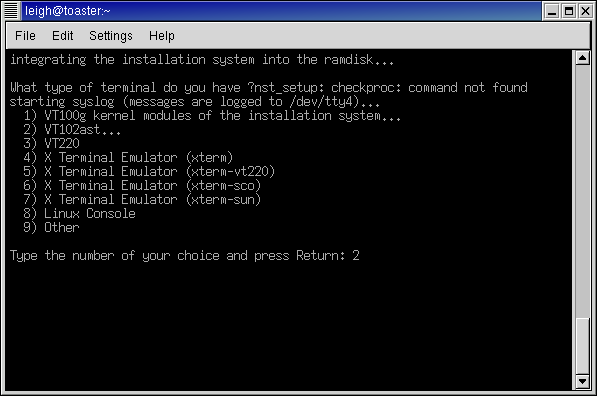
Note: I have been told that Hyperterminal for Windows does not work very well during the installation, so if you have problems it might be worth finding a better terminal emulator.
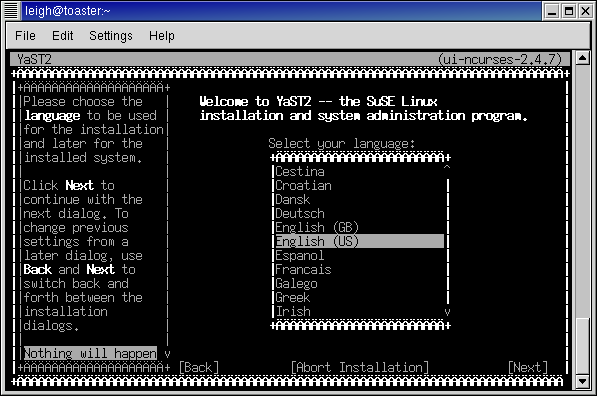
Select your desired language:
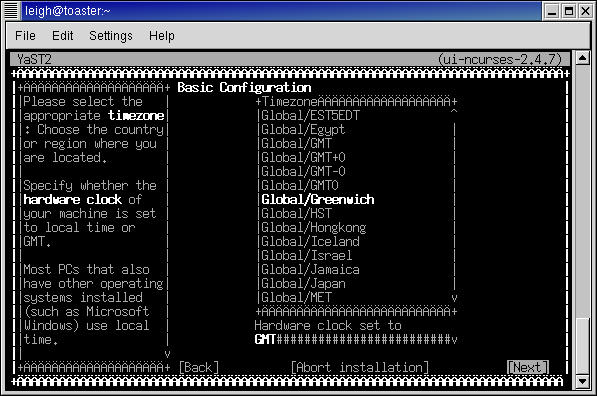
Select your desired timezone and hardware clock configuration:
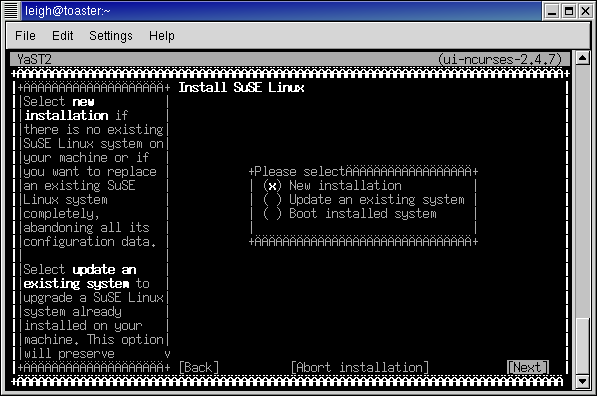
We will select "new installation":
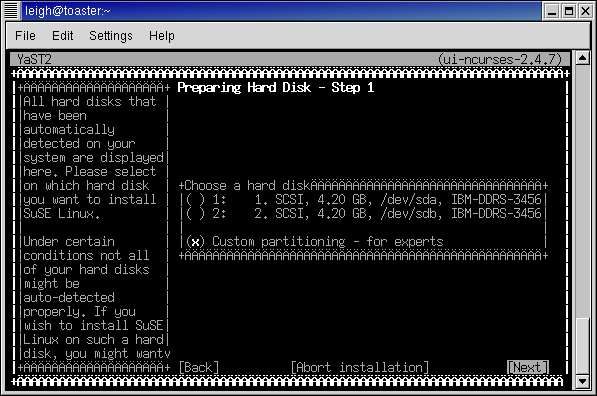
Disk partitioning can be problematic so I suggest using custom
partitioning, as shown below:
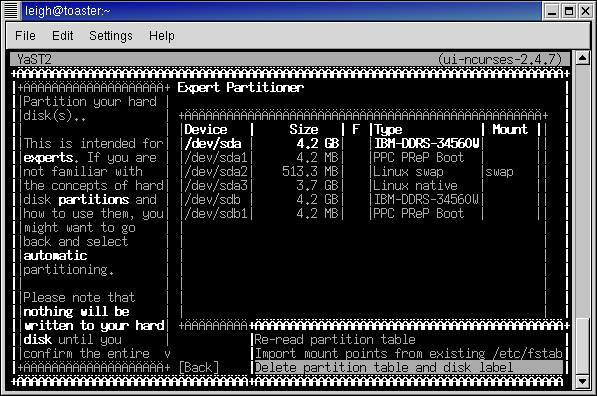
The expert partitioner screen will then be shown:
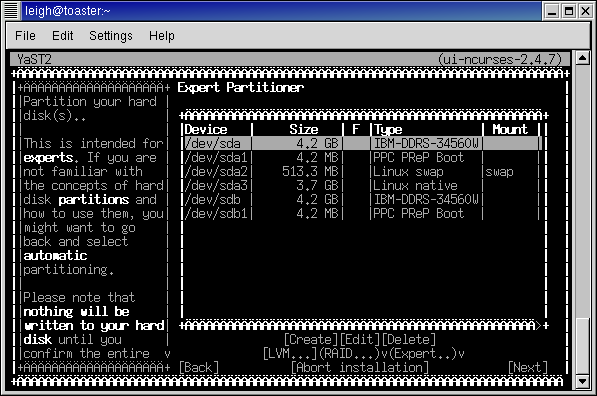
Because I wanted to keep my existing installation (on the first hard disk, /dev/sda) I performed the installation on the second hard disk (/dev/sdb). The screenshot above shows a single partition on that disk, which I normally use for testing new kernels.
This example will show how to erase the first part of the disk because
quite often the installer can get confused if there is an old AIX
partition table on the disk. So, select the "Expert" option on the
screen as shown below:
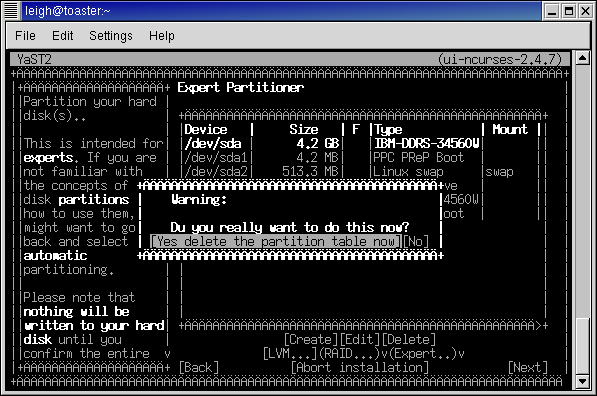
Select the "Delete partition table and disk label" option:
Select the right disk for your system (in my case /dev/sdb):

You then have a couple of dire warning screens to get past:

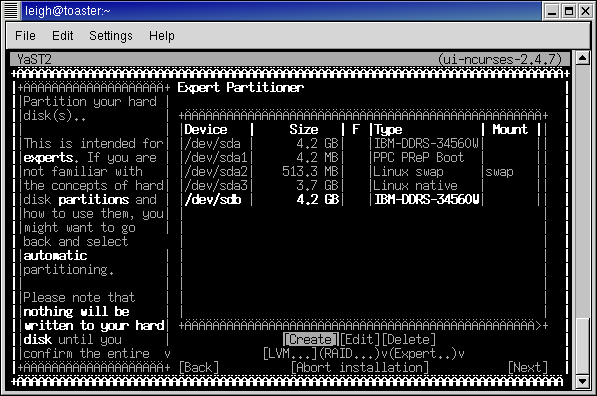
After you have erased the partition table and disk label you need to go to the previous screen and back again to let the installer re-read the partition table. After you've done this, the disk will have no longer have any partitions on it.
The first partition we will create will be the PReP boot partition. This
is the partition the firmware looks for to load the kernel image from.
It is recognised by having a partition type 0x41 (decimal 65). Note that
it must be a primary partition. To create this partition, first select
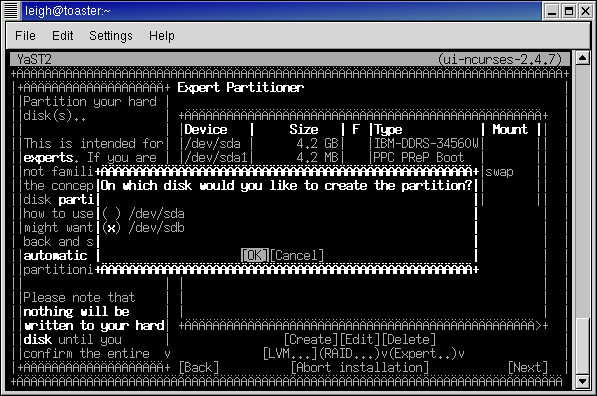
the "Create" option on the screen, as shown below:
Then select the correct disk to create the partition on:
The boot partition must be a primary partition, so select that
option:
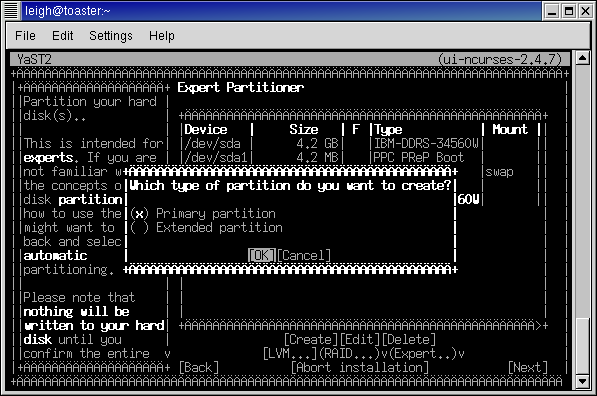
You are then presented with the create partition screen:
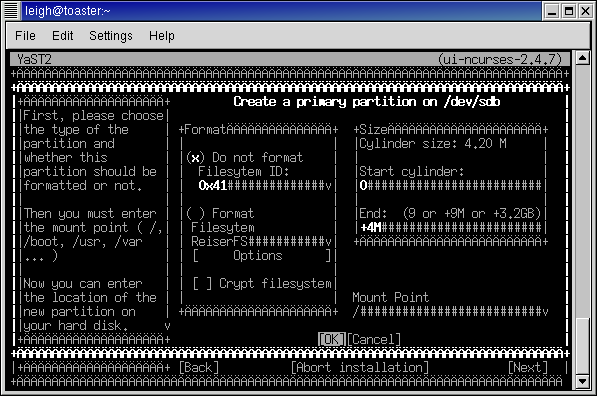
In the "Format" box, select the "Do not format" check box and manually type in a partition type of 0x41. Why this is not one of the selections I do not know. In the "Size" box, leave the start cylinder at 0 and select a size of "+4M". Note: If the PReP boot partition is too big your system might not boot. Select OK to create the partition.
Select the "create" option again and select the correct disk to create the partition on. Because there are only three partitions required in this walkthrough, I will create them as all primary partitions. If you require (or will require in the future) more than four partitions, you can create these partitions as secondary partitions.
In the "Format" box, select the "Do not format" check box and this time
select the "0x82 Linux swap" option from the Filesystem ID combo box.
Leave the start cylinder at the pre-selected value (may not be 1 if you
have a smaller disk). Specify the size as twice your the size of your
RAM. In my case, I have 256MB of RAM so I created a partition 512M in
size, as shown below:

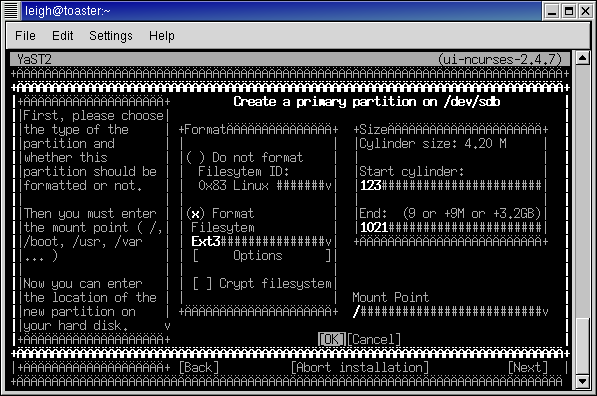
In this very simple example I will create a single partition for the
root filesystem. Create a third primary partition. This time, select
the "Format" check box. I like Ext3, so I chose to create an Ext3
filesystem. Note: if you use a custom kernel (like one from
my website) the kernel may not have exactly the same features as the
one that comes with the distribution. For example, the JFS filesystem
is an option in the combo box, but is not included in my kernel so you
must not select it. Leave the settings in the "Size" area at the
defaults to create a partition that uses the remaining space on the
disk. The options I chose are shown below:
After all the partitions are created the partition screen now looks
like this:
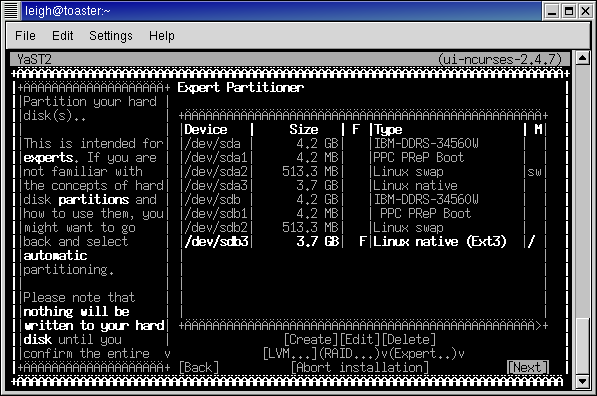
One point to note is that the installer automatically chooses the first swap partition it finds as the installation swap partition, which in this case is the swap partition from my main installation. This is not strictly correct for this example but doesn't cause any problems because the system will still boot correctly with a swap partition. This problem can easily be corrected after the installation is complete, but I won't show how to do this here because most installations will be onto a single disk where this problem will not occur.
Select "Next" to proceed to the software selection screen.
The software selection main screen looks like this:
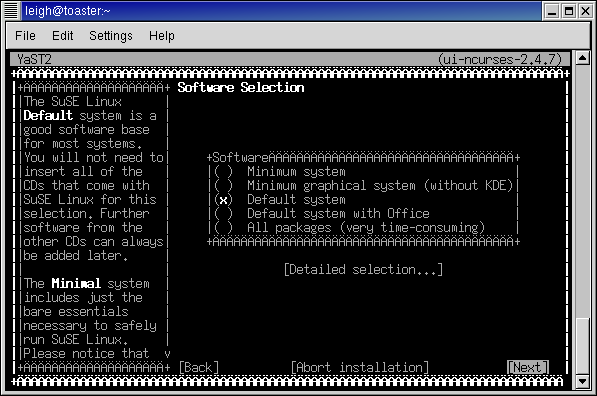
In this example, I will select the "Default system" installation option. However, feel free to select the "Detailed selection..." option to select any additional software you require.
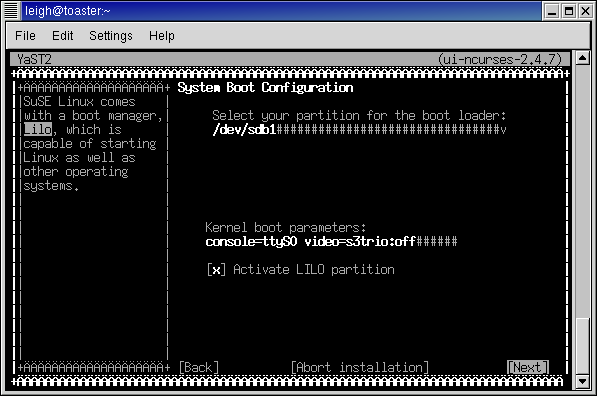
The system boot configuration screen is slightly irrelevant because it
is necessary to replace the installed kernel with our own after the
installation has completed. However, I've shown what the correct
settings are, for future reference:
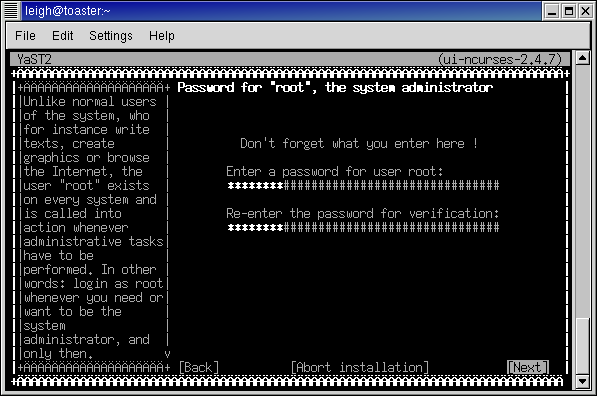
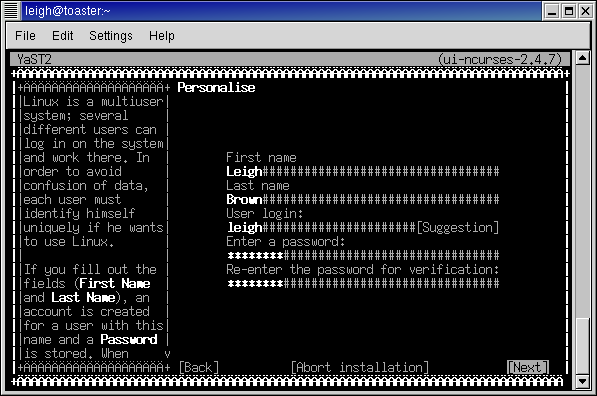
The next two screens are used to set the root password and create the
first normal user account. I'm sure you don't need me to tell you to
use strong passwords and to not use the root account except to perform
system configuration :-)
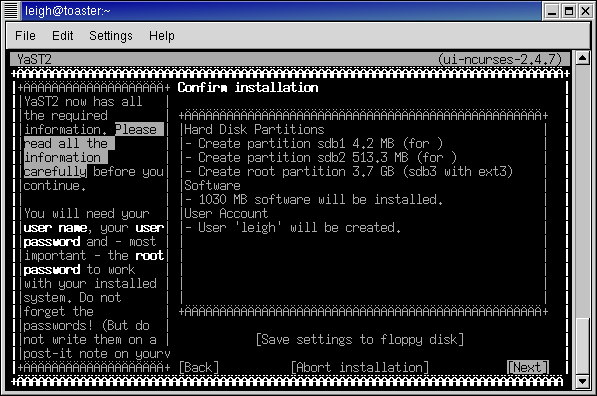
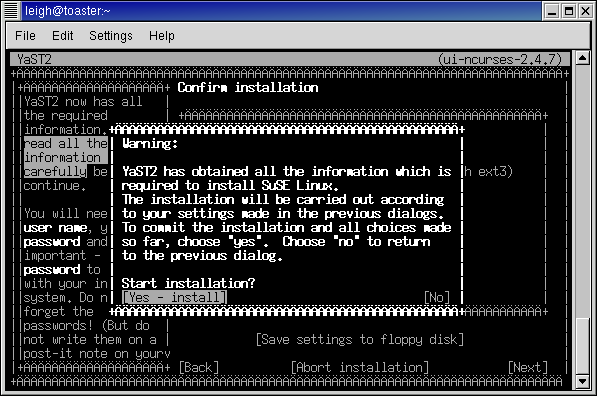
You will now be presented with the "Confirm installation" screen
followed by a final confirmation dialogue box:
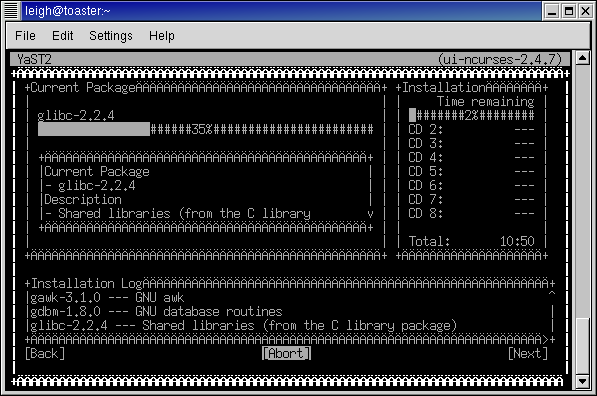
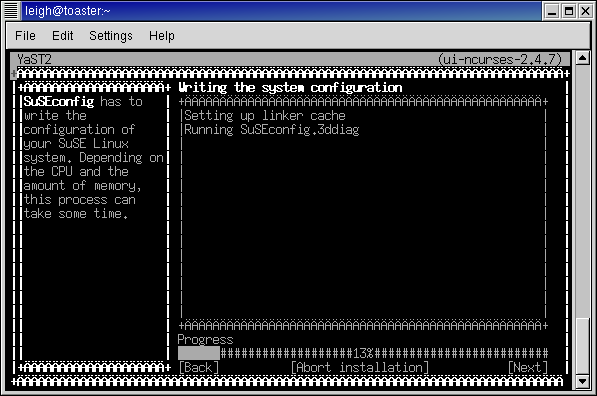
The installer will now install the software which is you cue to go and make a fine beverage. Go on, it's traditional! However, finish reading the walkthrough because there are a couple more things worth knowing.
Here's the installer doing it's business:
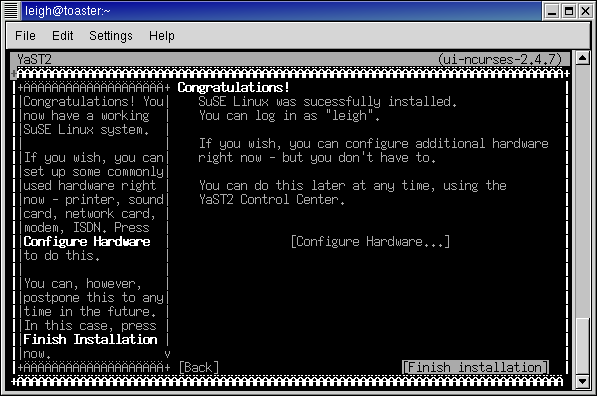
After the installation completes, you will be presented with the
following screen:
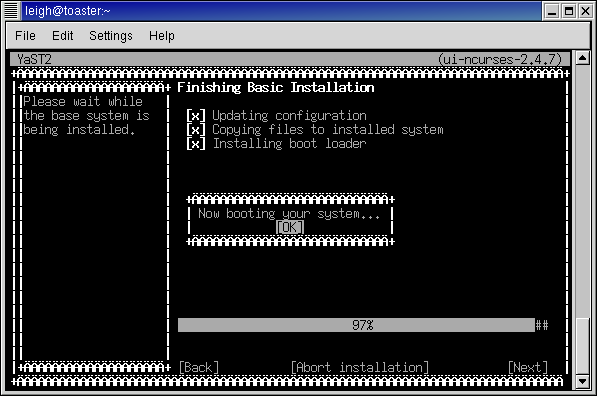
There are two things to know at this point. The first is that the system doesn't seem to reboot properly every time. If you get a blank screen and no disk activity then leave the machine for a minute or two then power it off and on again.
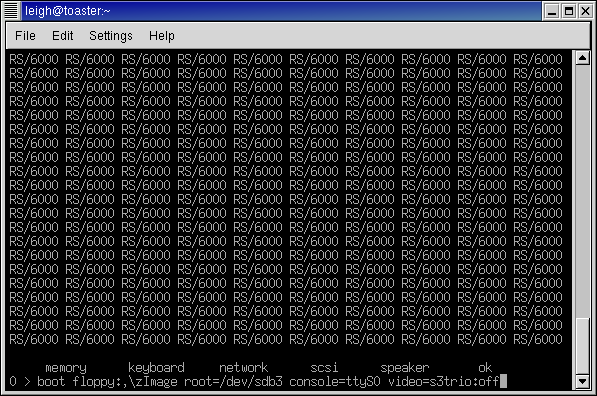
The next thing to note is that the kernel you used to boot the machine
has not been installed on the PReP boot partition. This means you have
to boot from the floppy one more time and install the kernel manually
before you can boot from the disk. This time when you boot, you don't
need to specify an initial ramdisk, and you must specify the root
partition you installed to, in this case /dev/sdb3:
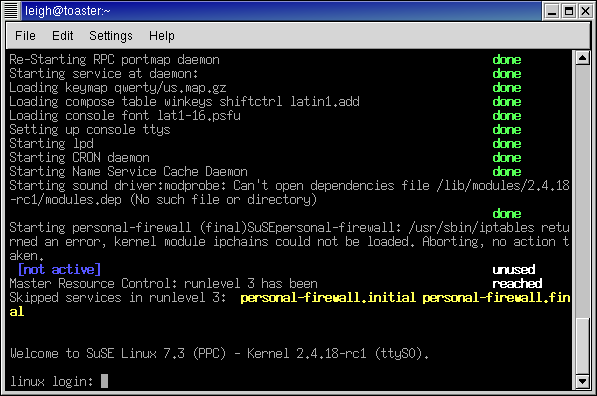
The installer kicks in one last time to do some final configuration:
At last ... you get the login prompt!
Note: you need to do the following configuration before you reboot.
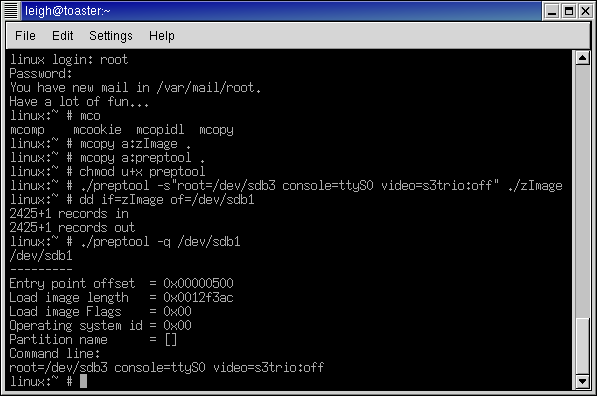
Now you can copy the kernel image from the floppy, configure it using
the preptool utility and copy it to the PReP boot partition. I'm
tired of writing so refer to this final screen shot:
That's it!