
|
50.536 bytes |
Service Hints & Tips |
Document ID: MNOK-3PZMRZ |
Aptiva - How to install a printer driver in Windows 95 or 98
Applicable to: World-Wide
Note: Printer drivers are supplied by the printer manufacturer. Occasionally, it is necessary to obtain a new driver to address software compatibility issues. The printer manufacturer is responsible for supplying the drivers and generally the manufacturer has the ability to provide disks or electronic support for the drivers. Have the printer powered on and connected to the parallel port using the correct type of cable prior to beginning this procedure.
1. The printer driver must be contained in the Window's 95 or 98 print Wizard or on a diskette provided by the printer manufacturer.
2. To install a printer, click on the "Start" button and go to "Settings" and "Printers". Click on the Printer menu item. The printer window will come open.
3. When the printer window opens, double-click on the "Add New Printer" icon which will start the Add Printer wizard and open the Add Printer Wizard dialog box shown in Figure 1. Click the "Next" button to start setting up the printer.
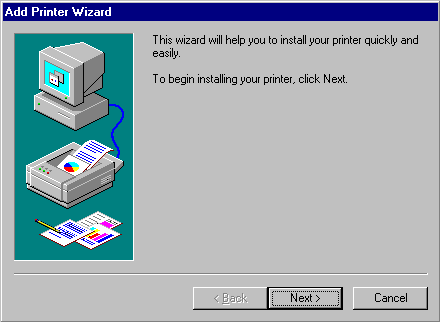
Figure 1 - Add Printer Wizard
4. This Wizard will help to go through the configuration and setup of a printer.
5. The next panel is the location of the printer - Local or Network Printer. Since Networking is not supported on the Aptivas, select "Local Printer" by clicking the circle next to the text. Click on the "Next" button.
6. In Figure 2 below, the manufacturer and printer is already selected.
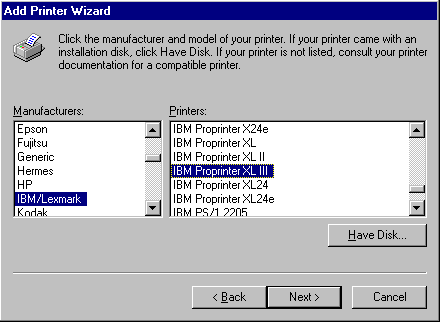
Figure 2 - Manufacturer and Printer Selection
7. This window displays the manufacturer and the type of printers that Windows 95 or 98 knows about. Select the manufacturer by sliding down the scroll bar on the right of the manufacturer box until it is displayed. Click on the manufacturer. In this case, the selected manufacturer is IBM/Lexmark.
8. On the right side, the recognized printer models are displayed. Slide down the scroll bar until the correct printer model is
shown. Click on the printer to select it. In this case, the selected printer is the IBM Proprinter XLIII.
9. If the printer is not on the list, the printer will have to be emulated by another printer driver or new drivers have to be supplied by the manufacturer. Contact the manufacturer for information about drivers. If this printer emulates another type of printer, select the emulated printer and then click the "Next" button.
10. If the printer manufacturer sends new driver software on a floppy or CD-ROM, select the manufacturer as above. Insert the disk or CD-ROM into the proper drive. Click the "Have Disk" button to load the software. The Installation Disk window will come up with the "A:" in the text field. If the software is on a floppy, click the "OK" button. If the software is on a CD-ROM, change the text field to show the CD-ROM's drive letter. For example if the CD-ROM is drive E:, type "E:" and click the "OK" button. The system should find the driver on the disk and show the manufacturer and the printer. Select the printer and click the "Next" button.
11. The next screen will configure the port to which the printer will be attached. In most cases you will click on the LPT1 selection. Other communication's ports may be used by printers. Click the "Next" button.
12. The next screen will come up with the name and configuration of this printer. If this printer's name needs to be changed, type the new name in the text box. To select this printer as the default, click on the circle next to the "Yes" text. This printer is now set as the default. Click the "Next" button.
13. The final screen is the Test Printer page. The default is to test the printer. In order to test the printer, keep the selection as it is. Click on the "Finish" button.
14. The system will finish the printer setup and add an icon to the printer window. The system will also try to print a test page.
15. After printing a test page, the system will check to ensure a test page printed correctly. If the test page printed OK, click on the "Yes" button. If the test page did not print correctly, click the "No" button and start the troubleshooting process.
|
Search Keywords |
| |
|
Hint Category |
Windows 95, Printers, Hardware Installation/Configuration, Software Installation/Configuration, Windows 98 | |
|
Date Created |
22-12-97 | |
|
Last Updated |
29-12-98 | |
|
Revision Date |
29-12-99 | |
|
Brand |
IBM Aptiva | |
|
Product Family |
Aptiva | |
|
Machine Type |
2134, 2136, 2137, 2139, 2140, 2142, 2144, 2153, 2156, 2158, 2159, 2161, 2162, 2163, 2164, 2168, 2176 | |
|
Model |
all | |
|
TypeModel |
| |
|
Retain Tip (if applicable) |
| |
|
Reverse Doclinks |