
|
537.097 bytes |
Service Hints & Tips |
Document ID: LWIK-3UPK6D |
IBM WorkPad - Installing the WorkPad Desktop software
Applicable to: World-Wide
Directions - Installing WorkPad Desktop Software
1. Place the WorkPad Desktop CD-ROM installation CD into the CD-ROM drive.
2. Autorun should start the installation program. If this does not work, move cursor to Start on the Start bar, and select Run. Type in the drive letter followed by a colon and autorun, and then select Enter (i.e., x:autorun where x = your CD-ROM drive letter)
3. Select Install from the menu.
4. You will then start the installation wizard, and the Welcome screen will be viewed. Select Next to continue.
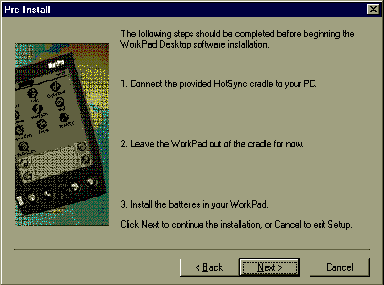
5. You will see the following screen. Select Next after reading screen.

6. Next you will be shown the Select Components screen. Select all that apply, and then select Next.
Note: You must have Microsoft Excel 5.0 or a later version for Expense and a supported e-mail application for Mail.)
7. You will next be prompted with the Destination Directory. It is recommended that you keep the default directory. Select Next.
8. You will be prompted to provide a Program Folder to place this application in. It is recommended that you keep your default. Select Next.
9. You must next create a User Account. Type in a name for your account. Select Next.
10. If you do not have Microsoft Word installed, you will receive an error.
Note: If you have this program and wish to use the functionality with WorkPad Desktop, you need to install Microsoft Word and reinstall the WorkPad Desktop software. If you do not have MS Word, continue by selecting OK.
11. If you do not have Microsoft Excel installed, you will receive an error.
Note: If you have this program and wish to use the functionality with WorkPad Desktop, you need to install Microsoft Excel and reinstall the WorkPad Desktop software. If you do not have MS Excel, continue by selecting OK.
12. The wizard will then copy the needed files to your hard disk.
13. Setup is now complete. Select Finish.
Note: You may wish to run the WorkPad Quick Tour. If so, select Run the WorkPad Quick Tour after clicking the Finish button. This will start the Quick Tour.
Your installation is now complete.
|
Search Keywords |
| |
|
Hint Category |
Installation/Removal Procedures, Windows 95 | |
|
Date Created |
21-05-98 | |
|
Last Updated |
06-04-99 | |
|
Revision Date |
06-04-2000 | |
|
Brand |
IBM ThinkPad | |
|
Product Family |
ThinkPad 310, ThinkPad 315, ThinkPad 365X/XD, ThinkPad 365C/CS, ThinkPad 365CD/CSD, ThinkPad 365E/ED, ThinkPad 380, ThinkPad 380D, ThinkPad 380E, ThinkPad 380ED, ThinkPad 380XD, ThinkPad 380Z, ThinkPad 385D, ThinkPad 385E, ThinkPad 385ED, ThinkPad 385XD, ThinkPad 390, ThinkPad 390E, ThinkPad 560, ThinkPad 560E, ThinkPad 560X, ThinkPad 560Z, ThinkPad 600, ThinkPad 600E, ThinkPad 750, ThinkPad 755C/CS, ThinkPad 755CE/CSE, ThinkPad 755CX, ThinkPad 755CV, ThinkPad 755CD, ThinkPad 755CDV, ThinkPad 760C, ThinkPad 760E, ThinkPad 760CD, ThinkPad 760L/LD, ThinkPad 760ED, ThinkPad 760XD, ThinkPad 760EL/ELD, ThinkPad 760XL, ThinkPad 765L, ThinkPad 765D, ThinkPad 770, ThinkPad 770E/ED, ThinkPad 770X, ThinkPad 770Z, ThinkPad i Series 1400, ThinkPad i Series 172x, WorkPad | |
|
Machine Type |
2600, 2625, 2635, 2636, 2626, 2640, 2641, 2645, 2646, 9545, 9546, 9547, 9548, 9549, 9544, 2611, 2627, 8602 | |
|
Model |
Various | |
|
TypeModel |
| |
|
Retain Tip (if applicable) |
| |
|
Reverse Doclinks |