Liquid Crystal Display (8650)
Liquid Crystal Display

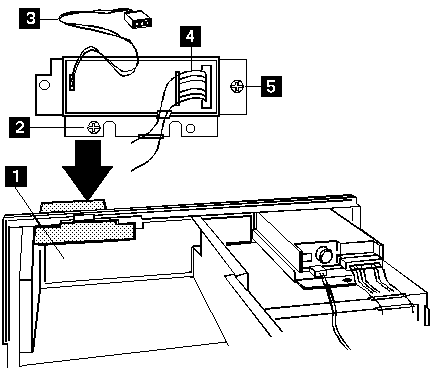
- Front panel control board
- Two screws on LCD carrier
- Backlight power connector from LCD to control board
- Signal connector from LCD to control board
- Mounting Screw
- Remove screws that secure the liquid crystal display (LCD) to the chassis.
- From inside the chassis, pull the carrier back out of opening.
- To remove the LCD form the carrier, pry out the four plastic rivets
that secure the display board to the carrier.
- Put the replacement LCD on the carrier, and secure the carrier with
four plastic rivets.
- From inside the chassis, place the carrier assembly back in the
chassis opening. Make sure the carrier flanges make good contact with the
chassis around the opening. (You may need to spread the flanges out a
little.)
- Reinstall the two screws to
secure the carrier to the chassis.
Please see the LEGAL - Trademark notice.
Feel free - send a  for any BUG on this page found - Thank you.

 for any BUG on this page found - Thank you.