How to create a shape in CATIA V5 and save it in ENOVIA LCA
- CATParts (detailed geometries),
- alternative shapes (used for calculation for example).
You can manage alternate shapes which means:
- from CATIA V5, you can:
- save a new alternate shape,
- modify an existing alternate shape,
- delete an existing alternate shape.
- from ENOVIA LCA, you can:
- load alternate shapes into CATIA V5 by means of a dialog box.
For further information about CATShapes, please refer to Managing Representations in Product Structure User's Guide.
-
In ENOVIA LCA Product Editor, select your document and send it to CATIA V5.
-
In CATIA V5 Product Structure, add a part by selecting Insert -> New Part.
-
Select this part and add geometry to it, for example you can create a pad by clicking the Pad
 icon.
icon.
To have further information on pads, please refer to the Pad chapter in CATIA - Part Design documentation. -
In Product structure, click the Manage Representations
 icon or
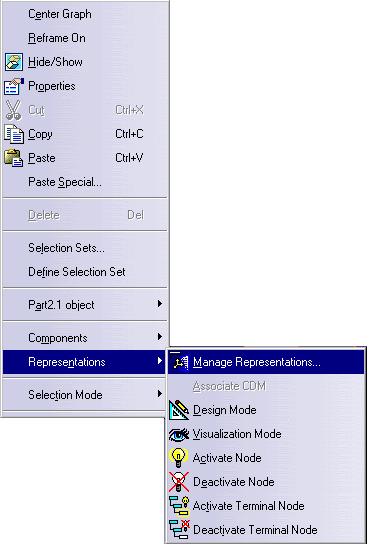
right-click the part and select Representations -> Manage
Representations... from the contextual menu.
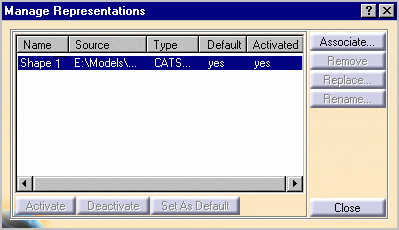
The Manage Representations dialog box appears, displaying:
- the Name of the representation,
- the Source file of the representation,
- the Type of representation,
- whether the representation is the Default representation of the product,
- whether the representation is Activated or not.
You can rename your shape by selecting the Rename... button, as well as associating another representation to it by selecting the Associate... button.
-
Save both CATPart and the CATShape by clicking the Save Data in ENOVIA LCA Server ...
 icon and this window appears. Select your document and click OK.
![]()
How to view the CATShape in ENOVIA LCA and send the CATShape and the CATPart back to CATIA V5
-
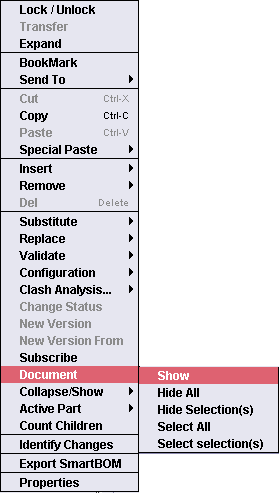
In ENOVIA LCA Product Editor, expand your instance and right-click and select Document -> Show from the contextual menu.

In the tree, you can now visualize the CATShape attached to the CATPart (highlighted in red).
-
Right-click the shape and select Send To -> CATIA V5 from the contextual menu.
-
In CATIA V5, the CATShape is retrieved: right-click it and select Representations -> Manage Representations... from the contextual menu. The name of the CATShape is displayed:

-
In ENOVIA Product Editor, select the CATPart and select Send To -> CATIA V5 from the contextual menu.
-
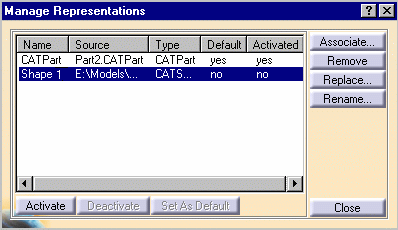
In CATIA V5, right-click the CATPart and select Representations -> Manage Representations... from the contextual menu. The CATPart and the CATShape are retrieved.

![]()