|
Create Documents in VPM
-
In VPM, select Object>Document to specify
the type of file that you want to create.
-
Select File>Create & Save. The
Create&Save window is displayed.
-
In the Part Number field, enter a string
of characters. Note that this string will be visible in CATIAwhen
loading the part: M39 for example.
-
In the Eng Change field, enter 1 (version
number).
-
In the Type field, enter Part.
-
Click the Source field and select the
M39.CATPart file.
-
Enter 1 in the remaining fields.
-
Click Ok when done. The document is now
created in VPM.
-
Double-click the Document to open the PSN editor.
-
Right-click the sheet corresponding to the created
document and select Open. The Part opens in CATIA.
-
Repeat the 4 steps described above for the following
parts:
Create the Assembly
-
In VPM, select Object>Part to specify the
type of file that you want to create.
-
Select File>Create & Save. The
Create&Save window is displayed.
-
In the Part Number field, enter TowHook.
-
In the Eng Change field, enter 1 (version
number).
-
In the Type field, enter Product.
-
Click OK when done and Yes to
confirm.
-
Specify that the TowHook is made up of M39.CATPart,
Axis_Step3.CATPart, Support.CATPart, and Liner_Step3.CATPart. T
-
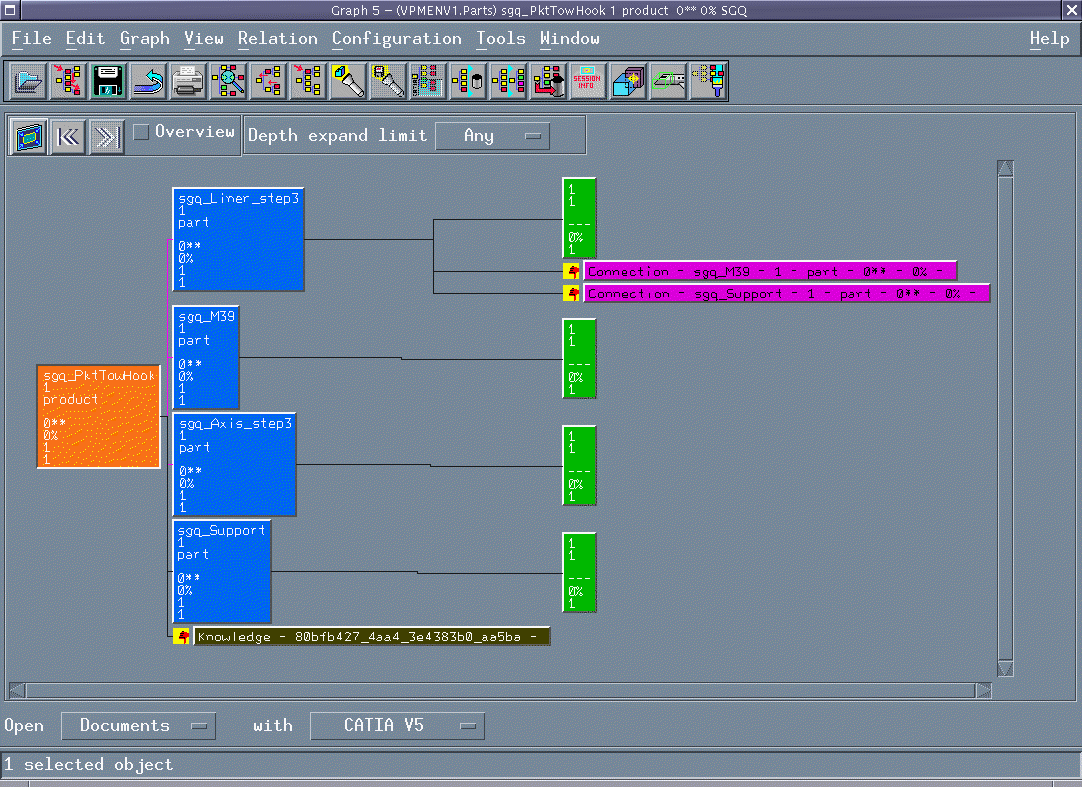
Double-click TowHook in VPM. The editor is displayed.
-
In the PSN editor, expand the documents and, holding
the shift key, right-click the 4 documents and select Open.
-
Select Add when prompted to replace or add
the models in your current viewer session. The assembly is displayed in
CATIA.

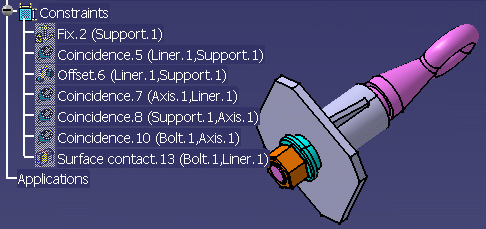
Apply Constraints to the Assembly in
CATIA
-
Apply constraints to build the assembly.
- From the Start menu, select the Mechanical
Design>Assembly Design workbench.
-
Apply a fix constraint to the Support.
-
Apply a coincidence constraint between Liner.1 and
Support.1.
-
Apply an offset constraint (10 mm) between Liner.1
and Support.1.
-
Apply a coincidence constraint between Axis.1 and
Liner.1.
-
Apply a coincidence constraint between Support.1 and
Axis.1.
-
Apply a coincidence constraint between Bolt.1 and
Axis.1.
-
Apply a contact constraint between Bolt.1 and
Liner.1.
-
Do not hesitate to use the Manipulations parameters
tool available in the Assembly workbench to move the assembly
components before applying the constraints.
| The constraints are created (see
picture opposite.) |
 |
Create a Formula
-
Create a formula applied on the Offset constraint.
-
Click the f(x) icon. The Formula Editor is displayed.
-
In the specification tree, select the offset
constraint and click Add formula.
-
In the editor, double-click Support\Plate_Thickness
and add "+15mm". (See graphic below).
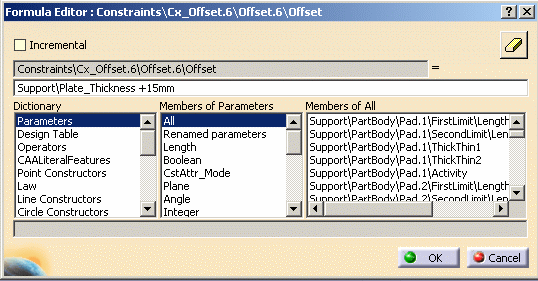
-
Click OK twice. The formula is created.
-
Save your .CATProduct file. Your file is saved in VPM.
Load the Assembly in CATIA
-
Go back to VPM and right-click M39.CATPart,
Axis_Step3.CATPart, TowHook, and Liner_Step3.CATPart and select
Open.
|
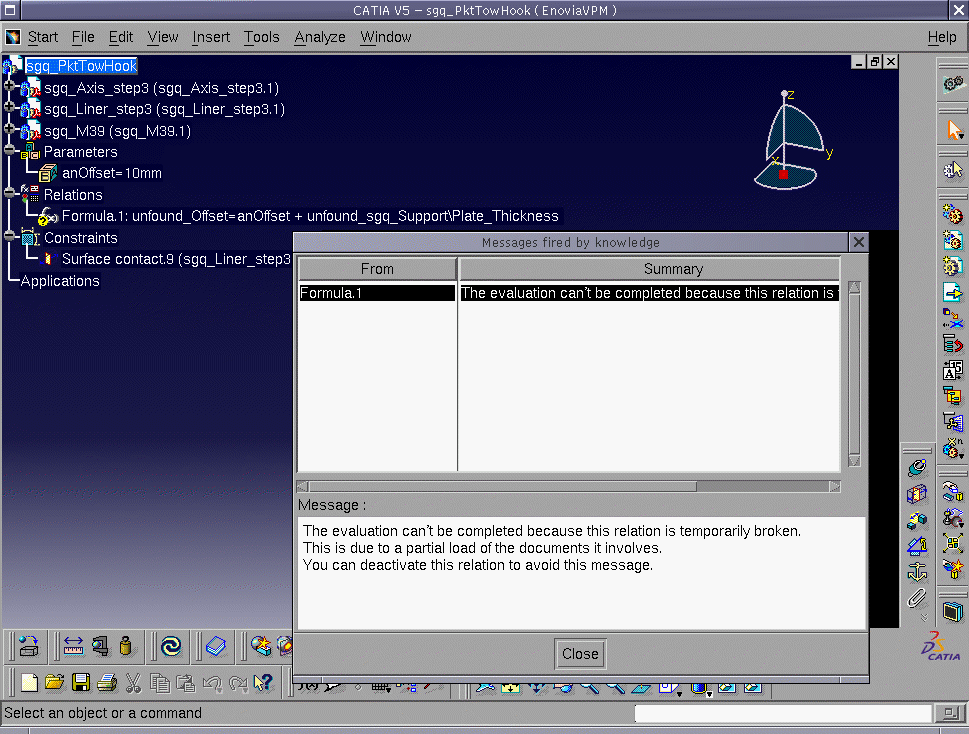
 |
- A message is fired by Knowledge indicating that the relation
cannot be solved.
-
 The
formula is displayed with an interrogation mark. The
formula is displayed with an interrogation mark.
- The formula cannot be edited.
- The formula can be deactivated.
- Some parameters are seen as "unfound".
The constraints applied to the Support document do not display.
-
Go back to PSN, right-click the Support document and
select Add: The formula applies correctly and the
constraints all display.
|