| |
-
Create a new part or edit the existing given part.
-
Select the Functional Tolerancing & Annotation
workbench (part context) if needed.
-
Click Create Assembly Set
 . .
-
The Assembly Annotation Set Creation dialog
box is displayed where you can give a name for the Annotation Set to be
created. The default name given is Assembly Annotation Set.1.
Click OK.
- If there is no existing Annotation Set in the part,
an Assembly Annotation Set is created:
- Annotations between the assembly components will be created
inside.
- The selected geometries for the annotations will be imported
inside the part as reference.
- Annotation concerning the part will be created in this Assembly
Annotation Set.
- If an Annotation Set already exists in the part, it
can be converted in an Assembly Annotation Set, but this
operation cannot be undone.
- Exiting annotations in the Annotation Set are kept.
- Annotations between the assembly components will be created
inside.
- The selected geometries for the annotations will be imported
inside the part as reference.
|
|
|
") |
This command is only available in the Functional
Tolerancing & Annotation workbench (part context). |
|
|
|
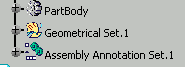
-
An annotation set is created.
-
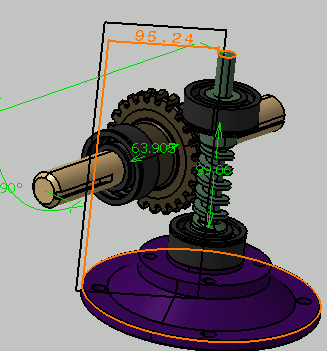
Now create an
annotation. For example create dimension between two surfaces. Click
Dimensions
 in
the Annotations
toolbar and select the surfaces as shown below. in
the Annotations
toolbar and select the surfaces as shown below.
The dimension is created.
- While running
an feature creation command, when working in an assembly annotation set,
you can select geometry that is not inside the part you are editing but
anywhere in the session assembly. Thus on selection of assembly
geometry, the selected geometry is automatically imported inside the
Assembly Requirements Model (ARM) part. Note that only the selected
feature geometry is imported, not the complete body.
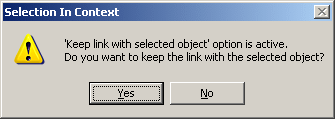
- If the
Keep link with selected object
option in Tools>Options>Part Infrastructure,
General
tab is selected, the geometry is imported with link (making this link
visible in ENOVIA Product Editor and VPM Navigator as a contextual
design link) and is displayed in an “External References” node in the
feature tree.
If the Keep link with selected
object option
is not active, the geometry is imported without link and is put inside
the in work (white underlined) body or geometrical set in the feature
tree.
- If the
Confirm when creating a with selected object
option in Tools>Options>Part Infrastructure,
General
tab is selected, then everytime a link is created between two elements a
message box prompts you confirm if the link should be created.
- If you modify
the initial assembly geometry by editing the corresponding part or
moving the part instance inside the assembly, the ARM part will be
turned to not up to date. Run the update command to update the assembly.
- Now this
assembly can be saved in ENOVIA for further use if required.
|