The User Weld Creation dialog box appears.
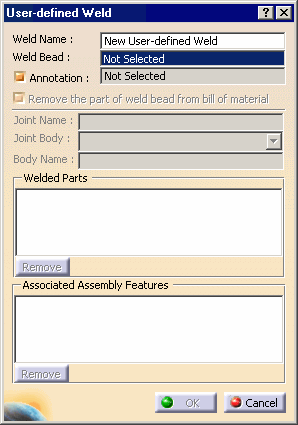
The Remove the part of weld bead from the bill of material option allows you to remove form the bill of material the part used to define this kind of weld, because it is not specified as assembly component.
-
Enter a meaningful name in the Weld Name field to identify your weld.
-
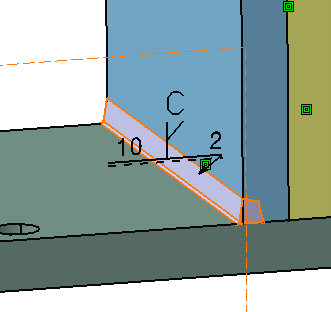
Select Body.2 below the Part.5 node as the body representing the weld bead.
Its name appears in the Weld Bead field.
-
Select the annotation associated with your weld.
Its name appears in the Annotation field.
-
The Welded Parts section is dedicated to the selection of the parts to be welded. Select Green Part and Blue Part.
Your weld will be created in the joint body of an assembly joint linking the welded parts.
-
The Associated Assembly Features section is dedicated to the selection of the assembly feature that has to be associated to the weld. Select Assembly Remove.1.
-
Click OK to confirm and create the weld.
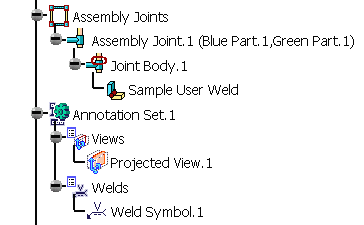
Just to check the validity of the operation, take a look at the specification tree.