 |
This task explains how
to modify a lines catalog. Piping resources are used below - replace with
the appropriate resource or directory in a different workbench. |
 |
You will need to
modify the lines catalog if you want the catalog to display the attributes
that have been added to line IDs from Release 14 onward.
You also need to update the catalog when you create a new line, or
change the value of one of the attributes. |
|
|
1. |
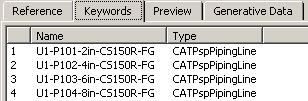
Enter the workbench to which the
catalog belongs. Click File - Open and navigate to the catalog you want to
modify. It opens in the Catalog Editor. The image below shows some of the
lines and their attributes before updating.
 |
| |
2. |
Click the Create/Modify Catalog
button
 .
The Create/Modify Part Catalog dialog box displays. .
The Create/Modify Part Catalog dialog box displays.

|
| |
3. |
If the lines are stored on a file
system then select File Base and follow the steps below. If they are stored
in ENOVIA then select ENOVIA Base and enter the names of all lines in a
text file as explained in Step 4. You can also load all lines in memory (if
they are in the catalog), in which case they will display in the Select
Documents window, and select the lines to process. (To load into memory,
first open the catalog, then click File - Desk, all the lines display,
select the lines, right-click on the selected line and select Open in the
drop down menu.) |
 |
4. |
If you want to update all the
lines then you do not need to take this step (unless you are using ENOVIA).
This step is necessary only if you want to update some of the lines in the
directory, or if you are using the ENOVIA Base option. Create a text file
(give it any name you want), with a text editor like Wordpad, and enter the
name of the new line you want to add or the line you have modified. Enter
each line ID on a separate line. For ENOVIA-based you must enter the names
of all lines you want to add or update. |
|
5. |
Select the application in which
you want to modify the catalog by clicking the down arrow in the
Application field. |
|
6. |
Click the button next to the Parts
Directory field and navigate to the directory where the lines are stored.
The default location is
...intel_a\startup\EquipmentAndSystems\XXX\SampleData\PipingLines
where XXX\XXX
is the application, such as Piping\. The
file is CATPspPipingLine.catalog. |
|
7. |
If you want to modify selected
lines then click the button next to the Parts List field and navigate to
the text file you created in Step 1. Click OK to begin modifying the
catalog, which may take a few minutes. A dialog box will inform you of the
progress. |
|
8. |
If you were updating a pre-Release
14 lines catalog then it will be updated with additional attributes. The
image below shows some of the lines in the updated catalog.
 |
|
 |