 |
This task explains how to create
a break on a stiffener.
|
 |
1. |
With your document open, click the
Split Stiffener button
 . The Split
Stiffener dialog box opens. . The Split
Stiffener dialog box opens.
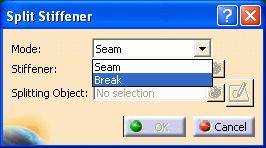
The default Mode is Seam. Select Break from the
drop down list. You are prompted to select an object to be split.
 |
|
2. |
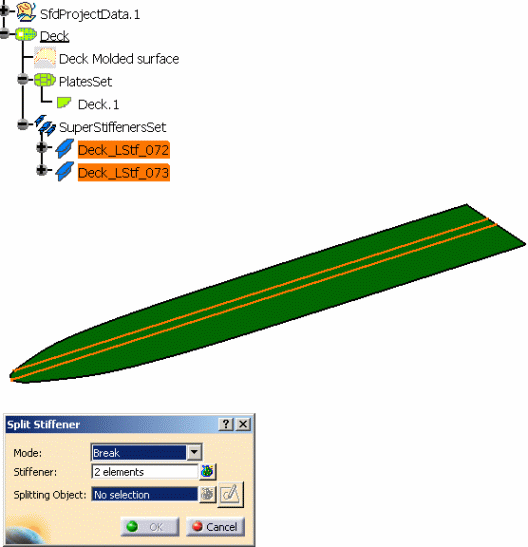
Select a plate if you want to break
all of the stiffeners on the plate. The number of stiffeners on the plate
is displayed in the Stiffener field. If there is only one stiffener on the
plate, the name of that stiffener is displayed in the Stiffener field.
The sketcher button is disabled. You are not allowed to use a sketch to
create a break. The image below shows the results of selecting a plate. You
are prompted to select a splitting object.
You can remove and replace stiffeners to be split by selecting the
Elements List button next to the Stiffener field. |
|
3. |
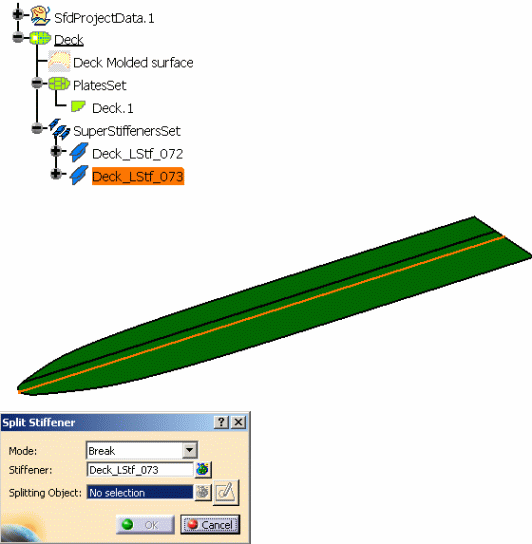
Or you can select individual
stiffeners if you want to break only those stiffeners. The image below
shows the result of selecting an individual stiffener to break. You are
prompted to select a splitting object.
 |
|
4. |
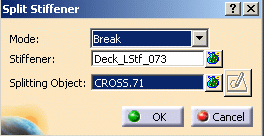
Select a splitting object. This can
be a plane, a curve, a surface, or another plate. The splitting object
should intersect the stiffeners, but no test is done to verify this. You
can select any number of splitting objects. In the image below, the user
has selected one plane as the splitting object. Notice that the name of the
splitting object is displayed in the Splitting Object field.
 |
|
5. |
The user procedure to create a
break on a plate is similar to creating a seam on a plate. The result,
however, is very different. The image below shows the result when the user
clicked the OK button. An additional stiffener was created for each
stiffener that was broken. Where there was one
stiffener before the break, there are 2 stiffeners after the break.

Unlike a seam, a break can not be edited or removed. A break is not an
object. You can only undo the break action. |
 |
Unlike Creating a Seam on a
Stiffener, a new stiffener is created and the original stiffener is
modified. The splitting object is set as a new limit of the resulted
stiffeners.
When you edit the stiffener panel, you can see that CROSS.71 has been set
as a limit of the stiffener. In one stiffener, the splitting object is seen
as the Start Limit and in the other stiffener as the End Limit.
Unlike Creating a Seam on a Stiffener, the openings and the seams
aggregated under the stiffener to split are cleaned during the break
processing. They are removed if they are useless. |
|
A) |
Create a new stiffener containing
an opening and a seam. 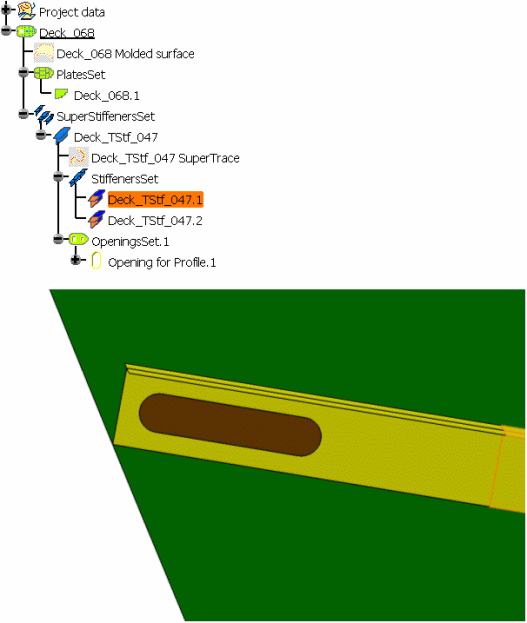
|
|
B) |
Break the stiffener by the plane
LONG.16. 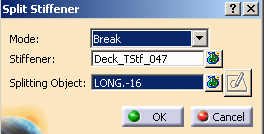
|
|
C) |
A new stiffener is created and the
original stiffener has been modified. The opening and the seam have been
cleaned and distributed between the 2 resulting stiffeners.
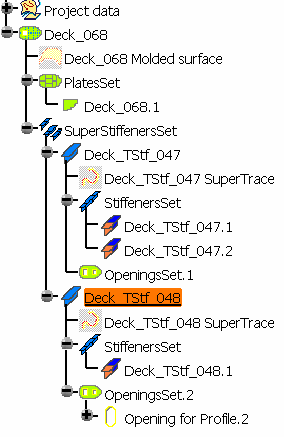
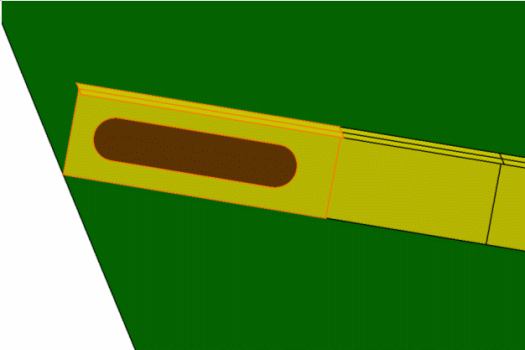
|
|
D) |
Some of the other functions that
were described in Creating a Seam on a Stiffener
are available here:
- the Elements List for the Splitting Objects
- selecting reference planes for the splitting objects
- selecting a plane to create a sketch (if you are creating a break on
shell stiffeners).
|


