Applying Torsion to a Part
|
|
This task explains how you can apply torsion to a flexible. | |
|
|
When you route a
flexible tube between two parts, you do not necessarily see the shape it
will assume - in other words the path it follows - after you tighten the
two parts to which it is attached. The torsion function allows you to
visualize this path. You should be familiar with the settings and options explained in Routing a Flexible. |
|
|
|
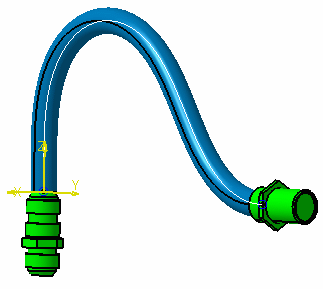
1. | The image below shows a flexible
tube routed between two elbows, with no torsion applied.
|
|
|
You can use the torsion feature while you are creating a route by clicking the Torsion button in the Flexible Routing dialog box. You can also use it for an existing route. To use it for an existing route, open your document and bring up the Definition dialog box for the flexible. To do so right-click on the flexible (make sure you are selecting the tube, and not the rib - click the Products Selection button if needed), select the FlexTube object in the drop down menu and then Definition in the menu that displays. | |
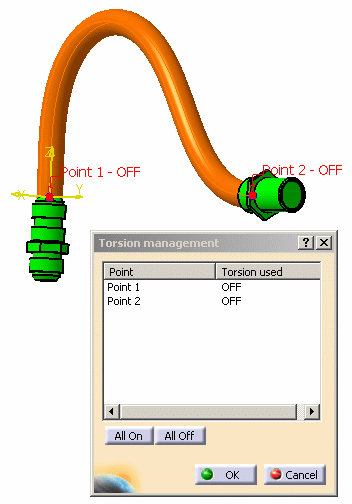
| 2. | Click the Torsion button. The Torsion
Management dialog
box displays. At the same time the flexible is selected and the two
points where torsion can be applied display.
|
|
| 3. | Click the All On button in the dialog box to apply torsion at all points. You can click on the points to select individual points. However, torsion must be applied to both ends to see the effect of rotating one end. Click OK to exit the Torsion Management dialog box, and OK again to exit the Flexible Routing box. | |
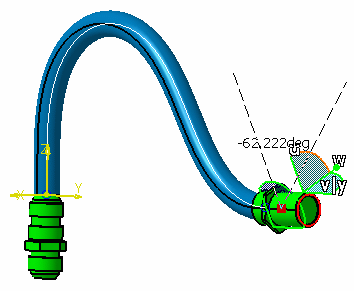
| 4. | Place the compass on the end you
want to rotate. Using the option Snap automatically
to selected object works well for this
purpose. Rotate the end to the position you want.
|
|
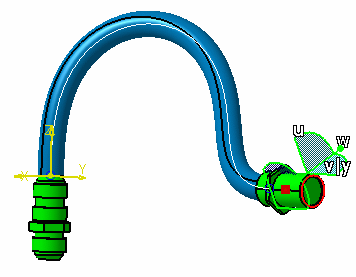
| 5. | Click the Force
Update button
|
|
![]()