Routing Flexibles from a Connector
|
|
This task shows you how to route flexibles from and to connectors. | |
|
|
You should be familiar with concepts and steps described in Routing Flexibles. | |
|
|
1. | With your document open, click the Select a Connector
button
|
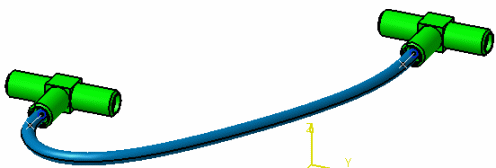
| 2. | Move the mouse pointer to the part to which you want to
route - again you will see connectors. Select the connector you want to
route to. The flexible will be routed between the two connectors (there
may be a few seconds delay).
|
|
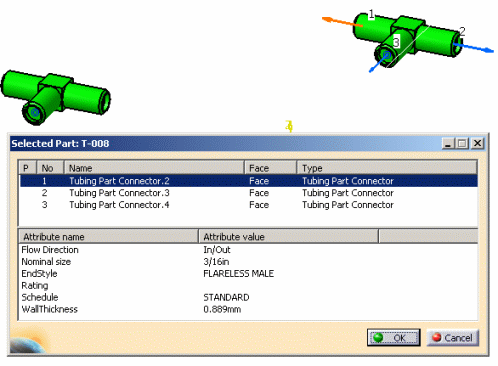
| 3. | If you want to use a dialog box to select the connectors, then click
the Part Connector Dialog button and select the part you want to route
from. A (selected part) dialog box displays, showing you the
connectors on the part, the attributes defined on it, and their
values. At the same time connectors display on the part - the orange
connector is the one that is currently selected.
Select the connector (in the dialog box) that you want to route from and click OK. |
|
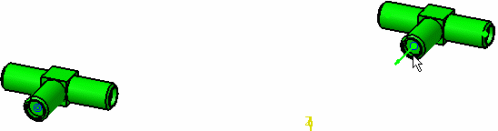
| 4. | Click the part you want to route to. The Selected Part dialog box
displays again. Select the connector you want to route to and click OK.
The flexible will be routed. The image below shows the green line that
displays as an indicator after you select the part you want to route to.
|
|