Routing with Defined Nodes
|
|
This task shows you how to route a run with predefined node points. | |
|
|
You can create a run by predefining the node points. This means you do not need to route the run by clicking the mouse pointer in the 3D window, as explained below. See Routing a Run for basic information. | |
|
|
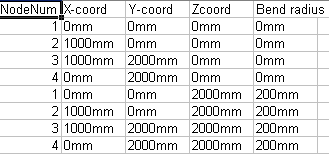
1. | Create a text file, using a text editor like
Wordpad, with column headings as shown below, and define the node sequence,
X/Y/Z coordinates and bend radius of the node points. A sample file is
provided with this application to help you define the text file. The file
name is RunInputNodeData.txt and the location is: ...intel_a\startup\EquipmentandSystems\MultiDiscipline\SampleData.
The file is reproduced below to show you the column headings and layout.
(It has been opened in Excel to make it easier to distinguish columns.
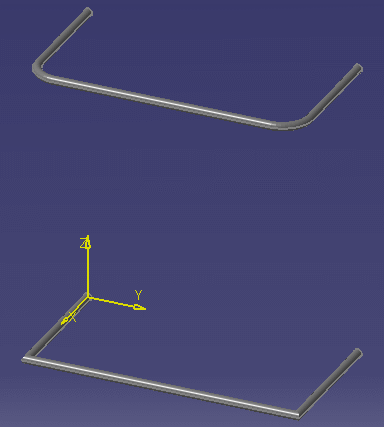
You can see that there are two sets of node numbers, ranging from 1 to 4. Whenever the application reads the node number 1 it will start a new run. So, based on the file above, two runs will be created. |
| 2.
|
Open the Run dialog box and click the
Import Node Points button
|
|
![]()

